Monday, December 31, 2012

Happy New Year!

Hope everyone is having a very happy new year!

2012 was a really productive year here at Adriprints Press!


In sewing and quilting, I made quite a few items, and met my goals for 2012
2 quilt tops (brown quilt is nearly fully quilted)
3 trousers (2 jeans, 1 clover)
1 fitted jacket
1 wool coat
2 dresses
5 tops (1 hoodie, 1 sleeveless, 1 pullover, 1 buttoned sleeveless, 1 buttoned short sleeved)
1 apron
1 dirndl bodice
1 plaid skirt

In knitting design, I had a good number of items published (self-published or otherwise)
Oslo Star Hat
Alhambra Hat
Stripey Legwarmers
Orange Blossom Camisole
Squishy Mittens
Squishy Chullo Hat
Amaranth Shawl
Amaranth Headband
... and I am waiting for a few more to be published hopefully early this year including: a children's line,
Squishy Vest, and a mystery plaid set.

In hobby knitting, I made quite a few items including a really lovely cabled sweater (Beatnik), an Easter bunny/egg, finally knit Sam's second sock, a few hats, and am working on 2 cardigans.

In crochet, I finished one of the cutest projects ever: the Yellow Submarine Booties, designed by my friend Nuria over at Red Sewing Box.


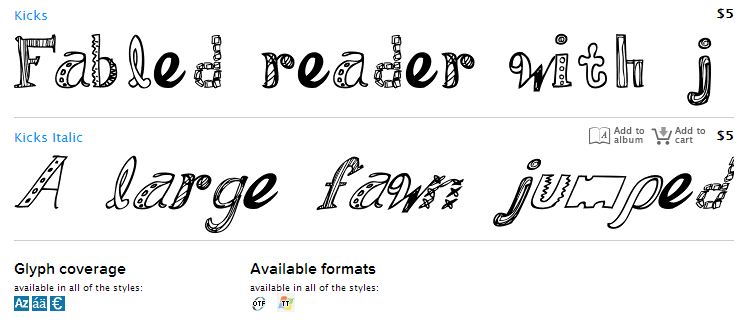
I published 1 font this year, Kicks, and hope to update and create some new ones this year.


And, my 2013 New Years Resolutions...
knitting- publish a few more patterns, learn brioche knitting
crochet - do a bit more of it
sewing- sew a pair of perfectly fitting jeans/trousers, drape 1 dress or outfit
quilting- finish quilting the 2 quilts from last year and make 1 quilt
design - learn more about WordPress to create an online shop

Thursday, December 6, 2012

WIPS: quilt, sew, knit...

Just to fill you in on projects from earlier this year.  My 2012 resolutions still stand for the most part, and my biggest gap is that I may not be able to finish this quilt in time!

Here's my progress so far...


I'm so close, right?  Since I took this photo, I've already stitched in the ditch 60%, but the free-motion quilting remains to be done as does the binding.  I'll keep you posted!

In knitting, I've finished the final worsted weight project in a line for boys' knitted garments... a cute 2-color shawl collar pullover.  It's still blocking and drying.


I'm also halfway through the body of a knitted vest design I'm working on... but more pressing deadlines have taken over since the vest will be a self-published project.


And in the sewing world, I started to lay out the couture dress from Susan Khalje's Craftsy course, but am thinking the full skirt is too full.  So, I embarked upon self-drafting my very own half-circle skirt!  Why not?


Monday, December 3, 2012

Giveaway Vogue 7239 Winner, and more giveaways!

And the winner of the Vogue 7239 pattern is...


floralwhirl!

Floralwhirl, I'll be contacting you after this post goes public. Thank you all for participating!  Also, Ruth, your name was attached to floralwhirl's but it detached itself!  I'll send you a fat quarter from my stash as a consolation prize since I technically picked out both names.

In addition, some of my blogging compadres are running some amazing giveaways on their sites.  Check out these blogs for more giveaway fun!

Stitchery Dickory Dock

Tilly & the Buttons

The Dreamstress

Tuesday, November 27, 2012

Post #200, a Giveaway, a Sale!

This post is #200!  Can you believe it?  I started blogging back in February of 2009.  Time flies!  You've seen me progress from aspiring designer and illustrator, to actually doing it.  Thanks for reading along.

So, in honor of a bit of blogosphere longevity, I'm giving away a sewing pattern, and creating a special coupon code for any knitting fans which will be valid for the rest of the week!


As for the giveaway,  I'm giving away the pattern for the Edie, 1967 Coat (Vogue 7239).  The pattern is for Size 14, Bust 36, and is for a dress version or a coat.


If you'd like to enter, just leave a comment below, and please include a valid e-mail address so I can contact you and mail you the pattern.  Giveaway entries will be accepted until the end of the week, as long as your comment gives you a time-stamp on or before Sunday, December 2, 2012.


As for the knitting pattern sale, all the patterns from my Ravelry shop are 20% off with the coupon code: BLOGLOVE1 also until December 2, 2012.  Enjoy!

You can check out the eligible patterns via this link.

Thanks for reading along!

ETA: Winners were announced!  Floralwhirl & Ruth's names were picked out together.  Floralwhirl took the pattern since hers was on top, and Ruth won a consolation prize fat quarter from my stash.

Monday, November 26, 2012

The Edie Coat, Vogue 7239 (1967)

As originally posted in The Sew Weekly for the 1960's Challenge..


The Facts
⁃ Fabric: 3m wool, 2m lining, interfacing
⁃ Pattern: Vogue 7239

⁃ Year: 1967
⁃ Notions: 3 buttons
⁃ Time to complete: several weeks in October
⁃ First worn: end of October
⁃ Wear again?  Since it's been cold, I haven't stopped wearing it!
⁃ Total price: ~30EUR =  7EUR/m for wool (21EUR), $2.50/m China Silk Poly for lining (5 EUR), interfacing, thread, etc...


Pattern Story - I won this pattern from a giveaway on the Seamless Blog, and will give it away once this is published on the Sew Weekly.  Look out for a blog post from me if you're interested in entering the giveaway.

I loved the pattern.  There is one funny bit around the neckline, and the finishing of the neck band, but other from that it was smooth sailing.  I had help from the Threads book on tailoring, and my Claire Schaeffer's fabric guide book.  I was set.  I didn't have to change a thing in the pattern except length of the sleeves and hem.  That was nice!


Here are some of the inner workings...
bound buttonholes

feather stitching, fuchsia lining

groovy pocket fabric

I had a lot of fun working on this coat and once it was finished, I realized this one was a true keeper.  I've been wearing it regularly ever since.  The coat reminds me of Edie Sedgwick for some reason.  Something about my haircut these days, perhaps?


Pupp-o decided to get in on these shots. Hey there, puppy-face!

Friday, November 23, 2012

Iris Pullover


I'm glad to finally be sewing again!  Here's a quick project I made in the in-between times.  Knitwear design is still taking the priority spot on my agenda, but hopefully I'll have some pretty samples to show for it in the near future!

In the meantime, here's the Iris Pullover from Schnittchen® - einfach nähe...
Schnittchen's downloadable patterns are much in the style of Burda and Knipmode in that you print out a large sheet with multiple sizes, and then you mark and trace just your size.  The patterns are unlike Burda/Knipmode in that they actually include seam allowances!  Woot!

For this kind of oversized garment it was nice to have the seam allowances already done... makes for quick, quick, quick sewing when it's just ~1/4" seam allowance (width of a sewing foot) and go go go!  It took me just a few hours to sew, and you don't need an overlocker (though it would make things even faster!) just a straight stitch and a zig-zag stitch.

So here it is!  My Iris Pullover...

This jersey knit fabric was lovely to work with albeit on the thin side.  I am definitely going to make another one when I can get my hands on some sweatshirt fabric at a reasonable price.  Suggestions are welcome for sweatshirt fabric resources in the EU!

The Facts
Fabric: 1.5m x 1.5m striped knit jersey from TST-Stoffen (at Stoffmarkt Holland fabric market)
Pattern: Iris Pullover from Schnittchen (has link to photo instructions)
Also, check out some of the free patterns on the site here.
Year: 2012?
Notions: none
Time to complete: 4 hours
First worn: Nov. 16, 2012
Wear again?  YES, I love it.  It's really comfy.
Total price: 5 EUR for the fabric

I love the way this pattern turned out.  I love the over-long sleeves so I can hide my hands inside the cuffs, and the long body so it covers everything.

Possible Mods for next time
It's too bad I didn't have a little more of the fabric, otherwise I'd have made it with the hoodie.  (Instead, with the little extra I had left, I'll be making some undies.)
I think I may also include a thumb gusset so I can stick my thumbs in the cuff and use the cuffs like pseudo-gloves.  Why not?


Overall Review
The Iris Pullover pattern is do-able for beginners with a machine that has a zigzag and a straight stitch.  Only special tool needed was a needle for elastics.  I used a Schmetz Stretch 75/11 needle.
Happy Sewing!

Thursday, November 15, 2012

New Illustration: Twist Collective

Just today, two of my illustrations were published with the online knitting magazine, Twist Collective.  Each issue features a story/myth/tale related to fibers or knitting in some way, and I was happy to oblige when they asked me to create the illustrations to accompany their latest tale.

Before I began illustrating, this one took a lot of research.  I had no idea what the Han Dynasty looked like, and here are some of the images I used to help me create a world for the princess...  These images were slurped from various museums, and I cannot remember where each item currently resides, sorry!


After much research, I started with the figure of the princess sadly admiring her mulberry bush and cocoons that she'd have to leave behind...


The second illustration (here in somewhat refined sketch form) features the procession where the princess is meeting  her new prince and ready to go to India with him. The first version of this was super rough and the figure was off too far to the left... I tend to be fairly straight-forward in my story illustrations, and maybe one day I'll break out of it, and illustrate all edgy like a comic book illustrator... maybe.  In the meantime, here's the sketch...


And, you all should really check out Daryl's second installment on the the story of silk and see the second illustration in its proper context... it's nice and bright and you'll see from the research where some of the elements of the composition came from.

Sunday, November 11, 2012

Block of the Month: October

This month's blocks were the most difficult to date.  And, sadly, they're the last blocks in the Craftsy Block of the Month course with Amy Gibson.  I'll miss her cheery instructions!


So, I'm once again a little behind in finishing these, but foundation paper piecing is a serious challenge to a quilting newbie.  I found the perforation process of the printed paper to be the easiest part.  I had to un-sew at least one section for each block during the sewing-it-up part, and that's a rarity for me.

I eventually found a way to make these blocks so that the fabric scraps were definitely going to cover the next section (plus a 1/4" allowance)...  It took finishing a whole block for me to develop it, and it's really hard to explain outside of making one on video (future project?).  I think each person comes up with a way to make these blocks work with their skill set and way of thinking.

With the paper pattern facing me, I placed piece #1 print/RS face down and glue-stick stuck it to the paper.  Then, I flipped the paper back and trimmed the seam allowance.  Then I turned it so the fabric was facing me and I pretended to have sewn the next piece and folded back it's seam allowance and made sure it really was going to cover piece #2.  Then I placed them fabric right-sides together and held them together securely and stitched over the line between #1 and #2... This was the best way I found to be sure things were going to work out.  It's not the fastest way, but it was the surest for me.


These two foundation paper pieced blocks were very time consuming, but absolutely impeccable in the points they create!  Soooo sharp!

Tuesday, November 6, 2012

Sew Weekly: Apron Challenge!

Just finished the Sew Weekly Apron Challenge this weekend, and I wanted to share my experience with you all because drafting your own apron is pretty easy and satisfying.


Making your own apron for whatever reason - in my case it was to match a dirndl I had made - is really easy.  This type of apron is a simple wrap-around apron with two straps that are long enough to wrap around the waist and tie in front.


You begin with a rectangle of fabric.  I measured mine out so my rectangle was about 8" less than my hips measurement.  The length is purely up to the matching skirt or your preference...

My rectangle was 31" W x 22 1/2" L
30" + 1" of seam allowance = 31" wide
21" + 1/2" seam allowance at the top, 1" seam allowance for a hem = 22 1/2" tall

To finish the edges, turn the edge over by 1/4" - press, then turn them over again, pin (see photo above), and stitch.

I knew that I wanted to gather the apron top to a width of about 12" to 13" so I kept this in mind when I next tackled the apron ties.  For an apron tie to wrap around my waist, and then be able to make a bow at the front, I needed about 115 to 120" of strap length.

My rectangle for the ties was 3" W x approx. 120" L

Because I didn't want a seam to be smack in the middle of the apron, I joined several lengths of fabric that were 3" wide with a flat-felled seam until I had the length I wanted and was sure no seam would land at the center.

Next, turn under the raw edges of the strap fabric 1/4", press, then fold over another 1/4" and stitch those edges down.  Then press the strap in half.

Mark the center of the strap with a pin.  Then mark the wrong side of the fabric 6 1/2" to each side of the center (6 1/2" x 2 = 13" gathering).

To gather the fabric, stitch two lines of super-wide basting stitches to the top of the apron and gather them until they are just inside the marked gathering lines.  I pinned strap + apron fabric right sides together and stitched across the bottom line of basting.  Then, press and turn up the strap, fold it over the remaining raw edge of the gathered apron, and top-stitch to seal the deal.  Make your hem as needed.

If you find that your apron ties are really uneven after tying a bow, add a bit of length to the end of the lacking strap. The last remaining detail is the triangle tips of the apron ties.  You fold the length of the ribbon in half with right sides facing, then sew along the short edge.  Press this little seam open, and when you flip it back out to the right side, let it be a triangle instead of forcing the seam all the way.  Press and stitch across the triangle.

Here's what the whole ensemble looked like when I was done... dirndl bodice, apron, and skirt.

Tuesday, October 23, 2012

Winter Accessories!

Currently, I've been working together with the folks at Schnittchen to create a line of boys winter garments and accessories.  The first in this batch is the accessories set...


The patterns will be sold as part of an all-inclusive knit-kit which even includes a pompom maker.  Seeing as I had just designed my own paper version, I was really excited to use the Clover pompom maker and see how it compares to the traditional paper template.  I have to say, it was daunting at first, but it's a really neat gadget!  I think the most useful aspects are how it can spring apart and that it creates a very round pompom that you don't have to trim down too much.

The toughest step was figuring out how to open it! :D


Monday, October 15, 2012

Block of the Month: September

Last month's block... but, better late than never, right?
I finally had a bit of time to make my quilting blocks for September.  I've yet to complete October's blocks as they require quite a bit of printer paper and special piecing.  I have had house-guests and Oktoberfest, and tons of projects to contend with my time... things seem to be winding down and hopefully I'll have more time to dedicate to finishing projects!

Here's Cleopatra's Puzzle Block:


 And, here's my first ever curved piece block, the Drunkard's Path Chain Block:


 And, that leaves just two more blocks for October to finish the quilt!  I'll likely be adding more blocks so that the quilt matches our bed size, but it's cool to know how far I've come in the process!  Almost there!