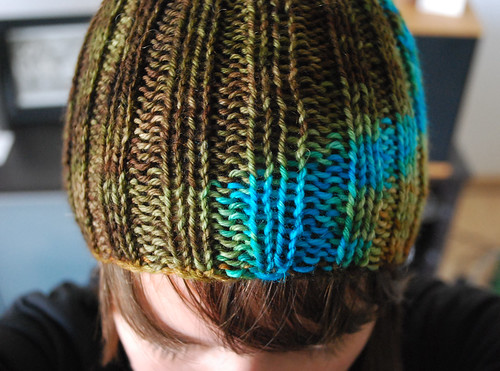
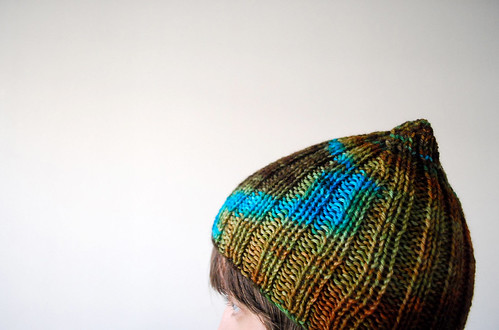
Named after the amount of time it took me to knit it, the Afternoon Beanie is a very simple hat made with DK weight yarn knit in K2P2 ribbing.
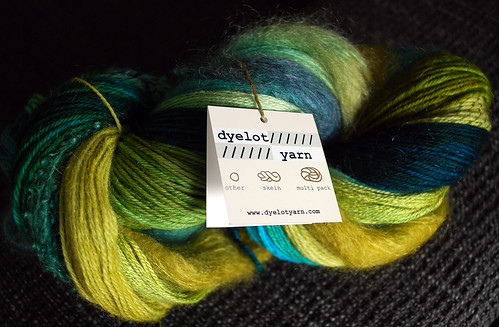
I used Dyelot Yarn's Merino in "Gringa" and "Tres Santa Fe" which are both 100% Merino superwash to make the two different beanies. One was made shorter to fit my head and the other longer (exactly like the directions) to fit my husband. For larger or smaller sizes the cast-on extras in 4 st increments.
Needles: I used 5.0mm dpns to knit this hat, but it all depends on your own needle and gauge.
Instructions for 22" to 25" crown:
CO 76 sts using cable cast-on method for elasticity. Divide evenly among 4 dpns.
Work 1 round in K2,P2 rib and place a stitch marker at the beginning of the round, and then after every group of 12 sts.
Continue knitting in K2,P2 rib until the piece measures 5.5" (or 3" before desired length) and begin decreases.
Decrease 1 stitch after each stitch marker (including the end of rnd), then work one round plain. Repeat this three times total.
Final Decrease rounds... continue decreasing 1 st after each stitch marker (without a plain round in between decrease rounds) until only 10 to 12 sts remain (depending on original cast-on) and then sew through the remaining stitches, pull tight, and weave in all ends.
There you go! I hope you have a wonderful afternoon and beanie, too.
My website has undergone simplification, and now further simplification. It's tough to be your own critic. Really tough. So, I've teamed up with a fellow Raveler to help me out with the technical part of my site. Kristle at The Knitting Penguin has been helping me with code for the last few weeks. Thanks, Kristle!!!
Here are some mockups for www.adriprints.com Currently, I'm testing different wallpapers... What do you think?
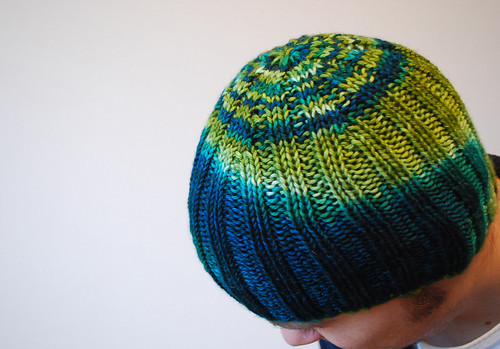
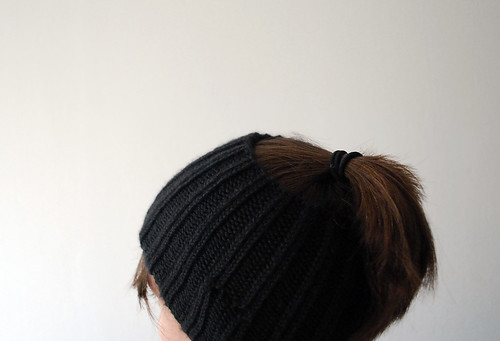
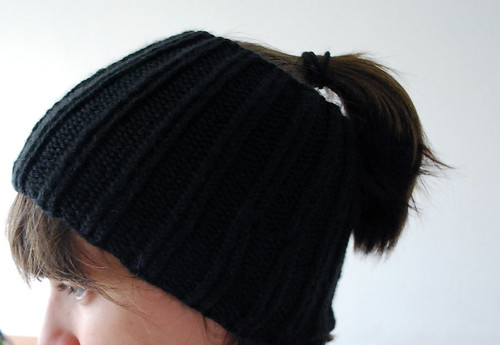
It's tough when you have long hair to find a hat or something that will warm your ears while allowing your hair to easily go through it. Here's a quick pattern to knit a beanie that has a hole large enough to fit your ponytail through it...
What you need:
~40 grams to 50 grams of worsted, aran, or slightly bulky weight yarn (I used Caron Simply Soft and Wollmeise Molly)
5mm dpns or short length 5mm circs
Gauge/Tension: 15 stitches and 14 rows = 2 inches in K2P2 rib
Instructions:
Cast on 80 stitches using Cable Cast-on for elasticity... Note: for a larger size CO 84 sts or 88sts, etc... since the pattern is really flexible, just add or decrease in groups of 4 sts to adjust for size.
Join for working in the round. Work in K2 P2 ribbing until piece measures 5" to 7" depending on how much of your ears/head you want covered.
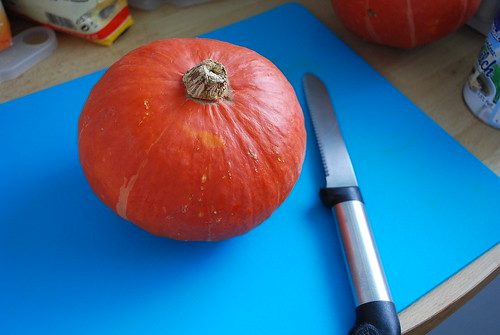
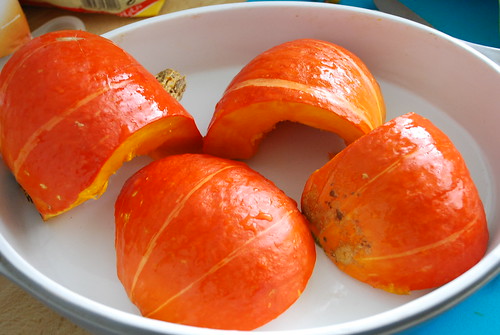
Well, let me begin with the fact that I now live in Munich, and sugar pumpkins aren't really on the market. So, the ideal would be a sugar pumpkin or a pie pumpkin, but what we have here isn't really that far off the mark... a Hokkaido pumpkin! Yay!
Ingredients for this not-too-sweet pie base:
2.5 cups of pumpkin (pre-baked and chunky-style)
1 can of evaporated milk or 1.5 cups of cream*
1/2 cup sugar
1/4 cup honey
1.5 tsp cinnamon
1 tsp ground cloves
1 tsp ground allspice
1/2 tsp powdered ginger
1/2 tsp vanilla sugar (optional)
1/4 tsp nutmeg
1 pinch of salt
3 eggs (4 eggs for a custardy fluffy finish)
*can also be substituted for Coconut Milk for a lighter taste (not sweetened coconut cream unless you want an extremely sweet pie).
1 9" pie plate and pie crust ready to go...
Really the recipe is quite flexible... so here's how to do the first part... the pumpkin prep
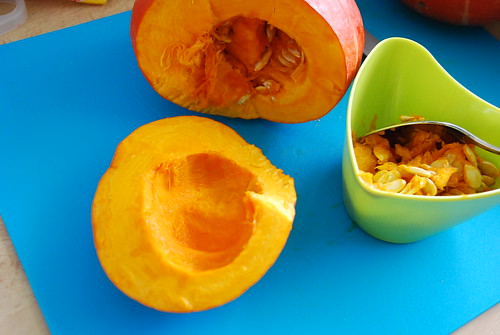
Wash pumpkin exterior. With a serrated blade, quarter the pumpkin and scoop out the seeds.
Place the hollowed pieces face down onto baking dish or cookie sheet lightly oiled and aluminum-lined.
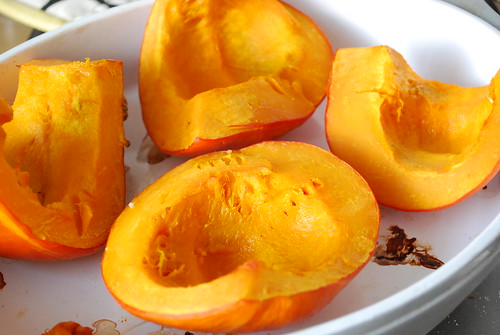
Bake at 170 degrees Celsius for 45 minutes or until tender (fork can easily pierce the fleshy innards, some pumpkins cook faster than others, so check halfway through).
Scoop out pumpkin goodness (avoid scooping skin). Each Hokkaido pumpkin yields a different amount, but it should be around 2 to 3 cups of pumpkin. Let this cool a bit and then mash it. For a more country-style pie, leave the pumpkin mash a bit chunky.
Assemble your dry ingredients, and pre-heat your oven to 230 degrees Celsius. In a bowl with your pumpkin mash inside, add in the milk and honey. Then, add the dry ingredients (sugar and spices) and lastly, the eggs. Make sure they are well combined.
Have your pie plate ready with it's crust already in it... then pour the mixture in.
Bake at 230 degrees C for 10 minutes and then lower the temperature to 180 and bake for another 40 to 50 minutes.
My oven has a nice air-flow so it actually only takes about 35 minutes. Check to make sure it's ready by sticking a clean knife in it and if it comes out clean, it's most likely ready. Let it cool and set.
We ate the pie before I remembered to take a photo. :P
Update: Here's a photo of a slice made with coconut milk and a graham cracker crust after it set.
Textile Design for Spoonflower's latest competition. The theme was "fish" and the limited palette is seen in different percentages, but no blends. :) Reminiscent of a print I made back in 2002 or so. Lots of fun.
After working on my site for way too long, I have finally decided to scale back my original illustration efforts in order to let people focus more on the work, and get a general feeling for my style... Here's a preview of the new website's main page:
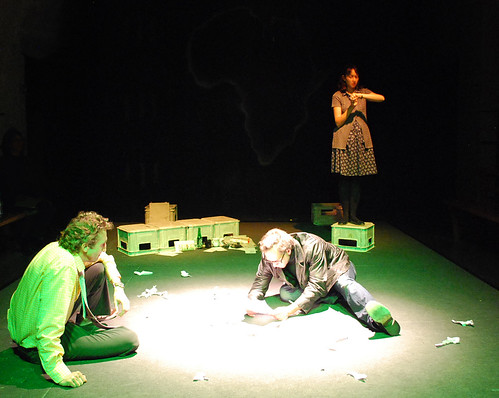
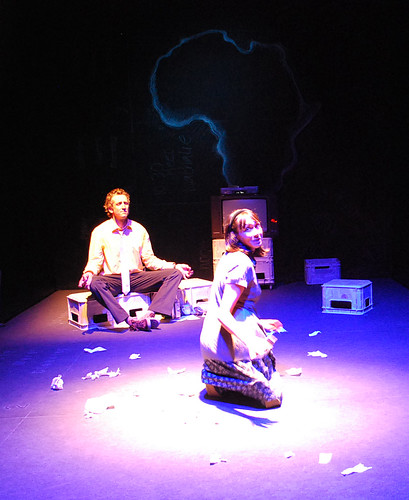
Here are the preliminary photos of the set design I have been working on. The photo shoot was done during an audience-less run-through. I hope you can make it!
Currently I have been working on logos for different companies. I have had the pleasure of working with Arielis from Ari's Cakes to come up with these two logos. She has yet to decide which she will use, and so I present both of them:
P.S. Ari's Cakes made my wedding cake below. To see more of her work click here or here.
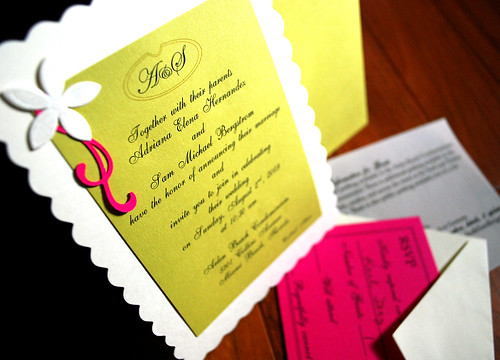
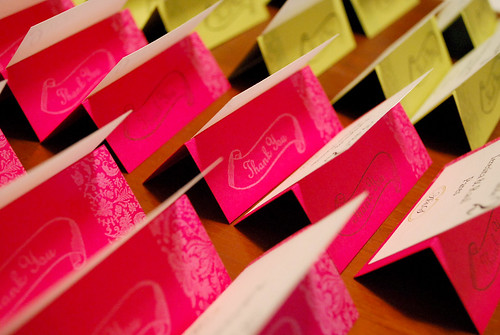
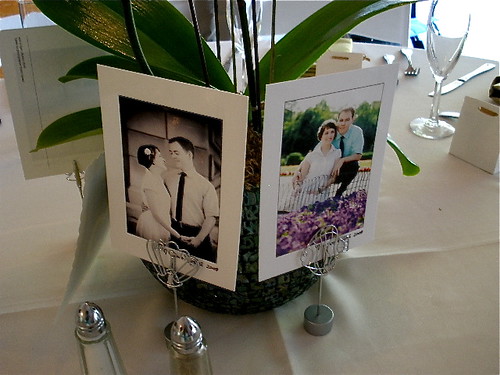
So, I was lucky enough to be able to pull off a mostly DIY wedding. Here are some of the things I designed for it: invites, cake topper, favors, menus, table takeaways, floral arrangements, postcards...It was all completed, of course, thanks to my mom and my cousin Arielis (who baked and styled the cakes).


