Looking for a simple, delicious guacamole base that your kids will eat? You can add spice to your own batch, but this one's plain delicious and even toddlers will eat it (at least mine does).
The most basic ingredients:
2-3 Hass avocados
1 small/medium red onion
1 handful cilantro
1 clove garlic
Lime juice to taste
Salt to taste
...
After that, add what you like! We usually add tomatoes if they're in season. My partner loves adding spice so he usually adds jalapeño pepper and some cayenne.
Also, for best results, don't eat it immediately. Let it sit in the fridge for an hour or so, to let the flavors blend together.
I've got another fun illustration for you all! This one is a really nice cornbread recipe I made last Thanksgiving. I was pleased with the results and will be making it again. Next time, for added texture, I might add canned or fresh cooked corn to it for a bit more added texture and cut a bit of the liquid.
Either way process was interesting for this one. I started back in November with a little sketch I did by the recipe itself... and finally got the time to finish it!
Don't know what to cook tonight? How about Butternut Squash Soup?!
I'm just mentioning it because I completed a really fun illustration for They Draw & Cook, and wanted to share it with you all.
So, if you do want to make the soup, it's really simple...
I am so happy with this one! I couldn't believe I got it done on time to be considered for the Make Art That Sells weekly review either. Our things finally arrived from Germany and it meant we were in super-unpack-cardboard-box-processing mode! But, I was also in a "making mode" as well as "where the heck is my scanner mode"... and so I made and found my scanner at last.
Here is my work resulting from the theme we were given: vintage cruise ship correspondence. It's a bit of a mash-up but I think between the chosen color palette and my brush pen illustrations which have a late 50's early 60's vibe in them, that it's enough to cover the vintage aspect. I really wanted a Piña colada after drawing this... love those so much.
Well, I don't know how many of you have ever baked your own sandwich bread, but I have way more respect for bakers now. This loaf of bread took three days to make... mostly because I started too late at night twice in a row.
The most difficult part was making the most efficient time of the process, but the recipe from Cook's Illustrated March-April 2011 Issue is really enjoyable to follow.
Here's the ingredients list, but what really makes it is the process... Biga
2 Cs bread flour
1 Cs warm water (100-110 degrees)
1/2 tsp instant or rapid-rise yeast
Soaker
3 Cs (16 1/2 ounces) whole-whet flour plus extra kneading
1/2 C wheat germ
2 Cs (16 ounces ) whole milk
Dough
1/4 C honey
4 tsps table salt
6 tblsps unsalted butter, softened
2 tblsps vegetable oil
It's too long to explain here (and you can find the whole process online here), but in short there are independent rising times, dough flattening, folding, rolling, more rising time, pizza stones, and finally water in the oven so the crust browns, but doesn't burn. The bread is delicious. For me, it was absolutely worth the trouble, and I'm enjoying every bite!
This one started out as an experiment, and it's results were delicious...
Ingredients
Whole-Grain Pancake base...
1 C Whole Wheat flour
1/3 C cornmeal
1/4 C All-Purpose flour
3 tbsp brown sugar (half for apples/ half for batter)
4 tbsp sugar (half for apples/ half for batter)
2 tsp baking powder
1 tsp salt
2 eggs
1/4 C vegetable oil
1 1/2 C milk
--
2 fave apples (peeled, cored, sliced thin or chopped)
1 tbsp lemon juice
1/2 tsp vanilla extract (or vanilla sugar)
1 /2 tsp cinnamon
1/8 tsp cloves
(see sugar above)
--
pack of bacon (in strips)
Instructions
Toss chopped apples with lemon juice, brown and regular sugar (leave half for batter), vanilla, cinnamon, cloves. Set aside.
In a separate container, combine dry ingredients for pancake batter: whole wheat flour, all-purpose flour, cornmeal, sugars (leftovers from apple toss), baking powder, and salt. Combine the wet ingredients (2 eggs, vegetable oil and milk) and add to the dry ingredients. Let sit for about 5 minutes so everything is really absorbed, then stir in the apple mixture.
The griddle... make sure it's hot, and place your bacon strips alongside each other and cook until crisp on one side. Turn over bacon strips (interlace or basket weave if you like). Then pour a 1/3 cup of batter (with apples) onto the bacon. When the batter starts bubbling on the outer 2" edges and looks dry, flip with bacon.
Cook for another few minutes until the pancake is easily shifted. Transfer to plate and repeat (or eat!). Serve with maple syrup or butter or powdered sugar if desired.
Makes a great brunch or dinner! Each pancake is really filling. Makes about 8 pancakes, about 8" in diameter.
olive oil cake w/lemon and icing, perfect w/strawberries!
Does this mean summer is really here?
freaky strawberry
I hope so! I went strawberry picking today since the fields opened earlier in the week. I think it's true...perhaps summer really is here. The strawberries say so, and I'd like to believe them.
I love eating fresh strawberries and making ice-cream with them.
Strawberry Ice-cream Recipe (adapted from the Ben & Jerry's Ice Cream & Dessert Book):
1 pint fresh strawberries (sliced, hulled)
1 tbsp lemon juice
1/3 C sugar
--- sweet cream base #1 (no eggs)
2 C whipping cream (I use soy cream)
3/4 C sugar
2/3 C half & half (I use soy milk)
Mash the strawberries, lemon juice, 1/3 C sugar, refrigerate, cover for 1 hr.
Then mix with sweet cream base until blended/pureed. Pour into ice-cream maker. Let ice-cream maker do it's thing. Enjoy!
As an alternative to the egg-less sweet cream base, you can also use this one with eggs:
--- sweet cream base #2 (with eggs)
2 eggs
3/4 C sugar
2 C heavy or whipping cream (I use soy cream)
1 C milk (I use soy milk)
prep this sweet cream base by beating the eggs until fluffy, slowly adding sugar, then the cream and milk. You can cook this base at 160° F (71° C) stirring constantly if you want to prevent any chance of salmonella. Let it cool completely in the fridge before adding the other ingredients and putting it into the ice-cream maker.
Lately I've been so hesitant to post, and I keep waiting to post, and holding out for something big to happen. Today, I decided to forgo that train of thought. I mean, why am I holding back? I started this blog to share what I was making - whether they be big breaks or small, right? So, here goes.
I've been on a dumpling kick. So, I've been making lots and lots of these delicious little pasta pockets. Thus far, I've been using one cookbook that several of my friends purchased whilst I drooled over it. The book is "Asian Dumplings" by Andrea Nguyen, and there's an accompanying website: http://www.asiandumplingtips.com/
Here are my creations based on recipes found in the book... a set of "big hug" folded dumplings right before they were cooked and devoured.
So far I've done the first 2 recipes: Pork and Napa Cabbage Water Dumplings and the Meat and Chinese Chive Pot Stickers. I've steamed, boiled, and cooked them like pot-stickers, and so far we have enjoyed them greatly! I really like the process of rolling out the dough and folding into the different shapes. I found that the 2nd day dough is much easier to work.
I've also been working in the background for several already-released patterns and several new ones! The rights for the Orange Blossom Camisole have reverted to me so I can self-publish the pattern which I did on Craftsy, Ravelry, and Patternfish.
In sewing and quilting, I seem to be acquiring patterns, cutting them out, but hesitating before making them. I don't know what's stopping me, but hopefully I can snap out of my reluctance. It's annoying me. I'd like to just clear off the table and finish the quilt I started last year with the Craftsy Block of the Month. I have everything even the backing ready to go! So what's stopping me? I have no idea.
I was off to a late start planting my anemone corms/bulbs. When they all got root rot, I thought they were goners even after replanting them all with more sand mixed in the soil. So, I was really pleased to see that even through my follies I have one bloom! Also, I'm glad I took a photo when I did because later that day (yesterday) there was an insane hail storm that tore the flower up. Poor thing.
Anemone "Mr Fokker"
The latest drama in the balcony garden flower boxes...
I had to replant all the anemone corms to stave off rot because I didn't mix in enough sand for drainage. Then as soon as the anemones started sprouting healthy shoots, a gang of entrepreneurial ants started using my oxalis plant as an aphid farm. Then a spider set up shop between and above the flower boxes and likely ate my little ladybug larvae that I bought to stave off the aphid farm. Or maybe it was the crazy grasshopper chewing on my pepper plants and then shedding its exoskeleton on my gladiolas--maybe he ate my aphid-eating ladybug larvae! Gardening drama is so much fun.
Oxalis "Iron Cross"
In pepper news, the pepper plants I picked up from a generous dude who had too many are doing really well. I have tons of green chiles and jalapeños. I think I may leave some jalapeños on the plant and see if they turn red... I usually don't have enough patience to wait for true maturation.
A few weeks back a friend of mine, Diana, started some "Amish Friendship Bread" also known as Herman Bread Dough. All the recipes that came with it seemed so strange, included pudding or lots of oil, and after one not-so-tasty experience with my first batch, I decided to come up with a better solution...
Here are my Amish Starter Chocolate Chip Muffin-cakes:
I had about 500g of starter (1/3 milk, 1/3 sugar, 1/3 flour), and to that I added...
200g butter, softened and in pieces
(Want less fat content? substitute 50 to 100g with applesauce)
3 large eggs (at room temperature)
1 cup flour (~225-250g)
2 tsps baking powder
1/2 tsp salt
1 1/2 tsp vanilla (or vanilla sugar)
150g of chocolate chips.
Preheat oven to 350F or 170C.
It's tough because you're starting with wet ingredients and adding dry ingredients, but I'd start with a bowl of your Amish/Herman dough. Then add the eggs, one at a time and use a hand-mixer or a whisk to get it all blended. Then add the butter in softened pieces, and blend some more.
Combine all dry ingredients (except the chocolate chips) in a separate bowl. Add the dry into the wet ingredients until just combined, then stir in 100g of the chocolate chips reserving some for sprinkling the tops of the muffins once their poured in their respective spots.
Pour a few tablespoons of batter into each baking cup (until it was a little more than half full). Then, sprinkle the remaining chocolate chips over the tops of each muffin cup so everyone gets at least a few initial chocolaty bites.
Bake for 13 to 18 minutes or until a toothpick comes out clean from the center. Make sure you place your tin in the center of the oven (away from the edges) an on a baking rack (not cookie sheet- unless you're using individual silicone baking forms) so it can get even air circulation from all sides. If said toothpick doesn't come out clean, then try again in 3 to 5 supervised minutes. My oven cooks very quickly, but watch for some light browning around the edges.
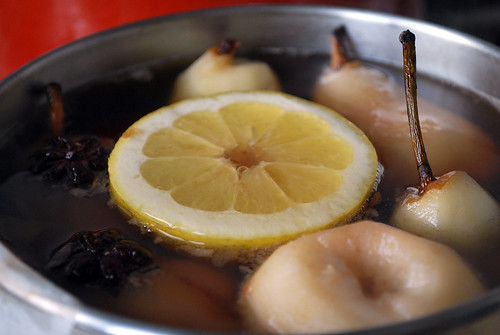
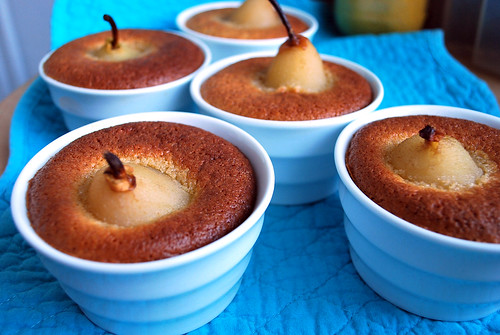
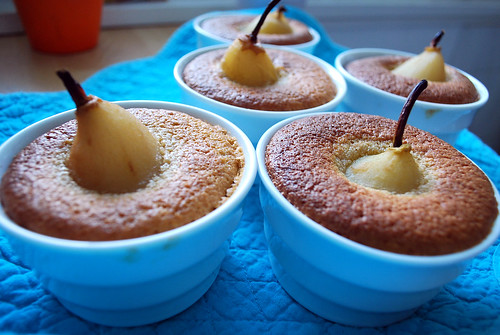
Thanks to the Tartelette Blog and her generosity in sharing recipes, I was able to make my own Poached Pear Souffle Cake. Both of us were feeling a bit sick and under the weather. The signs of spring were hiding behind the clouds and cold weather, until we went into the grocery store where there was a plethora of pears awaiting our consumption.
I immediately remembered Tartelette's recipe from back in December and grabbed six mini pears. So glad I did. This is a really beautiful recipe with gluten-free alternatives. The smells from the poaching opened my sinuses and really were a relief!
Photo evidence of my cooking adventure:
Thank you Tartelette for sharing your cooking prowess!!
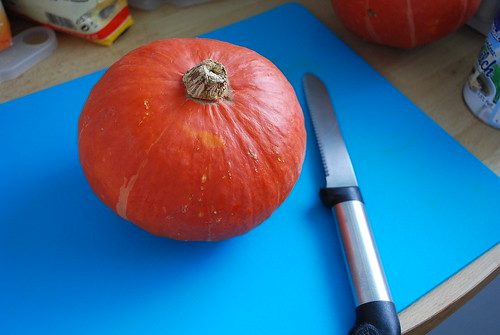
Well, let me begin with the fact that I now live in Munich, and sugar pumpkins aren't really on the market. So, the ideal would be a sugar pumpkin or a pie pumpkin, but what we have here isn't really that far off the mark... a Hokkaido pumpkin! Yay!
Ingredients for this not-too-sweet pie base:
2.5 cups of pumpkin (pre-baked and chunky-style)
1 can of evaporated milk or 1.5 cups of cream*
1/2 cup sugar
1/4 cup honey
1.5 tsp cinnamon
1 tsp ground cloves
1 tsp ground allspice
1/2 tsp powdered ginger
1/2 tsp vanilla sugar (optional)
1/4 tsp nutmeg
1 pinch of salt
3 eggs (4 eggs for a custardy fluffy finish)
*can also be substituted for Coconut Milk for a lighter taste (not sweetened coconut cream unless you want an extremely sweet pie).
1 9" pie plate and pie crust ready to go...
Really the recipe is quite flexible... so here's how to do the first part... the pumpkin prep
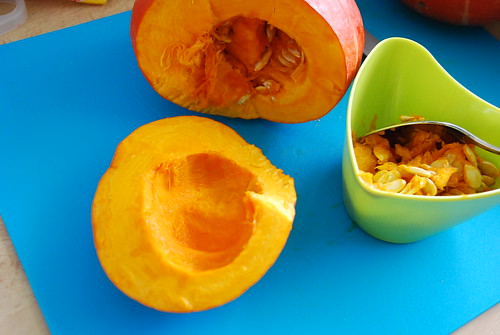
Wash pumpkin exterior. With a serrated blade, quarter the pumpkin and scoop out the seeds.
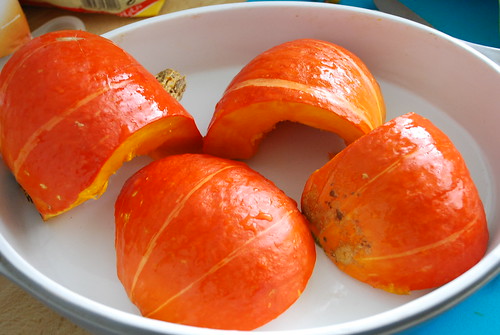
Place the hollowed pieces face down onto baking dish or cookie sheet lightly oiled and aluminum-lined.
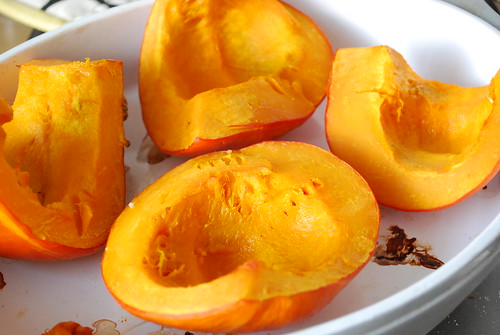
Bake at 170 degrees Celsius for 45 minutes or until tender (fork can easily pierce the fleshy innards, some pumpkins cook faster than others, so check halfway through).
Scoop out pumpkin goodness (avoid scooping skin). Each Hokkaido pumpkin yields a different amount, but it should be around 2 to 3 cups of pumpkin. Let this cool a bit and then mash it. For a more country-style pie, leave the pumpkin mash a bit chunky.
Assemble your dry ingredients, and pre-heat your oven to 230 degrees Celsius. In a bowl with your pumpkin mash inside, add in the milk and honey. Then, add the dry ingredients (sugar and spices) and lastly, the eggs. Make sure they are well combined.
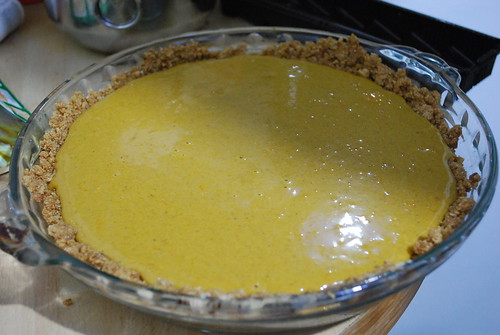
Have your pie plate ready with it's crust already in it... then pour the mixture in.
Bake at 230 degrees C for 10 minutes and then lower the temperature to 180 and bake for another 40 to 50 minutes.
My oven has a nice air-flow so it actually only takes about 35 minutes. Check to make sure it's ready by sticking a clean knife in it and if it comes out clean, it's most likely ready. Let it cool and set.
We ate the pie before I remembered to take a photo. :P
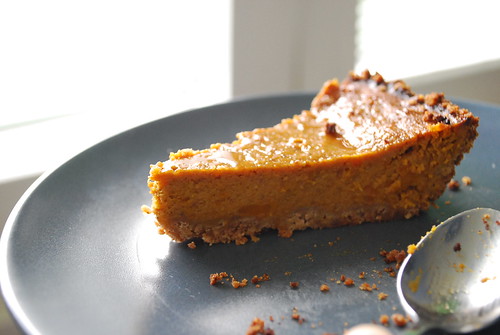
Update: Here's a photo of a slice made with coconut milk and a graham cracker crust after it set.
Currently I have been working on logos for different companies. I have had the pleasure of working with Arielis from Ari's Cakes to come up with these two logos. She has yet to decide which she will use, and so I present both of them:
P.S. Ari's Cakes made my wedding cake below. To see more of her work click here or here.
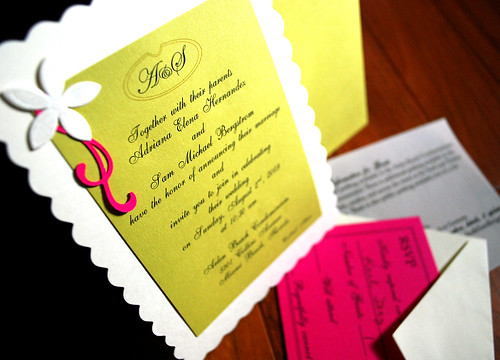
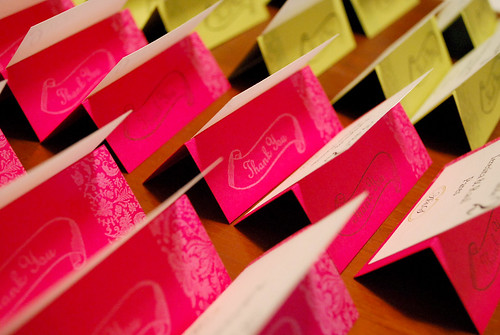
So, I was lucky enough to be able to pull off a mostly DIY wedding. Here are some of the things I designed for it: invites, cake topper, favors, menus, table takeaways, floral arrangements, postcards...It was all completed, of course, thanks to my mom and my cousin Arielis (who baked and styled the cakes).
Last week I made these lovely empanadas based on a recipe from epicurious.com. They came out really delicious. I used a pre-seasoned pair of steaks from the local super-market and goat cheese along with the specifications from their recipe. They came out excellent, incredibly flavorful, and I had one secret ingredient for the dough that some will cringe at, but dough flakiness shall not be compromised for the sake of our caloric intake! ((I used pig lard in the dough))