Showing posts with label flowers. Show all posts

Wednesday, June 22, 2016

Summer & June Gloom

My Summer Finch for the Finch & Foxglove site!

Did you know about June Gloom in Southern California? I just learned about it at the end of last month. I actually really like it!

So what is it? It's this weather phenomenon where clouds form over the ocean along the coast and the winds move these clouds onto land creating a foggy, cool atmosphere. I LOVE the cool mornings!

All this talk of beach and clouds and such has me all in a tizzy making artwork about fish and water! Did you see my new summer finch up top? It's now live on the Finch & Foxglove homepage, too.

Thinking about the beach...


And the water...

And I've been sewing too, I just haven't had the chance to photograph the garments I've made for my son and me. I participated again in MeMadeMay but again didn't post photographs. I wore lots of me-made clothing for Surtex in fact! I must do a sewing recap post soon.

Monday, November 16, 2015

Santa Barbara Map

I'm still very new to this town, but here's my visual impression of the place so far...

Lots of people doing stuff out in the open all the time.  Bright sunny days, beautiful vistas, lots to do with your family or on your own. Oh, and lots of great cycling.  Have you been to Santa Barbara? What were your impressions?

Sunday, May 10, 2015

Happy Mother's Day

Happy Mother's Day!

I painted these flowers for my mom, but thought you all might enjoy them too.

With love,

-Adriana


Saturday, February 21, 2015

MATS Bootcamp #2 February Assignment

Wow, this month has been huge! We're well over halfway through February, and I feel like there's just so much creative juice burstin' out of me with these assignments.  It didn't happen instantly, though.  Our mini assignment was to create a scenic plate.  I had lots of ideas for plates and analyzed the given inspirational plates to see what it was about them that I liked.  I drew lots that I'd love to see on holiday plates or a breakfast bowl of some kind.


And then, sleight of hand, Lilla and her team of magicians turned that mini into the real assignment which is wall-art on wood... oh, and please use real paint.  C'mon, be a good sport!
Paint.
Paint.
Paint...

Did I ever tell you guys I used to be a scenic artist?  I was.  In addition to Printmaking/Illustration, I studied Set Design and Theatrical Production as an undergrad and I worked at a couple of theatres painting backdrops and props.  I have painted a lot of things in my life, but it feels like another alternate-reality version of myself that did that work.  The last time I used any opaque paint in my own work was well over ten years ago.  Argh!  I can do this! Why was I so hesitant?

For some weird reason, I had a kind of aversion to using acrylic in my own work.  In my mind, as I painted these most recent MATS assignments, I recalled painting super cheesy assignments for learning grey-scale and color theory.  The awkward re-working of straight lines and forced photo-realistic depictions of things.  Ugh.  I remember one particularly silly illustration where the goal was transformation, and I did a pair of scissors > lobster.  I think I'd like to attempt that one again.  Ah well.  Eventually, I took to the acrylic with a love-to-hate-it kind of relish. :)  Why not embrace the discomfort?

Here's what I turned in...


And, here are the rest of the work on wood I painted!


Side Note: If you're in Germany and are looking for these wood plaque type rounds, they're called "holzscheibe" and you can find them at florist's shops (online in my case).

Tuesday, June 4, 2013

Rosita Mittens & Hat, Bow Slouch Hat revealed

This month on newsstands or at your local yarn store, you may see this magazine...


Inside, though, there are three of my designs!  I can finally reveal them since they're officially out in the open.
These three designs mark my first official printed-in-a-magazine knitwear designs. I'm super excited about them!

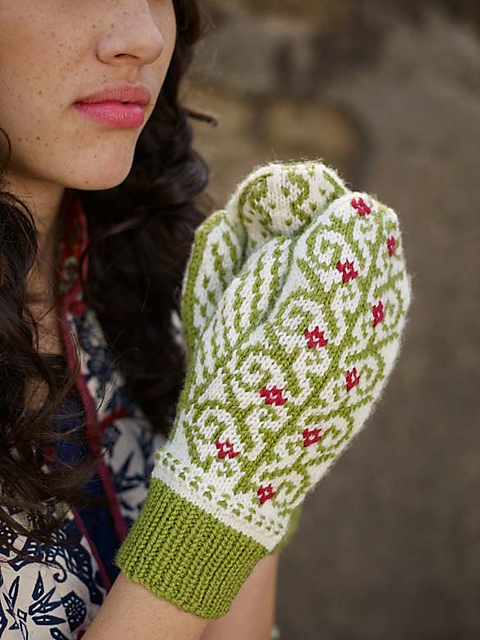
Firstly, there's the Rosita Hat & Mittens set.  The Rosita Hat & Mittens were inspired by the beautiful embroidered motifs on the traditional dresses of the Yucatan.

my inspiration
The mittens are knit in the round from the cuff to the fingers using stranded colorwork. Duplicate stitch is used to embellish the main mitten with flowers to finish the look!
photo property of Knitscene/Harper Point
The hat is made in a simpler way and uses a nice dots and dashes pattern to provide a bit of contrasting color.  The brim also looks nice folded up.

photo property of Knitscene/Harper Point
Here's me modeling the hat two different ways...


The third design in this issue of Knitscene Accessories is the Bow Slouch.  This is an easy pattern with a twist.  The brim is actually folded up and doubled for a nice, snug fit.  It can stay on even when worn at the jauntiest of angles!  This yarn, Accordion, is awesome.  It's so soft and knits up beautifully.  I never thought I'd be a fan of a mohair blend, but here it is folks.  I loved it.  And even made up a second hat for my mom.  Hers has a more modest bow, though.  I only wish I had more of this yarn to make up a third sample for myself!

photo property of Knitscene/Harper Point


And there you have it!  One of my big secrets I've had to keep under wraps since last year!
If you are interested in the magazine, you can find more details here:
http://www.interweavestore.com/knitscene-accessories-2013

Monday, September 3, 2012

Good Morning, Gladiola!

I awoke today to find that my slightly beat-up balcony garden had presented me with yet another unexpected gift!  Here's what the gladiolas have to offer.  I'm not sure if this is the pink or purple corm, but I was so pleased to have these blooms in my life.  I am in looove with their color.  What would you call this color?

gladiolas grace the garden


Friday, August 3, 2012

Garden Goodies

I was off to a late start planting my anemone corms/bulbs.  When they all got root rot, I thought they were goners even after replanting them all with more sand mixed in the soil.  So, I was really pleased to see that even through my follies I have one bloom!  Also, I'm glad I took a photo when I did because later that day (yesterday) there was an insane hail storm that tore the flower up.  Poor thing.

Anemone "Mr Fokker"
The latest drama in the balcony garden flower boxes...
I had to replant all the anemone corms to stave off rot because I didn't mix in enough sand for drainage.  Then as soon as the anemones started sprouting healthy shoots, a gang of entrepreneurial ants started using my oxalis plant as an aphid farm.  Then a spider set up shop between and above the flower boxes and likely ate my little ladybug larvae that I bought to stave off the aphid farm.  Or maybe it was the crazy grasshopper chewing on my pepper plants and then shedding its exoskeleton on my gladiolas--maybe he ate my aphid-eating ladybug larvae!  Gardening drama is so much fun.

Oxalis "Iron Cross"
In pepper news, the pepper plants I picked up from a generous dude who had too many are doing really well.  I have tons of green chiles and jalapeños.  I think I may leave some jalapeños on the plant and see if they turn red... I usually don't have enough patience to wait for true maturation.

Plentiful Jalapeño peppers

Wednesday, June 6, 2012

Updates: Knit & Garden

Photo update...
My SnB de Pijp Group made this wonderful hexi-puff seat cushion (or could-be future quilt) as a parting gift.  Thank you SnB de Pijp!!


The garden had it's first blooms and first losses.  I used the wrong kind of soil for the anemones which succumbed to rot. :(  But, the Oxalis are going strong as ever!


Friday, June 1, 2012

Growing, Going, Gone...

We moved.
Again.
And, I made a promise to myself that wherever we went next, I'd have a garden. I knew that the next place had a great balcony.  So as soon as I arrived at our new apartment, I planted all my bulbs from Albert Heijn (a grocery store in Amsterdam) into my lovely flower boxes from Blokker (a sort of catch-all shop also in the Netherlands).  The thing is, I wasn't expecting results so quickly! My sewing machine and illustration supplies aren't even unpacked yet, but these buds wait for no one!

The first ones up are...
Oxalis "Iron Cross"


And the teensy tiny tips of Triteleia are just making their way up...


Sunday, May 6, 2012

Postcards from Outside My Window

Originally written for Rock + Purl's Blog here

Outside my window there is a canal.

I moved to Amsterdam at the end of December 2011.  I photographed the view outside my window every month, and it helped me adapt to my new home.  These photos I organized like postcards to share with you.

December & January
We chose this apartment because of the view.  The balcony and main windows look out onto a canal and everyone loves to visit it.  Later in January, the canal turned to ice, but not knowing how deep it was, I did not try to walk on it.


February
Cold winds made beautiful patterns on the frozen water.  People from the neighborhood swept the snow to the center of the canal and people skated merrily, had snow fights, and bruised their butts when they fell.


March
What a crazy burst of color!  I bought some bulbs, 3 for 3 EUR to decorate my window.  They bloomed faster than I could have dreamed.  The hyacinths had the most wonderful scent.


April
This month was confusion.  Cold, wet, and rainy, splendid sunny days, clothing ranged from winter coats to shorts.  The grass stayed green, the skies wavered between blue and grey.


May
Big changes are coming. The weather seems to be shifting toward warmth, but the only constant is change.  I'll be packing and getting ready to move once again...  I hope my next view is as nice as this one.

Monday, April 23, 2012

Giveaway: Crochet Book

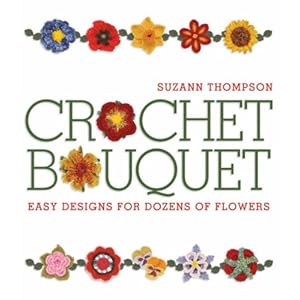
This week, I will give away Crochet Bouquet by Suzann Thompson.  Click on the image to see the book on Amazon.com.


This giveaway is open to anyone with a valid mailing address ready to receive a book!  In order to win, follow these 3 steps any time between now and April 27, 2012...


1 - sign up to follow the blog (ignore if you already follow it).

2 - leave a comment answering the following question: How did you start crocheting?

3 - Be sure to include your e-mail address in the comment so I can contact you if you win.

That's it!  Good luck, and thank you for reading!

Friday, March 16, 2012

Swayback Girl Clovers

I'm still waiting for my interfacing to come in the mail to complete my Starlet Suit Jacket... so in the meantime...

As one of the many Sew Weekly Contributors participating in Sew Weekly's "green challenge" week, I sewed a pair of Clover trousers.  I couldn't resist - the name and the challenge were too good together.

Front pocket detail + daffodils!
  • Fabric: 1.5m stretch brown denim (dyed to dark olive) purchased at Stoffen Spektakel in Amsterdam.  I used scrap cotton for the pockets.
  • Pattern: Colette Clover + self-drafted swayback triangle pattern pieces
  • Year: 2011 ⁃ Notions: invisible zipper
  • Time to complete: 2 days ⁃ First worn: Wednesday
  • Wear again? yes! I love them, although the self-drafted pieces together with the darts is a little funky, I love the way these trousers fit. No gaping at the bum.  No unintentional granny-panty flashing.
  • Total price:~23 EUR
  • Price breakdown: 3m @ 7EUR/m = 21 EUR, but I only used 1.5 m for the pants. It's pretty wide fabric. So, I have enough to make another pair! It's likely I'll make a different variation with more jeans-like qualities such as pockets with depth. Dylon dye in olive green was 8.70 EUR, and the zipper I had on hand from ages ago, but it was maybe 2 or 3 EUR.
 
Modifications to Clover pattern from Colette: Extended legs to full inseam length. I used a flat-felled seam throughout. And, by the way, can I tell you that flat felled seams are awesome, but really hard to do on your outer pant leg seams? It took a lot of scrunching and patience to finish them. I also drafted this triangle piece to help with swayback gaping which happens to me all the time. I am a swayback girl. I tried the trousers on after basting the legs together quickly just to test the fit and the waistline. I noticed I was getting the usual "low-rise back" effect and took action! I quickly drafted two triangular pieces in order to raise the back waistline to make sure I wasn't exhibiting my undies on a regular basis when wearing these.

the two triangle pieces
I did an adjusted dart as well. Instead of making the darts perfectly triangular, I extended them straight down and then tapered thanks to a tip from another swayback girl who recently addressed the issue on her blog. Here's the short version:
dart comparison, adriprints 2012

Pattern Crit: I was so happy that my first wearable muslin of Colette's Clover trousers is actually wearable. I made the zipper on the left instead of the right. I think it could use a hook/eye closure to help ease the zipper up. The invisible zipper installation proved to be a challenge, but with my Simplicity Sewing book + the Colette online tutorial + this invisible zipper tutorial from see kate sew, I was finally able to manage it and I only messed up one leg of the zipper just once! Plus, my fabric was really wide, so the pressure was off and there's enough leftover fabric to make another pair, which I definitely will! Also, I'm proud of my funky triangle pattern pieces.

my lady lumps

detail of triangle gusset
 About the dye... I used Dylon Fabric Dye (40C for the washing machine) color #34 Olive Green. My original fabric was a medium brown and with the olive green, they turned out a very deep olive. The dye worked really well and did not leach into the machine or on other items I washed with it right after dying (just to see). I followed the instructions and I'm really happy with the resulting dark green.

the dyed fabric w/ original next to it
 Check out the original post here on Sew Weekly!

Friday, August 7, 2009

Wedding Design: Invites, Cake, & more

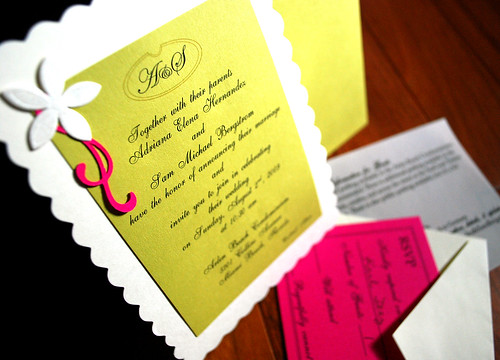
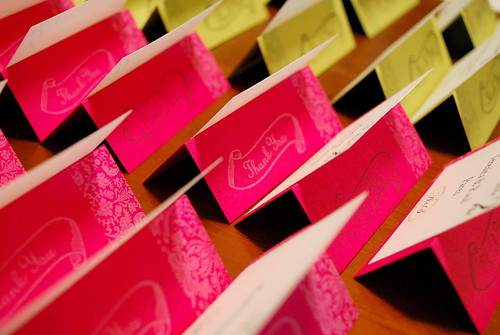
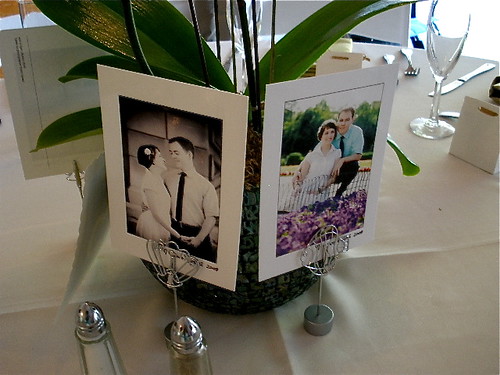
So, I was lucky enough to be able to pull off a mostly DIY wedding. Here are some of the things I designed for it: invites, cake topper, favors, menus, table takeaways, floral arrangements, postcards...It was all completed, of course, thanks to my mom and my cousin Arielis (who baked and styled the cakes).