Sunday, December 25, 2011

Bombshell Dress: Part 2, the Dress!

Merry Christmas!  Happy Holidays!  It's definitely holiday party time!

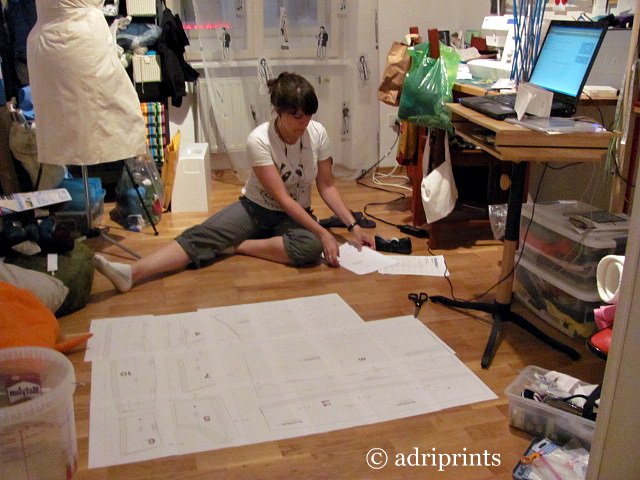
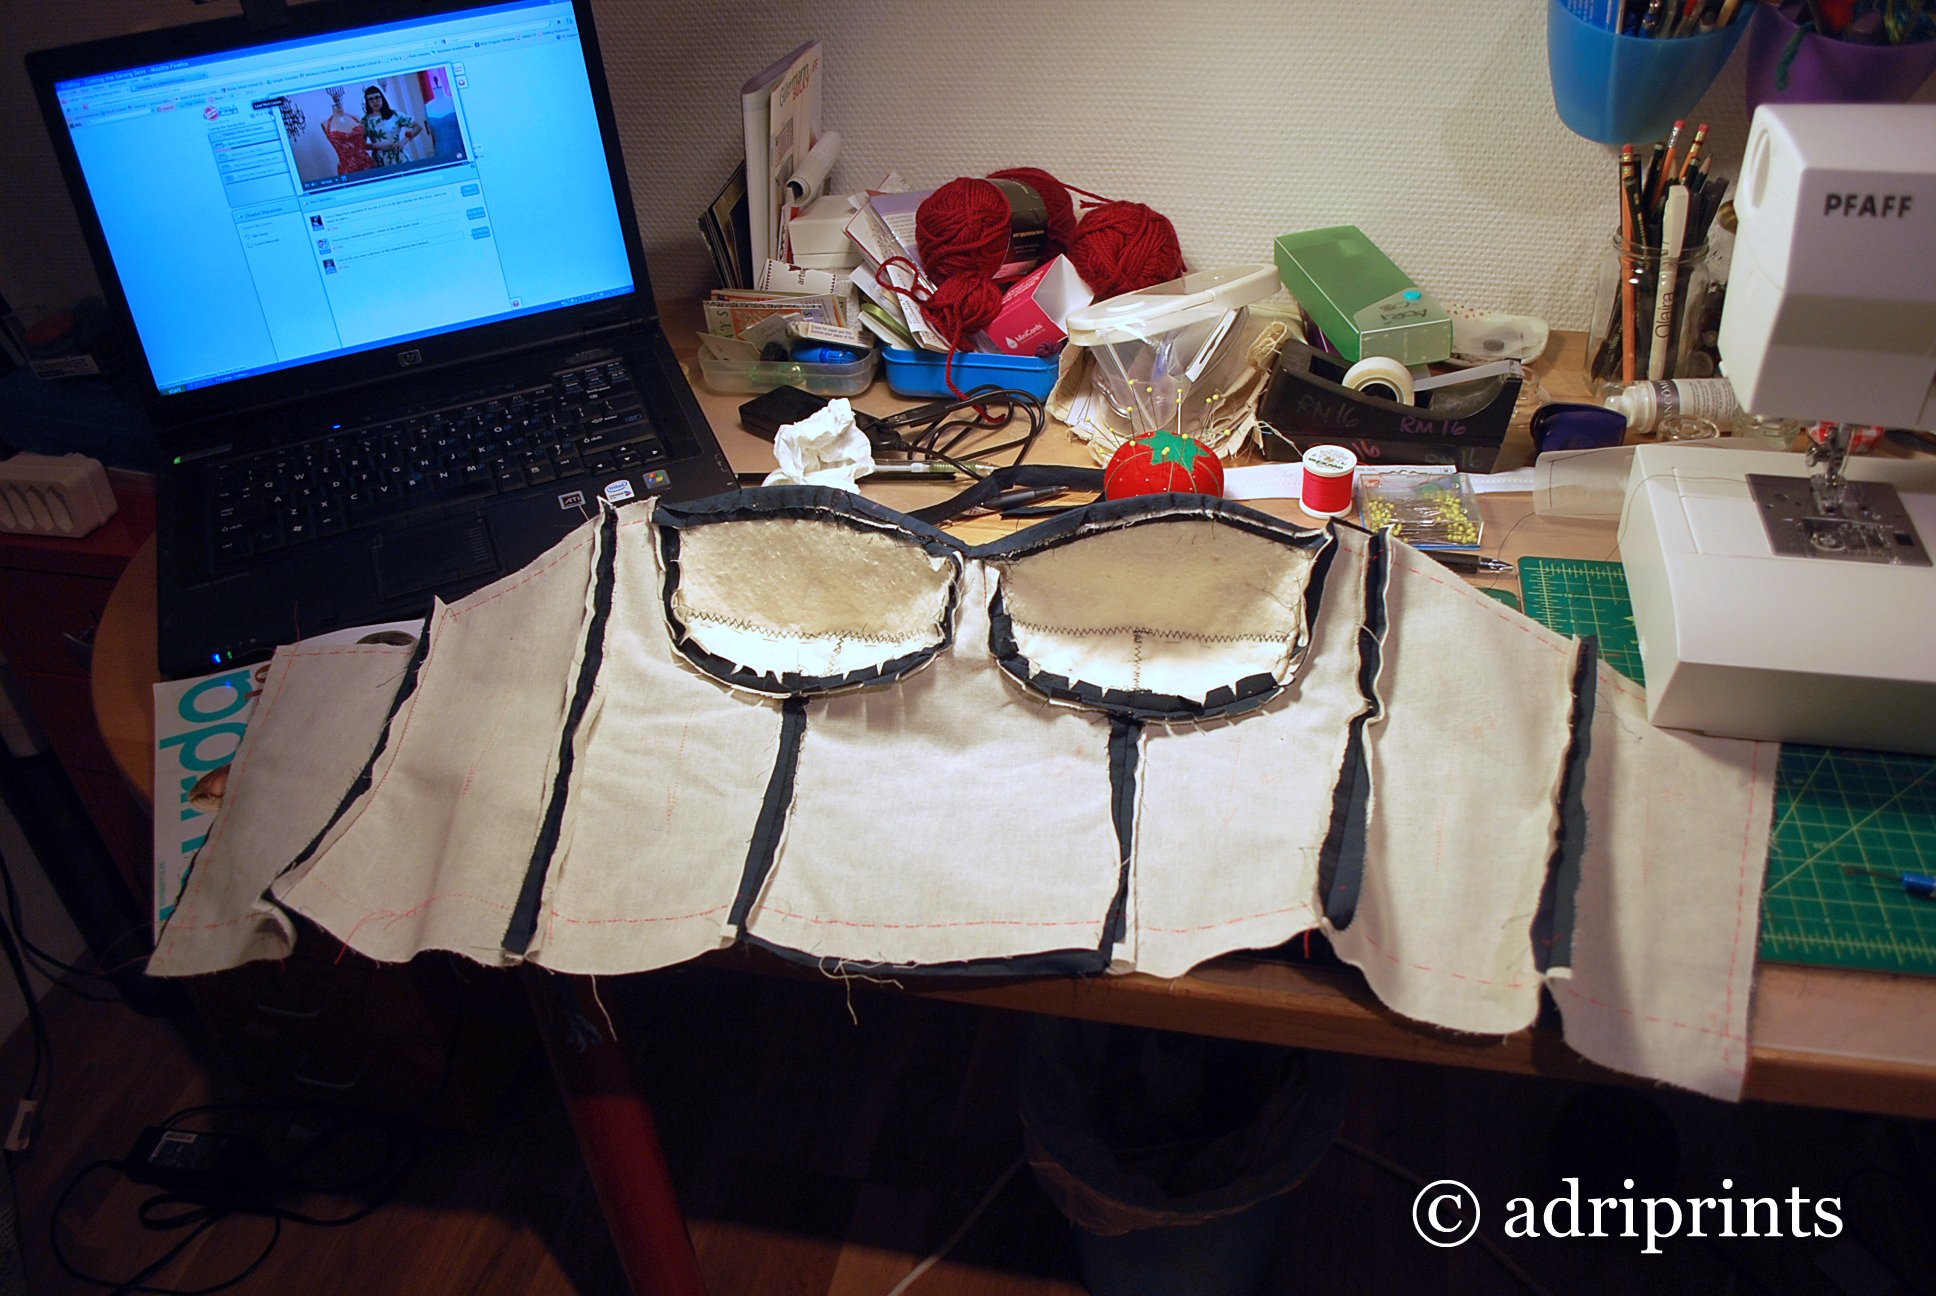
This dress is my New Year's Eve dress.  (( How in the world?  Did you make that? ))Yes, it can be done by you, too!  I followed the Craftsy course led by Gertie (Gretchen Hirsch of Gertie's New Blog for Better Sewing).  The Craftsy course featured a Burda pattern for evening dress #122A Bustier Dress w/Draped Detail from the 05/2011 Issue of Burda Style Magazine.  The course itself is a series of videos that walks you through every detail of making this dress from start to finish.  It was great.  I loved it, and it was a great way for me to get back into sewing regularly.
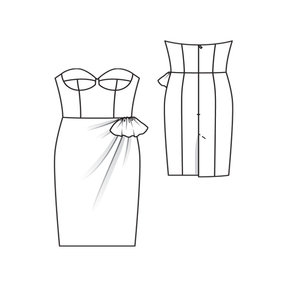
Burda 122A

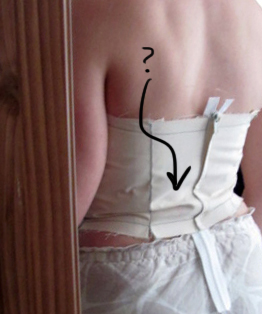
Modifications:  I omitted the drape detail as is shown in the course.  I modified the bust cups to fit me... I added about 1.5" to the top of the cups and 1" to the bodice.  There was also the swayback adjustment to the bodice top (Tip: If you adjust the bodice piece widths, don't forget to add extra space to the corresponding skirt pieces so they still match later).  To make a rounder cup, I flattened the design line of the bust pieces where they join top to bottom; it makes a less pointy cup.
 
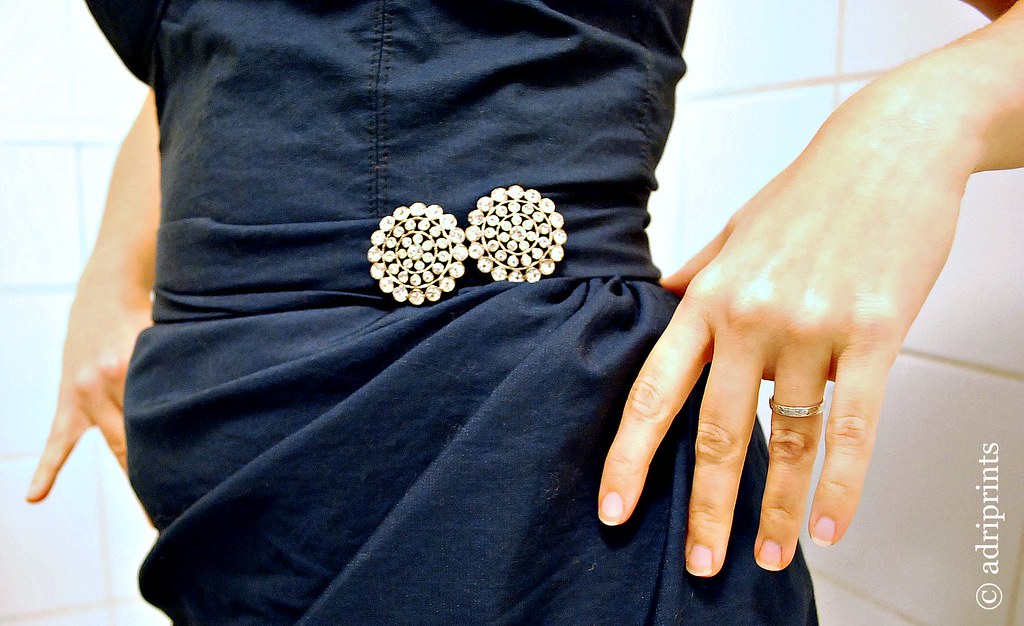
belt accessory, top stitching
I thought it needed some visual interest, so I added a top stitch to most of the seams in the dress.  Then there's the optional halter strap which is just a fabric strip with a few button holes.  Gertie guides you through that, too!  Finally, I added a belt accessory, and that was it!

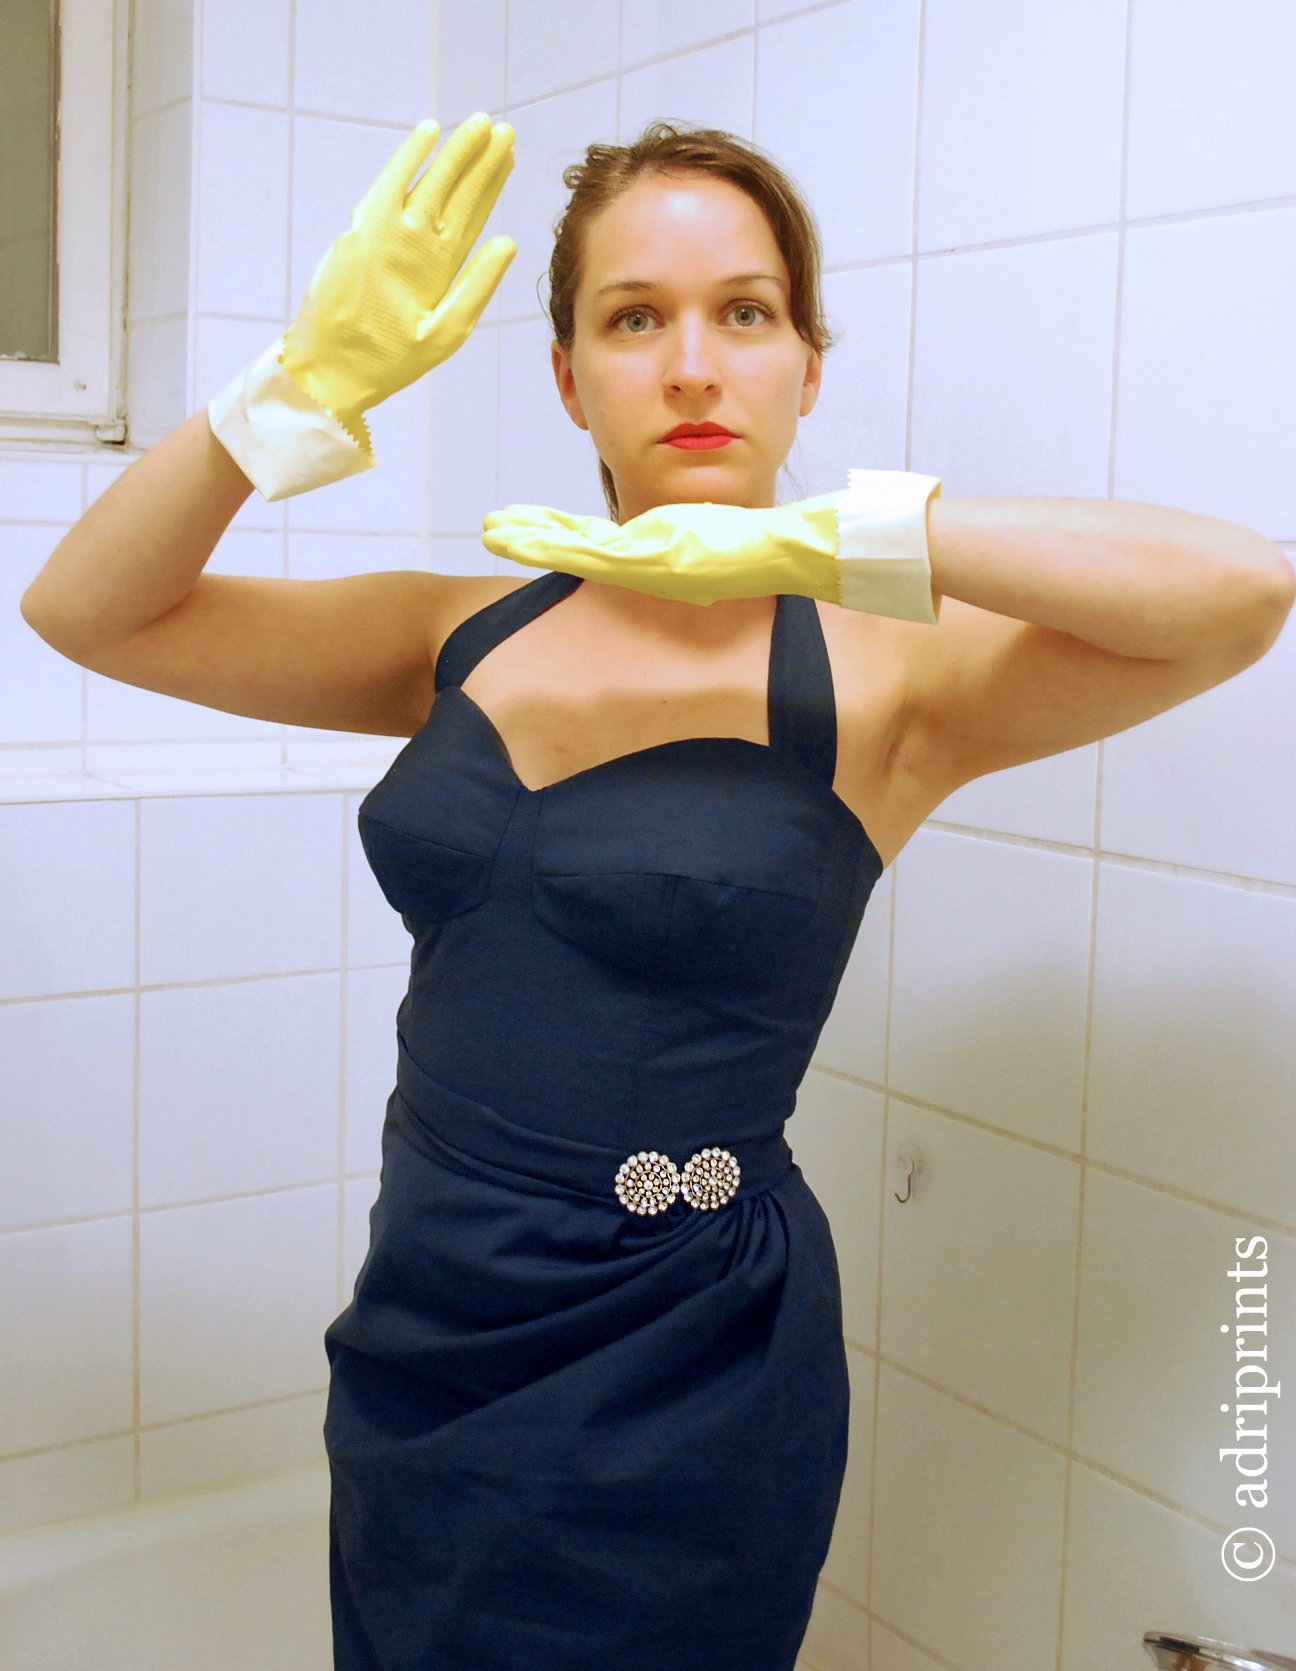
just strike a pose... serious adri
Okay, so maybe I should explain why I'm in the bathtub wearing rubber gloves... Well, that was the best place not covered in boxes and packing stuff.  Plus, the light was great!  And, I love the yellow rubber gloves.


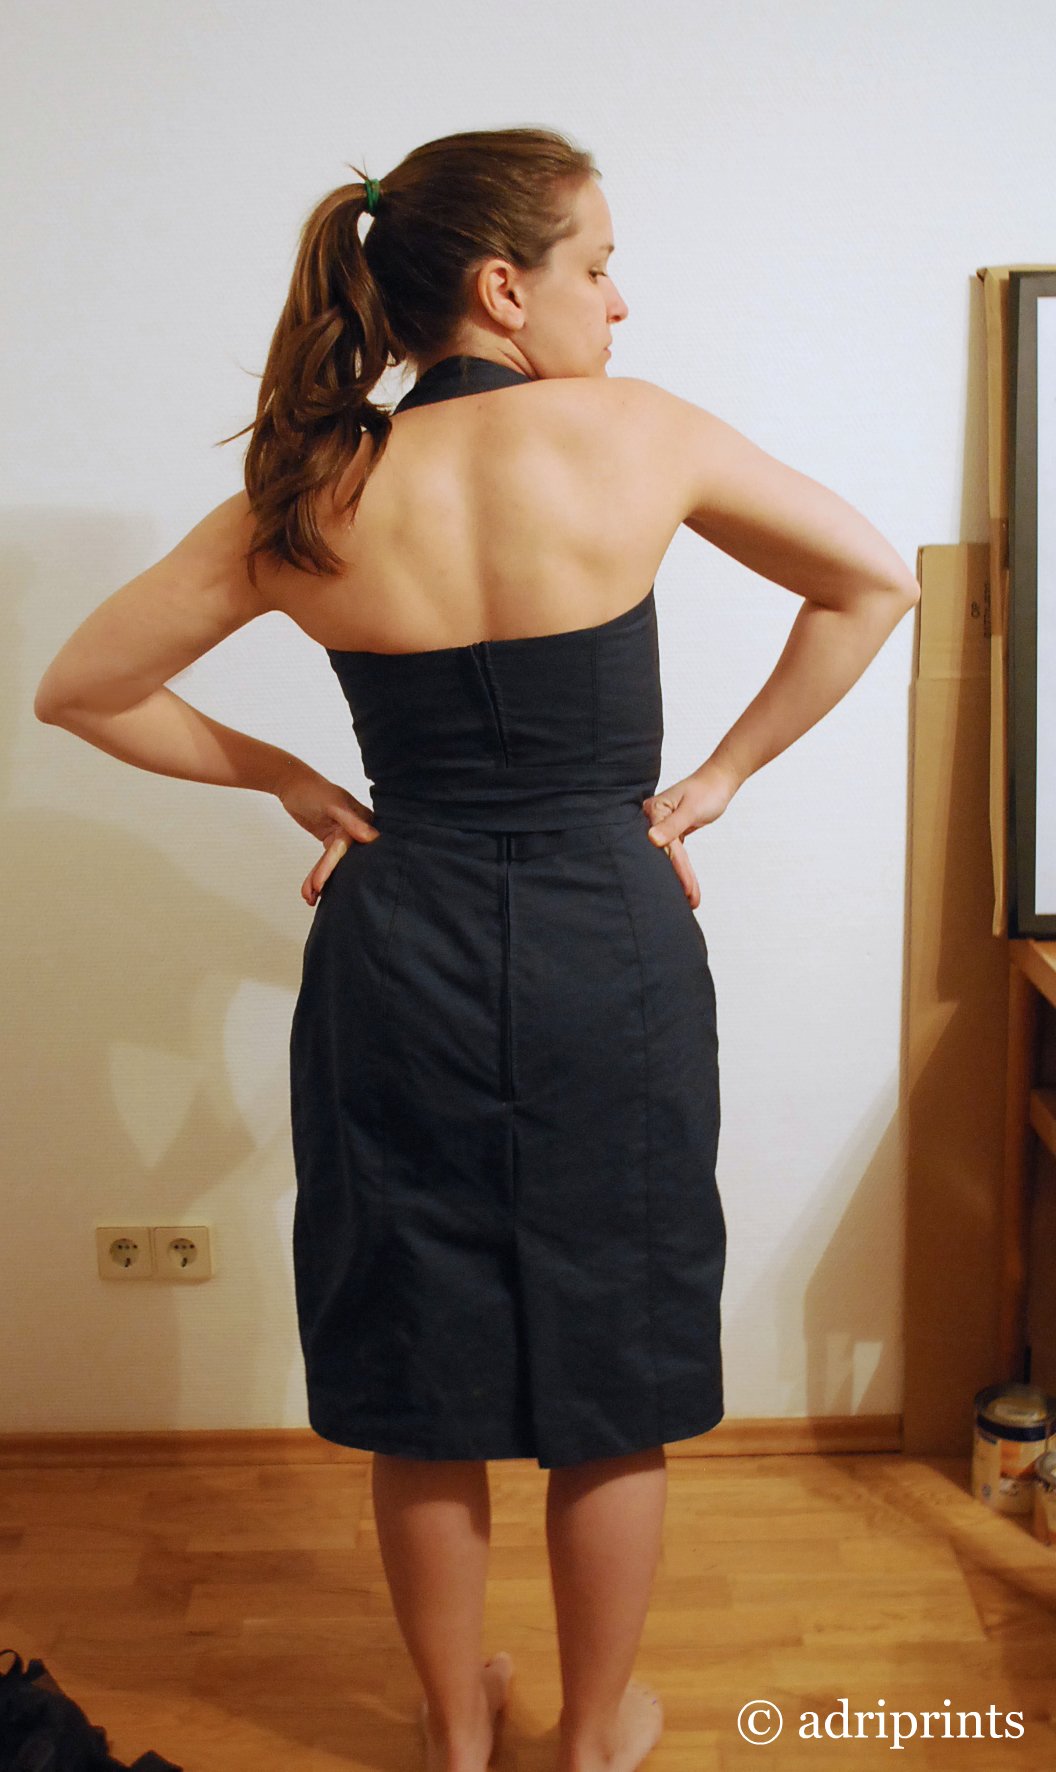
back view; surrounded by cardboard
shameless.

Details...
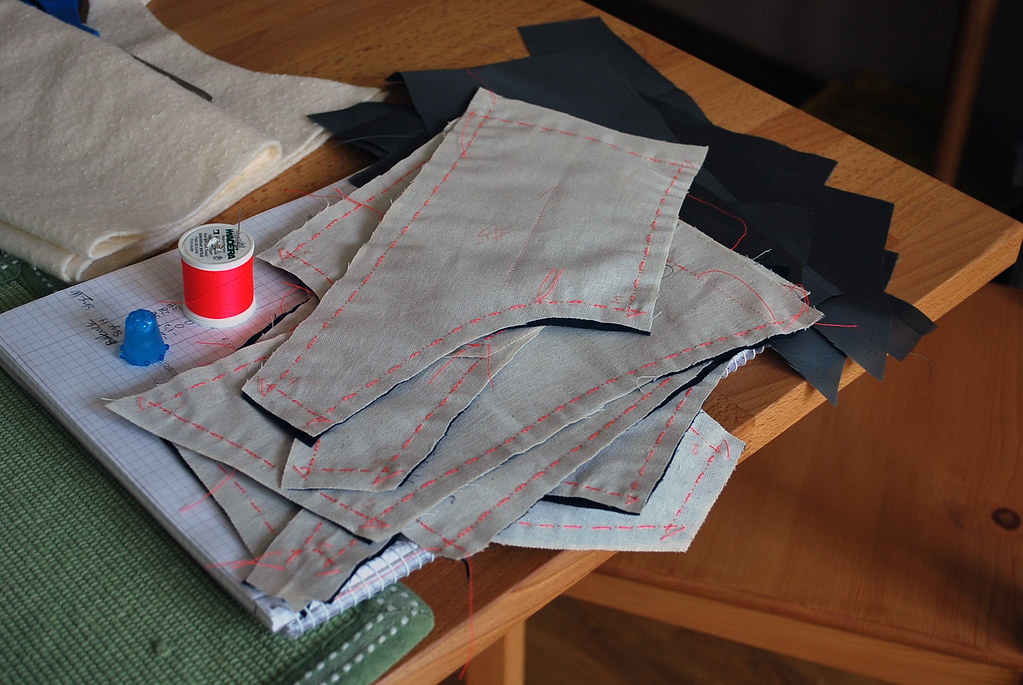
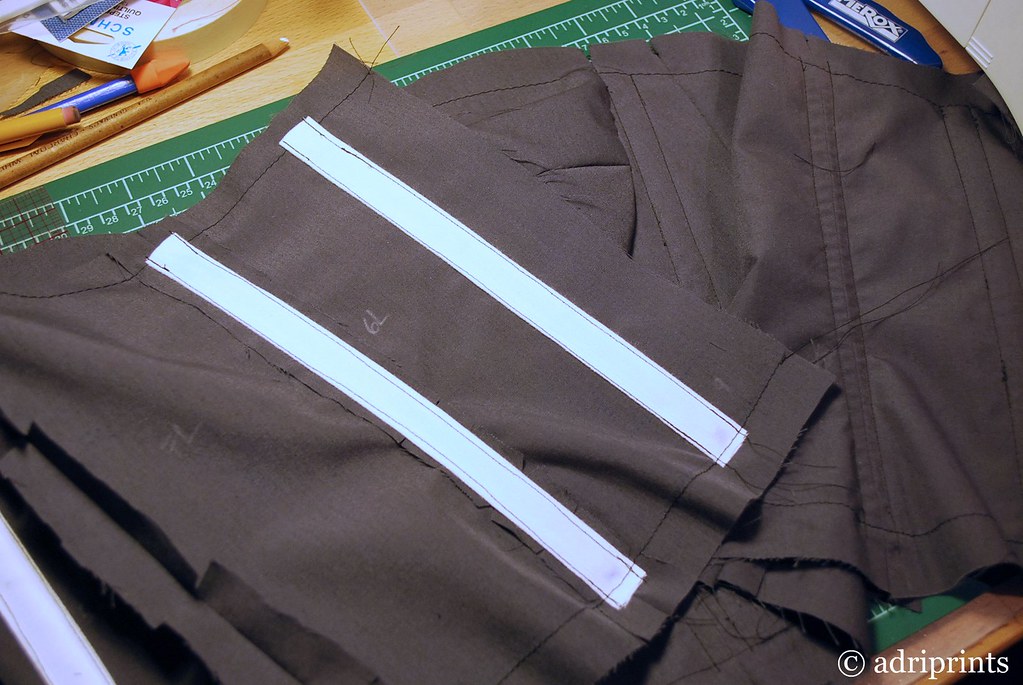
The outer dress fabric was purchased from the sales bin at Karstadt in Munich.  The grey cotton lining was from Ribes y Casals in Barcelona.  The grey acetate or some kind of nylon skirt lining, Petersham ribbon, and zipper was from Orag-Haus, Munich.  The spiral steel boning, casing, and caps were from Spitzen Paradies.  The belt clasp was a birthday gift from my friend, VĂ©ronique.  It was part of a collection of vintage buttons she gave me.  And, a big thanks to Alyson who convinced me to make this dress as a sew-along with her!  Thanks, Alyson!!

Part 1 of how I made this dress can be found here.

Friday, December 23, 2011

Thank you, Munich!

Getting ready to move is such a grueling process.  For some, this may be an exhilarating use of their organizational and leadership skills, but for me, it's just torture.  Living amongst the chaos of half-filled boxes, partially disassembled furniture, random paper, and all that snow falling outside; it just stresses me out.  Once things are finally in the boxes, and once they're in the truck and out of the apartment I can finally breathe a half-sigh of relief.

Even when all the boxes are packed, there's the emotional toll of leaving.  Moving long-distance is painful!  And, I'm not very good at saying goodbye to people, but really, who is?  I cope by saying "see you soon" or "see you next time" because "good-bye" just seems too final. This past week I've been giving my farewell "see you soon" speeches at every turn.  The last concert, the last Sunday knitting, the last MuKnitter's meet-up, etc. etc.  Each time, I'm reminded of the wonderful people I've met and the many memories we've shared during my 3+ years here in Munich.

If I didn't get the chance to tell you in person, I just wanted to say "Thank You".  Thanks for making the past couple of years so much fun.  Thanks for taking me to all your favorite places and showing me around.  Thanks for pushing me to try new things, challenging me to be the best me, and showing me how to do my best knitting tricks to date. Thank you for teaching me to speak German, and for accepting me into your groups. I'll miss you all dearly, and I'll see you all again soon.

Much Love,


Adri

Thank you for all the mementos!

Thursday, December 22, 2011

Bombshell Dress: Part 1

With a lot of help from Gertie's Craftsy Course: Sew Retro Bombshell Dress, I finished this big sewing project.  And, because it took a lot of hand-work, hand-sewing, and thoughtfulness, I thought I might walk you through the whole process.  In a following post or two, I'll show you the final dress. ((tee hee anticipation))

cutting out the paper pattern
In the beginning there were the muslins (also known as toiles, dummies, mock-ups, calicos, etc.).  A few of them.  These were to make sure the final dress would fit me since we knew the original pattern was a bit too small in some areas.  Thanks for the larger bust modification chapter, Gertie!


muslin #2, see the cups?  they are a little too pointy in this version
uh-oh! see that gathering... I had to adjust for a swayback


Muslins take a bit of work because you're sewing the actual pattern pieces together, then wearing them, adjusting via markers, pins, mirror, etc.  And all except the last of them ended up in the scrap bin.  But, when the muslin finally did fit my particular body specialties, I transfered the seam-lines onto fresh muslin and paper (for prosperity and reuse) and cut into the fashion fabric ((scary!)).  Spoiler Alert... It all worked out!  Yay for little victories!

the pattern pieces, thread traced (c) adriprints
Once I cut into the dress fabric, I had already sewn the main pieces about four times.  So, this part went quickly.  Then batting (or foam or whatever you choose) is added to the bodice cups for stability.  This part was a lot of fun.  I loved sewing the cup pieces together and then adding them into the bodice.  You think you're halfway through here, but you're not.  You still have to build the inner lining and the skirt, remember?

the cups are stable!  oh, and learn from me... leave more seam allowances.
After the cups are in, you add the skirt to the bodice, and insert the zipper.  I had to re-do the waistline and revert to the original waistline.  I am high-waisted!  Then, I made the inner lining which holds the boning for more structure.  I thought I would have to wear a bra with this one, but not so; it's so secure it's not necessary!

the inner lining with the casings for the boning
After this, it's just a matter of hand-sewing that inner lining to the bodice and making sure everything's in place!  Photos of the final dress can be found here.

Tuesday, December 20, 2011

Seamless's Challenge for 2012


I recently came across this challenge from Seamless blog.  Elena Cresci's challenge is to "abstain from buying any new clothes" until she finishes her degree in 8 months.  As for me, I'm taking the pledge until the end of 2012.  I was already on my way to not buying new clothes anyway. This year, I knitted several jumpers, hats, vests,  scarves, etc. Then, I sewed several new skirts, PJ pants, and a few new dresses. Now with my recently acquired patterns for trousers (Clover from Colette), I'm on my way to following the "Seamless Pledge" in 2012!

My sewing resolutions (more like goals) include:
  • making a pair of trousers that fit... both my waist and hips without any giant gaps at the waist or funny crotch/inseam issues, in fabric I'll actually wear
  • make a jacket w/lining or a coat w/lining (again in fabric that I'll wear)
  • make a quilt for the bed
  • drape a garment, creating it from scratch (patternless!)

The Rules for the Seamless Pledge

  1. No buying new clothes for the duration of your pledge. By new, I mean any new mass-manufactured clothes.
  2. You can buy second-hand manufactured clothes – so be prepared to get to know your local charity shops awfully well.
  3. Vintage clothing is a-ok!
  4. Anything you’ve made by hand is definitely allowed. Get your sewing machines and your kntting needles out, because handmade is definitely in!
  5. Get involved! Join in on the Flickr group and like our Facebook page. I’ll be looking to feature pledgers on the blog in the future. I’d love to see your second-hand finds, refashions and hand-made creations!

Sounds like a cool challenge, right?

Monday, December 12, 2011

Illustration: Unwind on the hill


This was such a fun illustration to do.  It all started with a request from a repeat client who was establishing a crafting group in Queensland, Australia.  She gave me some details and background on the group and wanted a header illustration for stationary, Ravelry,  blog, etc.

The Unwind on the Hill group is made up of women who come together and meet up at a local Senior Citizens center, but are from all kinds of backgrounds and meet up to craft and to share their crafting experiences with one another... an all around jolly group of ladies from what I hear!

Thursday, December 8, 2011

Illustration: Winter Classic Program


One of my recent illustration projects was this cover illustration and program layout design for ESME e.V.  Their winter concert took place last weekend, and I was lucky enough to do their cover design as well as the inner layout of the concert program.   I was happy to do an architectural illustration after not having done one in a long time.  First I photographed the location... and trudged through the mud with my dog in order to get the right angle for the illustration.  Luckily, all the water in front of the Schloss Nymphenburg is all evaporated and all that's left is a semi-desiccated mud field.  It was fun to walk through, although my dog thought otherwise and I ended up carrying him along with my camera equipment through part of it.

Quite an adventure was had by both in order to get the right shot.  Then the illustration itself was done with fountain pen and ink.  The background gradient was added later in Photoshop as well as the blue tones and text which were added in InDesign.  Overall it was a quick and fun holiday illustration!

Congratulations to the musicians and singers who participated in the Winter Classic concert.  Thank you for letting me be a part of it!