Saturday, August 30, 2014

Nursing Top from Ottobre 2009


With my post-partum body changing so quickly, and the baby growing so quickly, I debated whether to sew anything for me for a while.  I started eyeing that red maternity/nursing top I made in the spring which was too big for me now.  I stared at it for weeks.  Then, a sewing buddy of mine offered to lend me a nursing top pattern she had in one of her older Ottobre magazines, and that was the clincher.  Chop-chop went the too-big nursing top!

I'm glad I decided to cut it up... I used up every bit of that tee, and finished off the rest of that thick red jersey fabric.  I didn't have enough for the inner panel, so I used a bit of this lovely stripe jersey I bought from a fabric store closing sale.  Glad I bought 2.5 m of it!  It's so soft!


Do I look maybe a bit tired in these pics? That would be because I am.  Hee hee. Somehow, the LD (little dude) started teething at 12 weeks and I've been coping with all that entails.  He's generally the sweetest little sweety, but when he's teething he turns into a puddle of moaning sadness.  It's heartbreaking and so I can't help but comfort him... at 2am... at 3am... at 3:30am.. etc...

So yeah, a bit tired, but it's getting better, and LD is learning to cope better.  I also have many more tricks up my sleeve now that it's been a few weeks!

---
Anyway, about the project:
PatternOttobre 2009, #6 "Loving" Nursing Top
Fabric: recycled red jersey from maternity/nursing tee made in May 2014
Modifications: shortened the sleeves 1", but I think I just need a smaller size on top
Recommendations: instructions for the innermost panel say to turn over the nursing edges and stitch, but I think this reduces the stretch of the fabric.  I'd overlock this edge instead.  I turned over the bottom edges and used a rolled hem foot... this is not a good application for it.  The jersey loves to roll, and it made for a curly half-lettuce bottom hem.

The pattern is a very straightforward 7 piece pattern (you cut the binding, elastic, etc. based on given measurements).  I made an EU size 40 using my full bust measurement.  Next time, I'll cut a 38 top, maybe even a 36 for the shoulders and sleeves, and keep the bottom 40.  It's easy to adjust since there's a separate waist section.  On me, though, this is more of a nursing tunic dress. I'll be making some adjustments, but I like the dress aspect of it.


The trickiest part of this pattern was the clear elastic!  My machine loves it to the point of squishing it all together and creating these teensy, tight gathers which I did not need for this particular pattern.  In the end, I found the solution to be paper!  Once I put the thin pattern paper between the foot and the elastic, everything went swimmingly... okay, not quite - that binding went a bit wonky, but I can live with it. 


This went so quickly after figuring out the best way to sew with clear elastic!

Overall, I'm happy with it - it's wearable, but the shoulders/neck are wide for me... it's tough to choose a size with such a variable bust measurement, but the jersey should be forgiving enough to allow me to make a smaller size top.  I will definitely make another!

Saturday, August 16, 2014

Knittin' for Baby: Striped Coverall

And, another project completed just fast enough to wear once.  Ah well.  At the very least, it made for some nice photos.


Can I also recommend a little something to knitters who follow in my footsteps and think that open-ring snaps are the way to go?  Here's my advice... reinforce the knitted fabric with some kind of backing.  Either a thin strip of jersey or something.  The prongs are kind of ripping into the button bands.  Argh.  What was I thinking?!  Oh... I wasn't.  I just wanted to "get 'er done."  And so it goes...


Project: Striped Coveralls for the little dude
Pattern:  All-In-One in Deramores Baby DK (1009) by Deramores Retail Ltd
Yarn: Debbie Bliss, Baby Cashmerino in Dark Green and Grey (1.5 skeins of both colors)

Modifications:

  • Solid color sleeves
  • Shortened sleeves to prevent the LD from eating the cuffs.
  • Added a crotch gusset as seen below... because there was no way they would fit over cloth diapers or at 3 months... and the LD is kind of an average sized 3 month old.


Wednesday, August 13, 2014

Quickie Illustrations

From mid-July to this past Friday, there was a draw-along challenge kind of thing leading up to an art opening with the local Munich Artist's Group.  I dedicated a meager 15 to 20 minutes of time to these illustrations and I sadly couldn't keep up with the full 30 days.  But, I was happy to be illustrating again, and I did have a few really nice ones at the end of it.

Here is my favorite...

illustrate a place

And these were alright, too...

self portrait

favorite animal - chameleon 
a word - lackadaisical

Saturday, August 9, 2014

Two-Part Nappies Revisited: Part 2

A quick tutorial on how to make your own diaper inserts using my pattern (or your own drafted pattern).
These diaper inserts require an outer waterproof cover of some kind, and will fit from newborn to 6kg+ (at least they're still working for us!).

the absorbent inserts inner flannel / outer terry cloth
Materials
  • Absorbent fabric (German term in parentheses) such as flannel (Flanell/Molton), terry cloth (Frottier), hemp fleece (Henf), or jersey, etc...  Feel free to recycle materials you already have; like an old flannel blanket, an old sweatshirt, or a towel.  I use terry-cloth on one side because I like to use Snappis and avoid hook & loop closures, but feel free to use whatever closure method you want.
  • Elastic (I used 1/4" wide elastic that is resistant to high heat)
Instructions
1- Place the paper pattern on the fold, and cut your materials for the diaper insert.  Don't forget to transfer all markings to your fabric.


2- Cut fabric for center pad (it's that center rectangle with the dotted line in the pattern).  I cut 2 layers of bamboo terry-cloth.
3- Layer the 3 elements as follows: absorbent material #1, pad rectangle(s), absorbent material #2.


Center the pad, and secure all three layers with pins.


4- With the smoothest fabric facing up, sew 1/8" to 1/4" within the four edges and across the center of the pad to secure it in place.


5- Measure the elastic band for the sides and top, then cut elastic 2-3” shorter than the measured length.
6- Tack both ends of the elastic where indicated and pin at the center.  Make sure to leave a little space on the outer edge for finishing the fabric.
7- Use a zig-zag stitch to attach the elastic on the back of the insert and the leg openings, stretching the elastic between the two outer layers as you go.


8- Use a zig zag stitch or overlock around all the outer edges to finish.  I stretch out the back and sides while feeding it through the overlocker.  I do not serge over the crinkled/gathered edges.

Wash a few times, and then let baby poo all over your work! Hahah!

Friday, August 8, 2014

Two-Part Nappies Revisited: Part 1

This post covers lessons learned in making diaper covers at home.  In cloth diapering, the outer cover is a waterproof barrier that prevents leakage.  These can also be used over regular disposables to prevent leaks, or just because they're really cute.


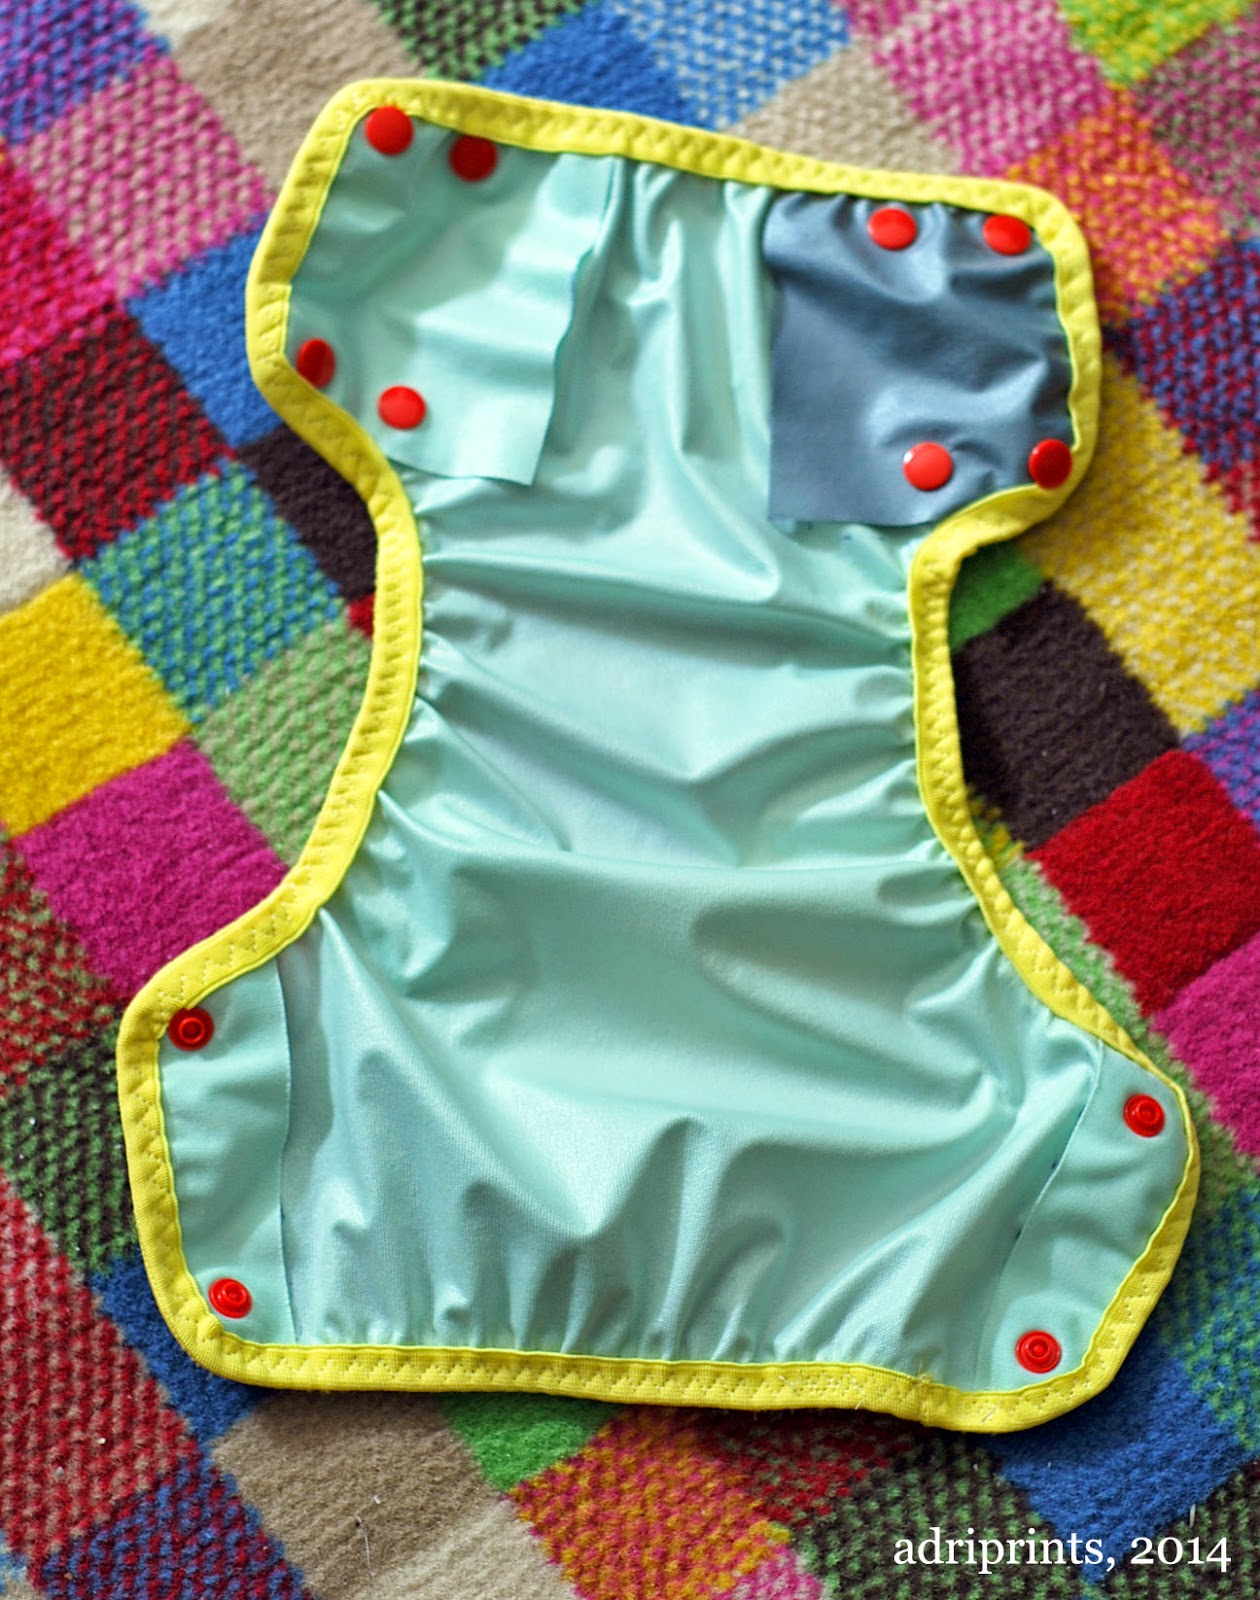
After a few mishaps and lots of leaks, re-purposing PUL, and studying more cloth diapers, I think I've found a few types of cloth diaper systems that work for the little dude.  This particular diaper cover is a homemade version of Motherease's diaper cover the Air Flow.  It works really well with the diaper inserts I make at home (more on that later).  These are not easy to come by here in Germany, so to me it's worth the effort of making more of them.

What I've learned so far:
FOE - fold over elastic goes on a LOT easier if you use a triple zig-zag stitch.  This video was key.
detailed photo of the inner wing of the diaper cover


KAM snaps - these snaps make a better seal with the Eco-PUL I bought from Diaper Sewing Supplies when there are 3 layers, and it's been exposed to warmth (i.e. it's been through a 60* wash and tumble dry).  That's it!  That is what was missing last time.  I didn't wash/dry the cover before trying out the snaps, and it was too thin.  Now I'm kind of sad I chopped up the grey & yellow cover before washing/drying.  It may have been salvageable.  Oh well.


With my latest effort, I went with a retro color combination!  Aesthetics aside, they work really well.  No leaks or poo-splosions yet!


As for the diaper inserts (the absorbing inner part of these two-part systems), I've drafted a pattern for anyone who wanted to try it on their own!  You can download it from the Google-Drive link here.

Come back this weekend to see the photo-tutorial on making your own diaper inserts!