
In this portion of the tutorial, we cover Steps 7 through 9 of the JJ Blouse, a free pattern from BurdaStyle. Note: I actually skipped Step 9 which is the belt loops. I chose not to include them.
Step 7:
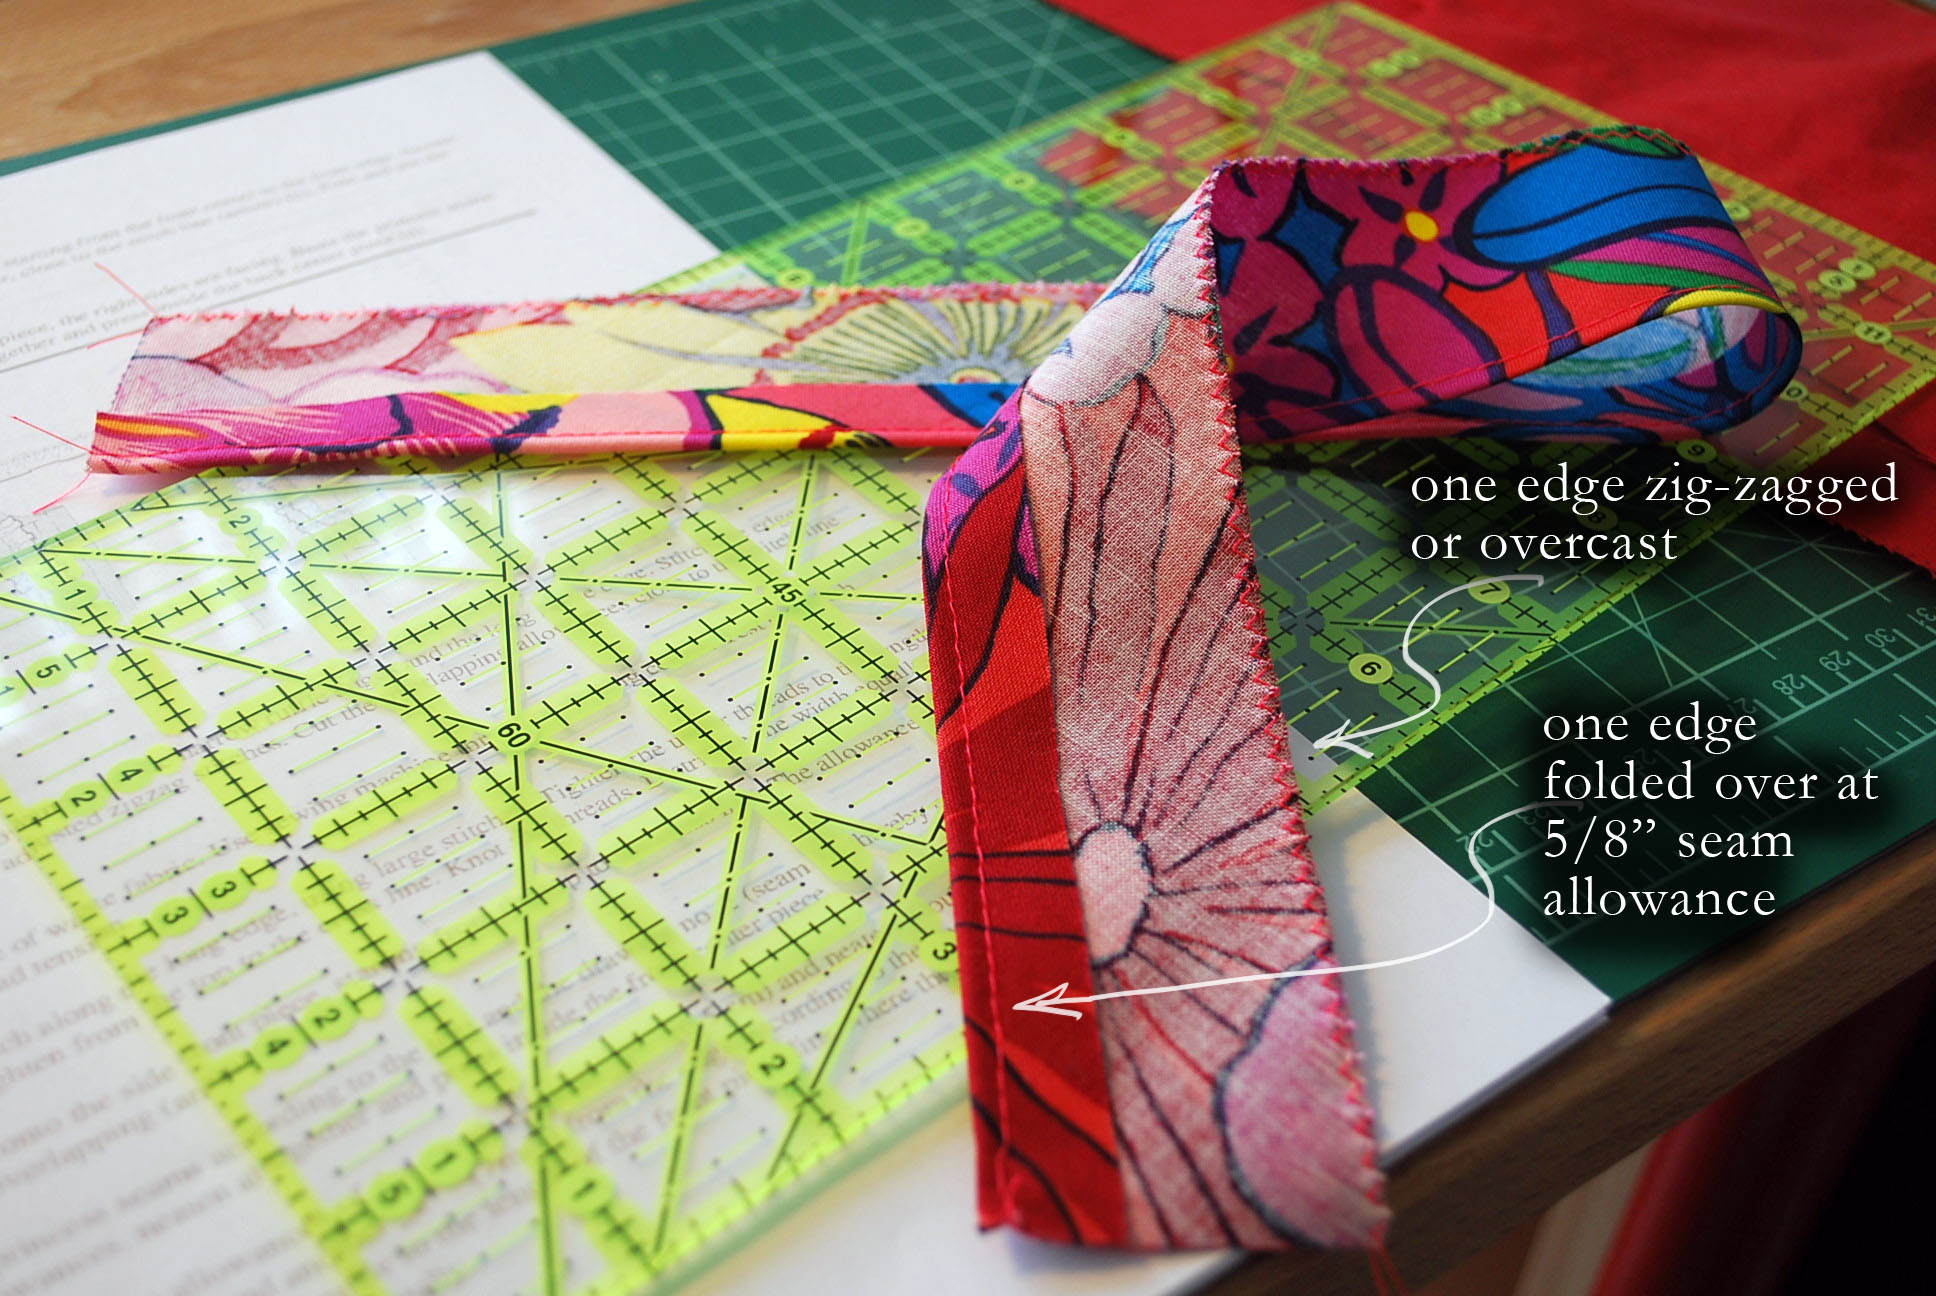
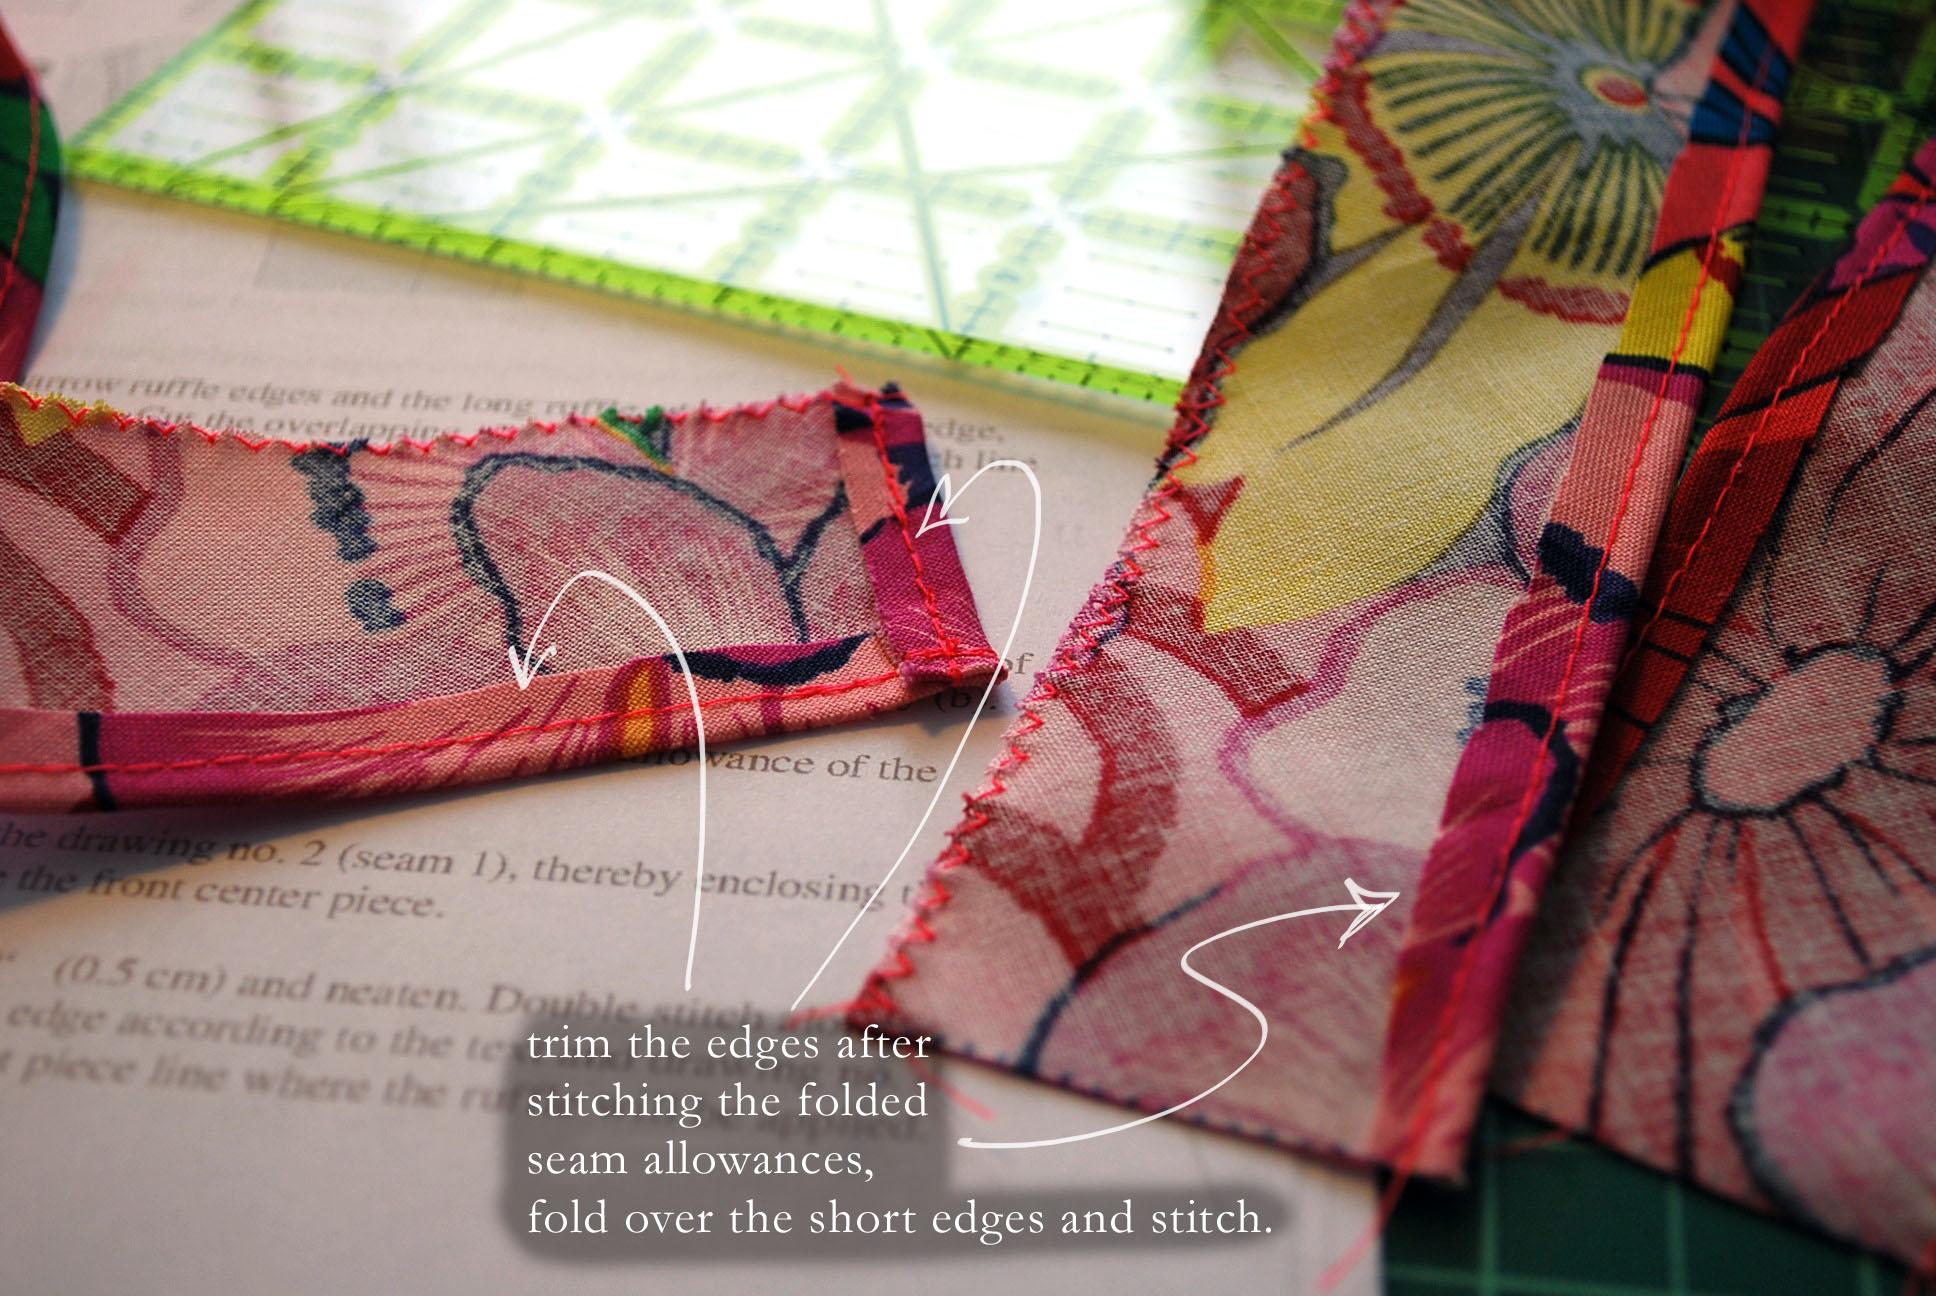
(A) The ruffles begin as flat pieces. First the seam allowances on the longest side are folded up, pressed, stitched about 1/8" away from the edge, then trimmed down on the wrong side. Then fold the side edges over and stitch 1/8" away from the edge. The untreated edge should be zig-zag stitched to keep the fabric from fraying.
 |
| Step 7A |
 |
| Step 7A |
(B) Double-stitch close to the zig-zagged edge. Try to keep the two rows of stitching as parallel to one another as possible. Separate the top threads from the bottom threads.
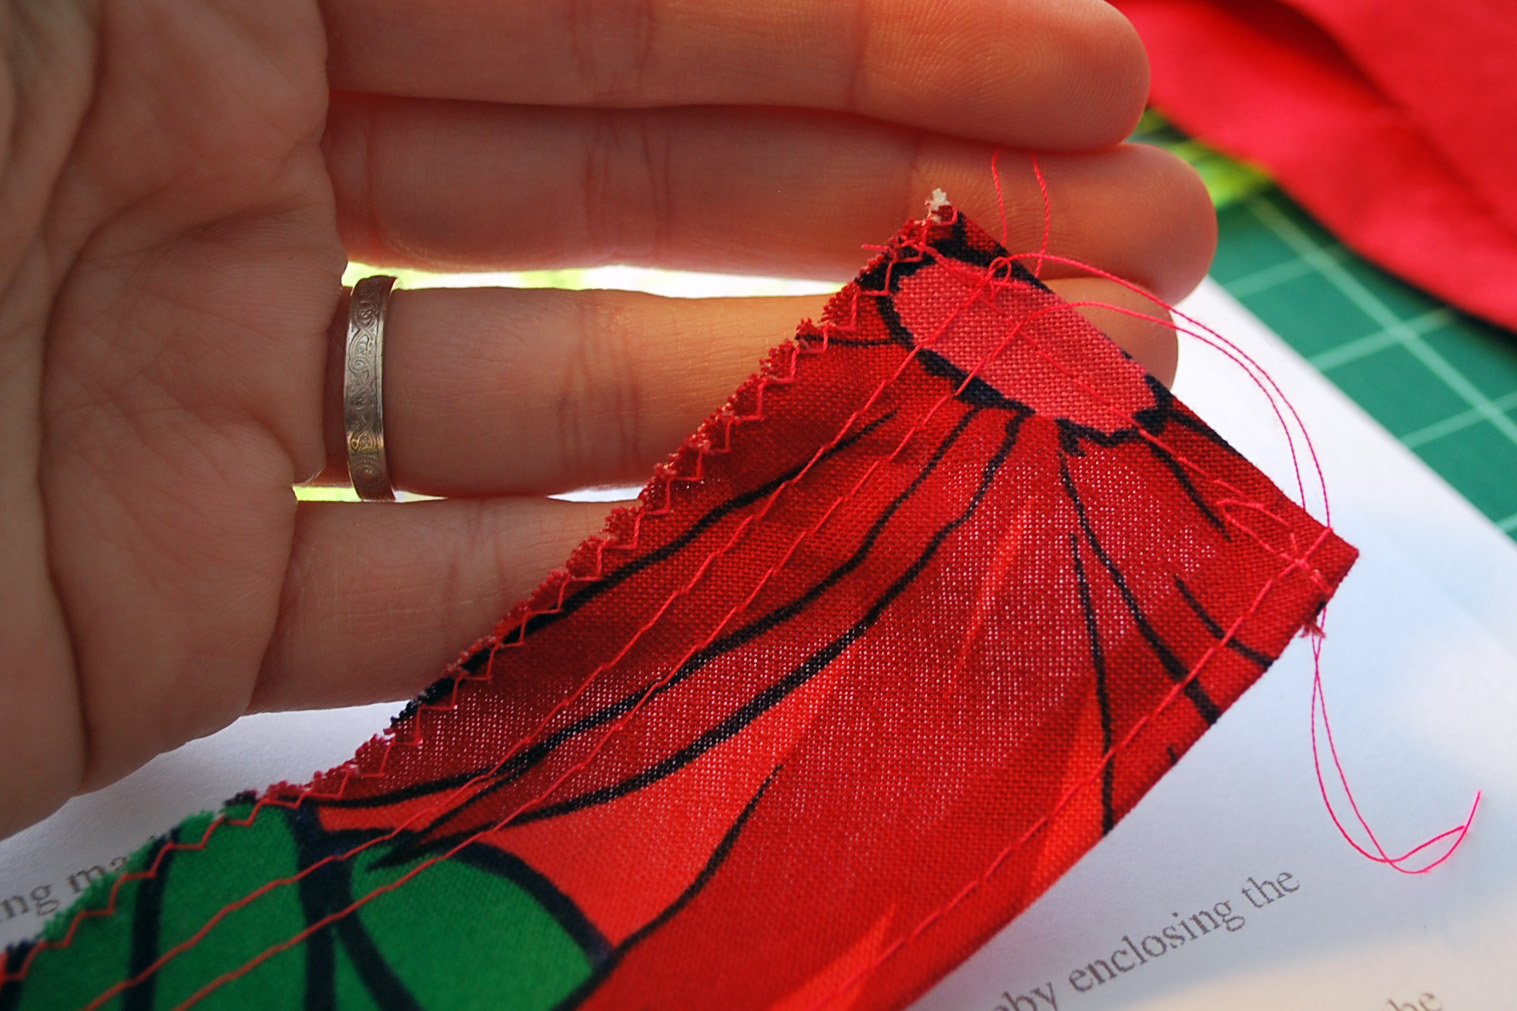 |
| Step 7B, double stitching on the zig-zag edge |
 |
| Step 7B |
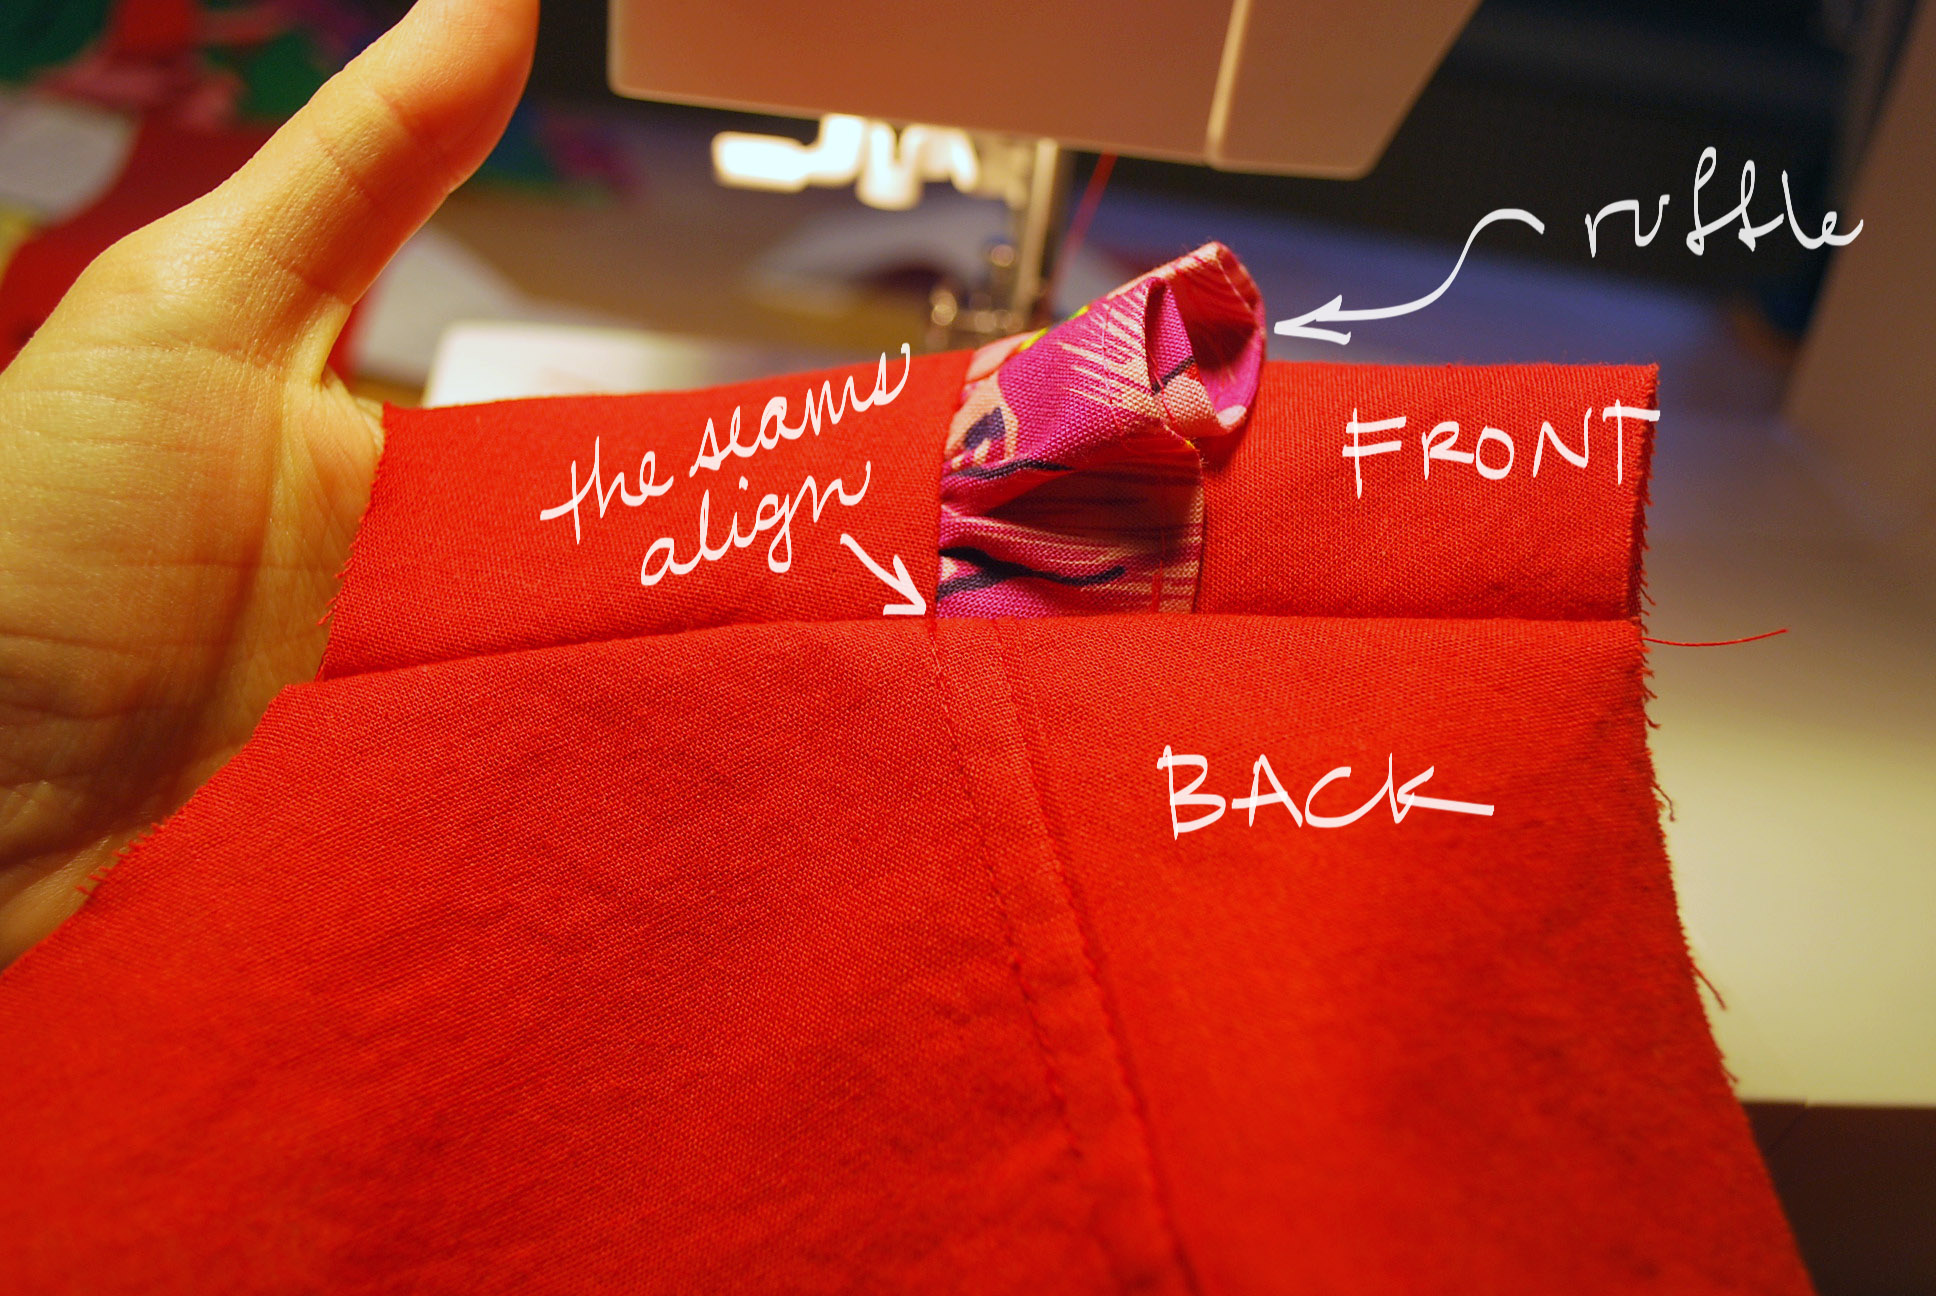
(C) Next, baste the ruffle onto the edge of piece #2 with the RS of the ruffle and the garment facing up, and the edge of the ruffle along the edge of the pattern piece perfectly between the two marks.
 |
| Step 7C |
(D) Sew the princess seams, piece #1 to piece #2 the one that has a ruffle attached to it w/right sides together. This is one seam I didn't flat-fell. Proceed with the next ruffles should you wish to add them. I only did four ruffles instead of the intended six.
Step 8:
Baste the shoulder seams with right sides facing. If you're doing flat-felled seams, try on the garment now to make sure the everything fits properly and your waist/hips/etc will work out... here's where you can make changes should you have to. If you've made changes to the neckline, adjust your collar accordingly. If you've made changes to the shoulder-line or side seams, be sure to finish your edges before proceeding.
 |
| Step 8, sew shoulder seams together |
Leave the lower, longer curve un-sewn. Trim the allowances of the basted edges, clipping/notching where necessary. Prep the corners to be turned inside out. Turn collar inside out, baste the three edges about 1/8" from the edges, and press. Collar still has one open edge... I did this incorrectly and did all four sides. Oops.
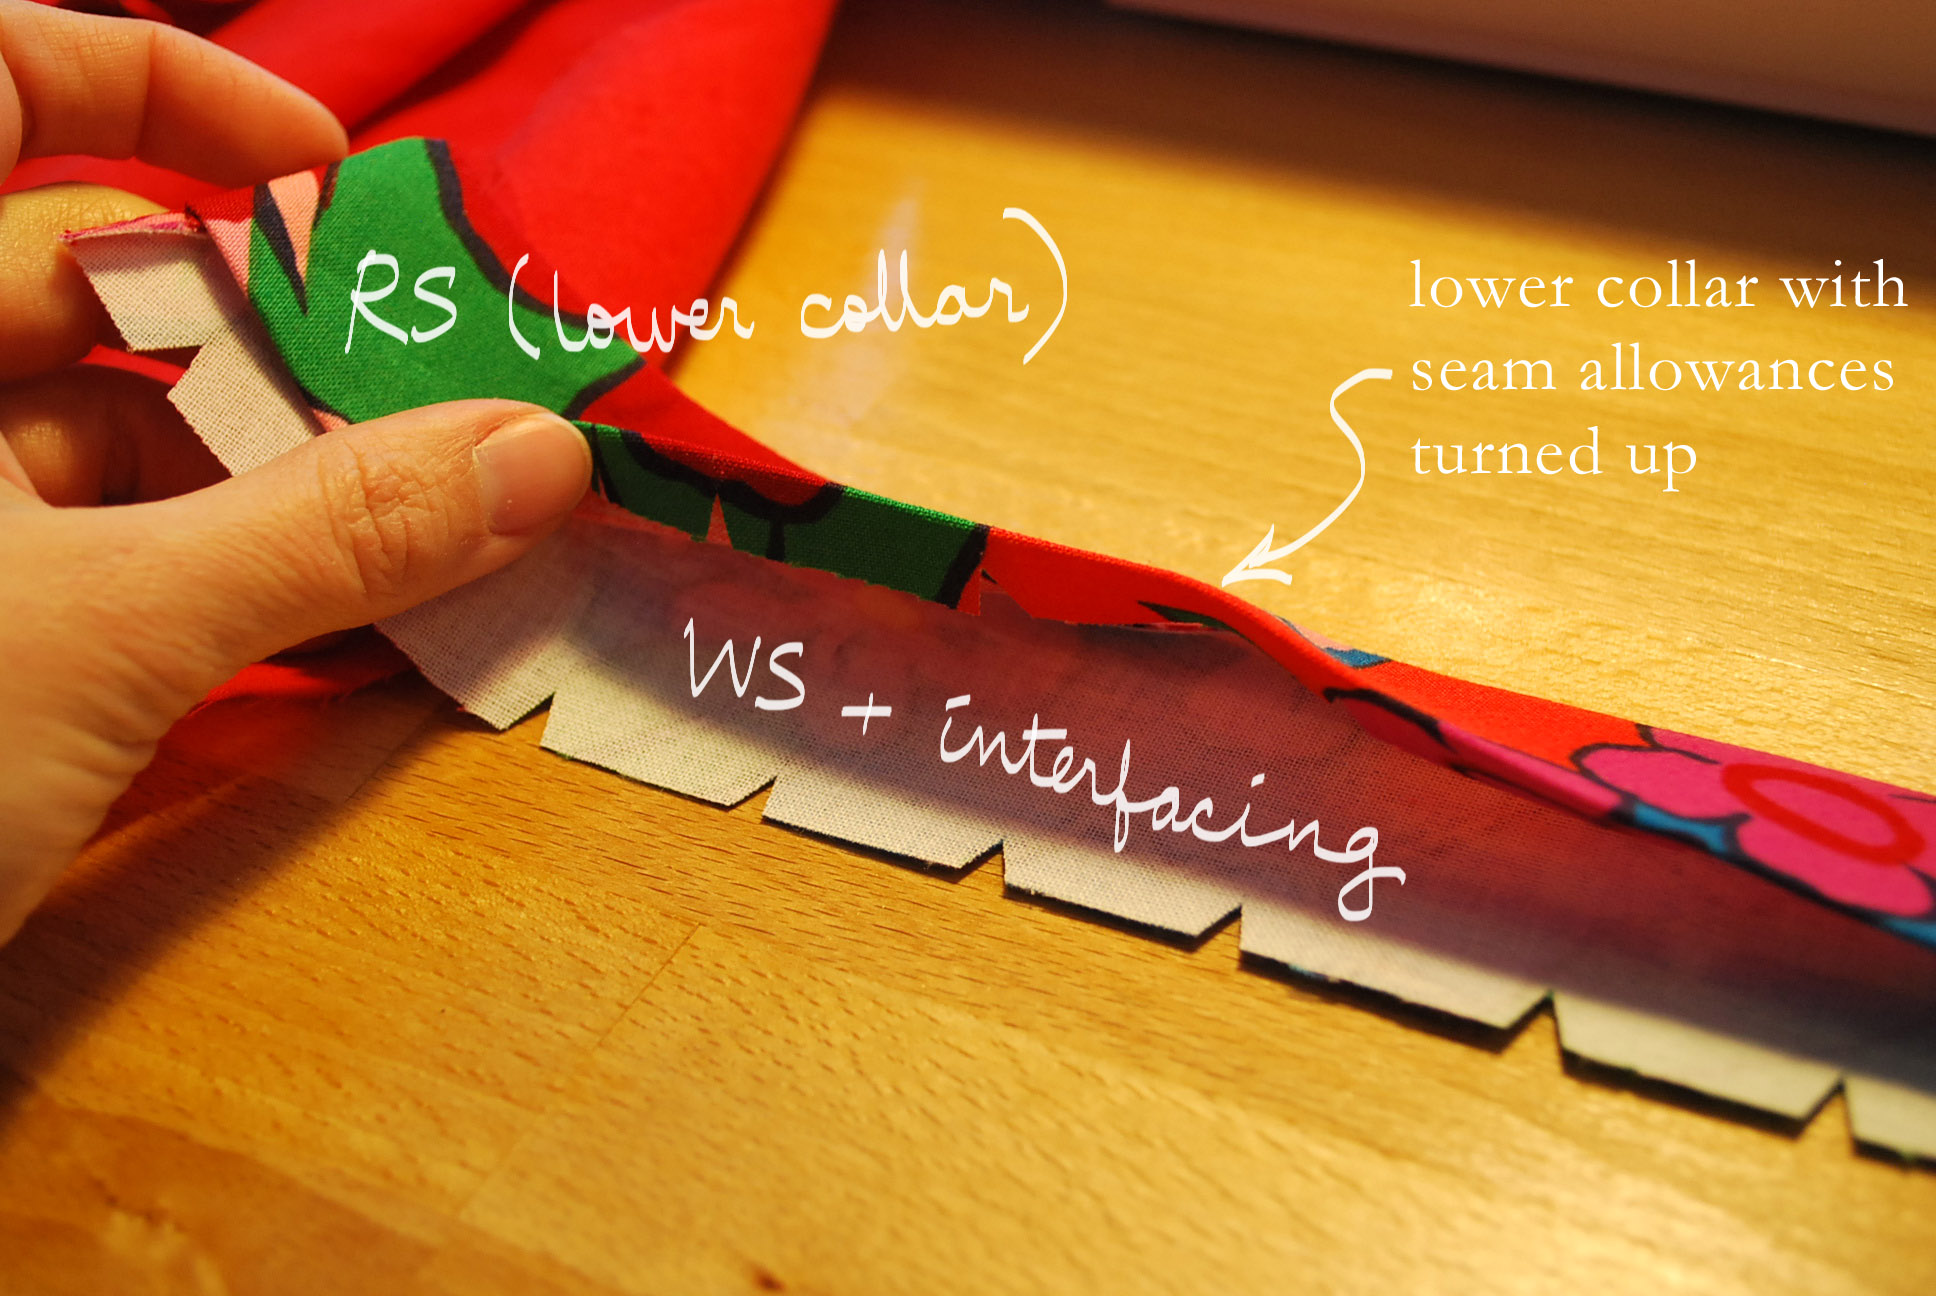 |
| Step 8A, collar turned inside out |
 |
| After Step 8B, collar completed |
Step 9:
I didn't do this step. The belt loops just didn't catch my eye. The instructions here are clear enough, though, should you want to attach belt loops.
Steps 10 through 12 are in the third and final installment of this JJ Blouse Tutorial.
No comments:
Post a Comment