Showing posts with label SewWeekly Challenge. Show all posts

Monday, December 31, 2012

Happy New Year!

Hope everyone is having a very happy new year!

2012 was a really productive year here at Adriprints Press!


In sewing and quilting, I made quite a few items, and met my goals for 2012
2 quilt tops (brown quilt is nearly fully quilted)
3 trousers (2 jeans, 1 clover)
1 fitted jacket
1 wool coat
2 dresses
5 tops (1 hoodie, 1 sleeveless, 1 pullover, 1 buttoned sleeveless, 1 buttoned short sleeved)
1 apron
1 dirndl bodice
1 plaid skirt

In knitting design, I had a good number of items published (self-published or otherwise)
Oslo Star Hat
Alhambra Hat
Stripey Legwarmers
Orange Blossom Camisole
Squishy Mittens
Squishy Chullo Hat
Amaranth Shawl
Amaranth Headband
... and I am waiting for a few more to be published hopefully early this year including: a children's line,
Squishy Vest, and a mystery plaid set.

In hobby knitting, I made quite a few items including a really lovely cabled sweater (Beatnik), an Easter bunny/egg, finally knit Sam's second sock, a few hats, and am working on 2 cardigans.

In crochet, I finished one of the cutest projects ever: the Yellow Submarine Booties, designed by my friend Nuria over at Red Sewing Box.


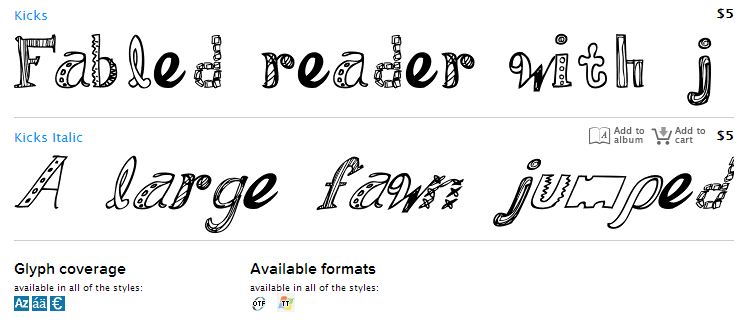
I published 1 font this year, Kicks, and hope to update and create some new ones this year.


And, my 2013 New Years Resolutions...
knitting- publish a few more patterns, learn brioche knitting
crochet - do a bit more of it
sewing- sew a pair of perfectly fitting jeans/trousers, drape 1 dress or outfit
quilting- finish quilting the 2 quilts from last year and make 1 quilt
design - learn more about WordPress to create an online shop

Monday, November 26, 2012

The Edie Coat, Vogue 7239 (1967)

As originally posted in The Sew Weekly for the 1960's Challenge..


The Facts
⁃ Fabric: 3m wool, 2m lining, interfacing
⁃ Pattern: Vogue 7239

⁃ Year: 1967
⁃ Notions: 3 buttons
⁃ Time to complete: several weeks in October
⁃ First worn: end of October
⁃ Wear again?  Since it's been cold, I haven't stopped wearing it!
⁃ Total price: ~30EUR =  7EUR/m for wool (21EUR), $2.50/m China Silk Poly for lining (5 EUR), interfacing, thread, etc...


Pattern Story - I won this pattern from a giveaway on the Seamless Blog, and will give it away once this is published on the Sew Weekly.  Look out for a blog post from me if you're interested in entering the giveaway.

I loved the pattern.  There is one funny bit around the neckline, and the finishing of the neck band, but other from that it was smooth sailing.  I had help from the Threads book on tailoring, and my Claire Schaeffer's fabric guide book.  I was set.  I didn't have to change a thing in the pattern except length of the sleeves and hem.  That was nice!


Here are some of the inner workings...
bound buttonholes

feather stitching, fuchsia lining

groovy pocket fabric

I had a lot of fun working on this coat and once it was finished, I realized this one was a true keeper.  I've been wearing it regularly ever since.  The coat reminds me of Edie Sedgwick for some reason.  Something about my haircut these days, perhaps?


Pupp-o decided to get in on these shots. Hey there, puppy-face!

Friday, November 23, 2012

Iris Pullover


I'm glad to finally be sewing again!  Here's a quick project I made in the in-between times.  Knitwear design is still taking the priority spot on my agenda, but hopefully I'll have some pretty samples to show for it in the near future!

In the meantime, here's the Iris Pullover from Schnittchen® - einfach nähe...
Schnittchen's downloadable patterns are much in the style of Burda and Knipmode in that you print out a large sheet with multiple sizes, and then you mark and trace just your size.  The patterns are unlike Burda/Knipmode in that they actually include seam allowances!  Woot!

For this kind of oversized garment it was nice to have the seam allowances already done... makes for quick, quick, quick sewing when it's just ~1/4" seam allowance (width of a sewing foot) and go go go!  It took me just a few hours to sew, and you don't need an overlocker (though it would make things even faster!) just a straight stitch and a zig-zag stitch.

So here it is!  My Iris Pullover...

This jersey knit fabric was lovely to work with albeit on the thin side.  I am definitely going to make another one when I can get my hands on some sweatshirt fabric at a reasonable price.  Suggestions are welcome for sweatshirt fabric resources in the EU!

The Facts
⁃ Fabric: 1.5m x 1.5m striped knit jersey from TST-Stoffen (at Stoffmarkt Holland fabric market)
⁃ Pattern: Iris Pullover from Schnittchen (has link to photo instructions)
Also, check out some of the free patterns on the site here.
⁃ Year: 2012?
⁃ Notions: none
⁃ Time to complete: 4 hours
⁃ First worn: Nov. 16, 2012
⁃ Wear again?  YES, I love it.  It's really comfy.
⁃ Total price: 5 EUR for the fabric

I love the way this pattern turned out.  I love the over-long sleeves so I can hide my hands inside the cuffs, and the long body so it covers everything.

Possible Mods for next time
It's too bad I didn't have a little more of the fabric, otherwise I'd have made it with the hoodie.  (Instead, with the little extra I had left, I'll be making some undies.)
I think I may also include a thumb gusset so I can stick my thumbs in the cuff and use the cuffs like pseudo-gloves.  Why not?


Overall Review
The Iris Pullover pattern is do-able for beginners with a machine that has a zigzag and a straight stitch.  Only special tool needed was a needle for elastics.  I used a Schmetz Stretch 75/11 needle.
Happy Sewing!

Tuesday, November 6, 2012

Sew Weekly: Apron Challenge!

Just finished the Sew Weekly Apron Challenge this weekend, and I wanted to share my experience with you all because drafting your own apron is pretty easy and satisfying.


Making your own apron for whatever reason - in my case it was to match a dirndl I had made - is really easy.  This type of apron is a simple wrap-around apron with two straps that are long enough to wrap around the waist and tie in front.


You begin with a rectangle of fabric.  I measured mine out so my rectangle was about 8" less than my hips measurement.  The length is purely up to the matching skirt or your preference...

My rectangle was 31" W x 22 1/2" L
30" + 1" of seam allowance = 31" wide
21" + 1/2" seam allowance at the top, 1" seam allowance for a hem = 22 1/2" tall

To finish the edges, turn the edge over by 1/4" - press, then turn them over again, pin (see photo above), and stitch.

I knew that I wanted to gather the apron top to a width of about 12" to 13" so I kept this in mind when I next tackled the apron ties.  For an apron tie to wrap around my waist, and then be able to make a bow at the front, I needed about 115 to 120" of strap length.

My rectangle for the ties was 3" W x approx. 120" L

Because I didn't want a seam to be smack in the middle of the apron, I joined several lengths of fabric that were 3" wide with a flat-felled seam until I had the length I wanted and was sure no seam would land at the center.

Next, turn under the raw edges of the strap fabric 1/4", press, then fold over another 1/4" and stitch those edges down.  Then press the strap in half.

Mark the center of the strap with a pin.  Then mark the wrong side of the fabric 6 1/2" to each side of the center (6 1/2" x 2 = 13" gathering).

To gather the fabric, stitch two lines of super-wide basting stitches to the top of the apron and gather them until they are just inside the marked gathering lines.  I pinned strap + apron fabric right sides together and stitched across the bottom line of basting.  Then, press and turn up the strap, fold it over the remaining raw edge of the gathered apron, and top-stitch to seal the deal.  Make your hem as needed.

If you find that your apron ties are really uneven after tying a bow, add a bit of length to the end of the lacking strap. The last remaining detail is the triangle tips of the apron ties.  You fold the length of the ribbon in half with right sides facing, then sew along the short edge.  Press this little seam open, and when you flip it back out to the right side, let it be a triangle instead of forcing the seam all the way.  Press and stitch across the triangle.

Here's what the whole ensemble looked like when I was done... dirndl bodice, apron, and skirt.

Wednesday, July 25, 2012

Jeans, Jeans, Good for the Heart

I think July might be jeans month for me.  I started on the first pair after the cropped hoodie project (Her Pretty Ways, View A).  I had leftovers from the first trousers I sewed (remember the Clovers I did earlier this year?).

Using Jalie 2908, I made my first pair of jeans, and wow what a learning curve!  It took me nearly two weeks working a few hours a night, studying the instructions, looking at my jeans and that of every person I stood behind or near... I think the part that took me the longest (don't laugh) was the back pocket embroidery.  I was soooo scared it would look awful, that I fretted over it for several days.  It is a combination of hand-embroidery and machine stitching.

Fit-wise, the jeans are really nice around the thighs, but it's a bit tight at the waist.  I definitely "muffin-top" with these pair when I'm sitting.

I learned heaps after making this first pair, and here's a summary of tips and tricks from the first go-around...
  • top stitching can be very tricky over multiple folds of fabric such as near the back yoke and crotch area, be sure to have a guide on your presser foot clearly marked or a guide on the fabric
  • those bar-tacked reinforced areas are there for a reason (my fly began to unravel as soon as the stretch denim felt the pull of my mighty thighs).  I quickly tacked where they said to.
  • make sure the zipper guard covers the whole zipper
  • the stretch needle is a must for stretch denim, otherwise one suffers from skipped stitches
  • be sure to align the buttonhole with the actual button and try them on to check for fit before cutting it open!
  • top-stitch only once to define the curved stitch-lines of the outer fly otherwise it looks funny
  • pay attention to the orientation of the belt loops when attaching the waist yoke.  It is troublesome to undo and redo them.
These are the first pair... They were on the Sew Weekly here.

 The second pair came together much quicker. I went with one size larger with mixed results.  The jeans are comfortable, but maybe a little too big at the waist.  They are definitely wearable and comfy.   Instead of taking me two weeks, it took me only two afternoons (about 8 hours or so).  I wrote about them for Tuesday's "featurette" on Sew Weekly here.

I came up with a few tricks to make this pair look like my favorite pair...
  • double the top thread to get a thicker line of top-stitching (test this first on scraps as it may result in skipped stitches with funky tension, also, sew slowly)
  • use two different color threads - one for top-stitching, and another closer to the denim for construction, and subtler lines like those used to install the belt loops, and the curved stitch-line of the outer fly
  • although instructions say lay the zipper face down with the teeth aligned to center line, I'd actually move those a little left of the center line.  My zipper teeth tend to show a little on the edge since the overlap doesn't quite cover it.
I did some fun modifications using a ribbon on the pocket as a detail, and zig-zag stitching on the belt loops, but other from that I stuck closely to the pattern.  I  think my 3rd pair will be the best!  I'm going to try for a pair of "skinny" jeans that I can easily tuck into boots, or use as pedal pushers, and not suffer the "muffin-top" look.  Wish me luck!


Thursday, June 28, 2012

Her Pretty Ways Cropped Hoodie

Originally posted on The Sew Weekly for the "On Trend: Summer" Challenge here.

I'm not mad; just smirking.
I really, really wanted to participate again in June for the SewWeekly challenges, but my first skirt idea using some stashed wild floral fabric fell flat when I didn't have enough yardage to do what I wanted. Drats. So, then I went rummaging through my patterns, and was reminded of this downloadable freebie from YSR (your style rocks.com) that I had come across a while ago when searching for a hoodie pattern. This pattern happens to be a cropped hoodie. Yes! Cropped is in! Once that decision was made, it all came together. I'd had this pale yellow t-shirt from my grad school days that I tried to tailor, but at that point, I still wasn't confident with knits...

So, I hit the books and researched knits and elastic fabric, and lo-and-behold my "stretch" needle came back out! The stash grey stuff is an interlocked knit (a thin drapey double-knit) and the t-shirt is knit jersey.


The Factoidals

⁃ Fabric: grey interlock knit (Ribas y Casals), and an ol' yellow RISD t-shirt
⁃ Pattern: Our Own Pretty Ways - Style A (free w/registration on YSR)
⁃ Year: contemporary
⁃ Notions: snaps, fusible interfacing, some elastic
⁃ Time to complete: 4 hours
⁃ First worn: this week
⁃ Wear again? Yes!
⁃ Total price: about 8 EUR (for the grey knit)


Modifications to the pattern...

I didn't have a ribbed band for the bottom edge, so I just used t-shirt. I used 2 colors for the hood grey/yellow. I omitted the drawstring - my eyelet/grommet maker was malfunctioning and wrecking the fabric so I passed for now. Instead of hook and eye closures I used snaps. The sleeves were a bit droopy for me, but I'll live with it. I tried applying an elastic band w/contrasting yellow, but it just wasn't working. The shape + fabric just isn't meant to be gathered...at least not yet by me and my handy-dandy skillz. :D

I do feel that knit fabric is way more forgiving than I expected it to be. I'm really pleased with the results!

Wednesday, June 20, 2012

Up-cycled Sorbetto Top

 Originally posted on the Sew Weekly for the Vacation/Summer Holiday Challenge.

Finally, my sewing machine and fabric are out of their boxes!  Here’s my super-satisfying-to-make Sorbetto top.

The Facts
⁃ Fabric: upcycled rayon skirt
⁃ Pattern: Sorbetto (free here!)
⁃ Year: 2006?
⁃ Notions: DIY bias tape made from swiss dot batiste scraps
⁃ Time to complete: 4 hours (the tape making took most of this time)
⁃ First worn: this week
⁃ Wear again? yes, with lots of care (see below)
⁃ Total price: 0!  freeee

This little Sorbetto top came to be after a friend of mine gave me a skirt she had tossed into the wash and came out like this:

Oops.
So, I knew this rayon fabric had an unraveling issue.  I dug into Claire Schaeffer’s book on fabric and learned that rayon does unravel easily. Check.  Rayon likes to be zig-zag or overlocked… this skirt was overlocked so I have my doubts, but I also learned that the stretchy needle I bought was going to be put to good use!

Because I had limited fabric, I removed the front pleat of the pattern.  Other from that, and using bias binding at the hem, I followed the pattern exactly.  I made a size 2 and there’s a lot of room.  The rayon has a bit of elasticity to it as well.  I just felt a bit of pressure when I was making it, that every puncture from the needle would start the unraveling.  So, I’ll wear/wash as gingerly as I can.  Also, swiss dot doesn't make very good bias-tape.  Every "dot" jigs the presser foot so if you do dare to use it as your bias-tape maybe a walking foot is in order to keep it from straying...
I wanted to interject here, that I’ve been away for a bit because I’ve moved countries!  I’m back in Germany after my short stint in the Netherlands.  Oh, Amsterdam, I will miss your fabric markets. :(
Sniffle sniffle.  Seriously, though, my seasonal allergies have really kicked into high-gear.

endless sniffling

All in all, easy peasy top.  And, I do recommend this as a summer project because it’s light, airy, and perfect for your next holiday or wherever you might be setting your next picnic!


Friday, May 18, 2012

The "Go-Go Triangles" Dress

Originally posted on the Sew Weekly for the "mix it up" mixing prints challenge.

Cheers to mixing it up!  A weekend wedding was just the kind of fire I needed under my butt to make this dress I've had in my queue since this time last year.  Although it was freeezing, I stripped off my jacket and ran into the sun so Sam could take photos while the sun was still shining.  Lucky weather for a Dutch spring wedding - we haven't regularly seen the sun in a while!
 
The Facts
⁃ Fabric: 1.5m Batik & .75m quilting cotton, .5m quilting cotton for bodice lining, acetate for skirt front lining
⁃ Pattern: 5/2011 Dress with A-line Skirt
⁃ Year: 2011
⁃ Notions: zipper, some bias fusible interfacing tape
⁃ Time to complete: 3 days
⁃ First worn: 05/12/2012
⁃ Wear again? yes!
⁃ Total price: Not sure, probably around $20.


Price breakdown: The Batik was a gift from my friends (a gift certificate for Quilt et Textilkunst in Munich).  The Timeless Treasures quilting cotton for the sketchy blue parts of the dress were from the Fat Quarter Shop or Hawthorne Threads (~$9/yd). The Amy Butler quilting cotton for the lining has been in my stash for at least 4 years.  The acetate was leftovers from the Plaid Starlet Suit Jacket.


This dress goes down as my fastest dress ever.  I was so happy I put it together so quickly and with as little mishaps as possible.  Everything came from my stash this time and it felt good not to have to run to the store.  It all came together just in time for the wedding - even a day early!  I guess I must have learned something in the last several months after participating in six challenges. The wedding went well (although it was still quite cold for May!) and my dress was comfortable and matched the blue/teal color theme of the day.  Many guests were wearing teal blue it was hard to believe none of us knew what the colors of the decor were going to be... the invite was red and white!

yes! I picked the right colors!!

As for the pattern, I recommend it for those with a little experience and even the adventurous beginner.  I adapted a little bit by changing the zipper to a lapped one, and I added a lining to the front and side triangles.  It really helped with dancing whilst wearing nylons - no cling or bunching while busting a move.  I lowered the neckline slightly - ooh you can't see it because the knitted cowl is covering it...Ah well, the cowl a pattern by Laura Chau called Dipped Infinity Scarf which is super easy and pretty IMO.   Take my word for it that the neckline is a boat-neck and the straps are quite thin but still mostly covered my bra straps.  I modified the back to adapt to my shape before the zipper was installed, and that was it!

Saturday, April 7, 2012

Starlet Suit Jacket: Plaid Wool

Originally posted on the Sew Weekly,  April 5, 2012


The Facts
Fabric: 100% Wool, acetate lining, gabardine leftovers for piping
Pattern: Gertie’s Starlet Suit Jacket from Craftsy
Year: 2012, vintage-inspired
Notions: 4 vintage buttons, hair canvas, interfacing, piping cord
Time to Complete: 3 weeks
First worn: this past weekend
Wear again? Yes!  I lurf it.
Total Price: ~37EUR
Price Breakdown: 17 EUR wool (end of bolt), 7 EUR acetate from the Bombshell Dress, 8 EUR interfacing, scrap cotton used for pocket bags, 2 EUR piping cord, 3 EUR for small amount of hair canvas.

piping and welt pockets

blue acetate lining

One of my sewing resolutions for 2012 was to make a jacket with a lining.  I was really intimidated by the very thought of this last year.  But, I guess I must have gained some confidence somewhere in the in-between because I decided I could tackle matching plaids, DIY piping, an acetate lining, bound buttonholes, and a welt pocket.  Oh, and some hand tailoring too; the upper collar is interfaced out of hair-canvas with pad-stitching. The first step was overcoming the fear of cutting into this fabric.  It was the end remains of a bolt of beautiful wool plaid with a really soft hand.   At the fabric store, I grabbed the bolt and bought it, but I fretted over what to make with it…

Then came Gertie of Blog for Better Sewing fame.  She makes everything look attainable.  Her Starlet Suit Jacket pattern and course came out in February, and that was it.  Starstruck and sold.  I proceeded step by step through the course and completed the jacket in fairly good time for this challenge.  I’m still marveling at how her bound buttonholes came out so smooth!  There’s something so polished about them when they’re done right.  It was my first time making bound buttonholes, and I think I might have overworked the fabric because I can’t steam the wrinkles out. So, now I’m on the hunt for spray starch, and having never owned such a thing, I look at my sewing space in amazement… invisible ink pens, hair canvas, a real iron, and now spray starch!  But, I’m also wearing a dandy new wool jacket with pretty soft blue lining!


collar + my hammy

Friday, March 16, 2012

Swayback Girl Clovers

I'm still waiting for my interfacing to come in the mail to complete my Starlet Suit Jacket... so in the meantime...

As one of the many Sew Weekly Contributors participating in Sew Weekly's "green challenge" week, I sewed a pair of Clover trousers.  I couldn't resist - the name and the challenge were too good together.

Front pocket detail + daffodils!
  • Fabric: 1.5m stretch brown denim (dyed to dark olive) purchased at Stoffen Spektakel in Amsterdam.  I used scrap cotton for the pockets.
  • Pattern: Colette Clover + self-drafted swayback triangle pattern pieces
  • Year: 2011 ⁃ Notions: invisible zipper
  • Time to complete: 2 days ⁃ First worn: Wednesday
  • Wear again? yes! I love them, although the self-drafted pieces together with the darts is a little funky, I love the way these trousers fit. No gaping at the bum.  No unintentional granny-panty flashing.
  • Total price:~23 EUR
  • Price breakdown: 3m @ 7EUR/m = 21 EUR, but I only used 1.5 m for the pants. It's pretty wide fabric. So, I have enough to make another pair! It's likely I'll make a different variation with more jeans-like qualities such as pockets with depth. Dylon dye in olive green was 8.70 EUR, and the zipper I had on hand from ages ago, but it was maybe 2 or 3 EUR.
 
Modifications to Clover pattern from Colette: Extended legs to full inseam length. I used a flat-felled seam throughout. And, by the way, can I tell you that flat felled seams are awesome, but really hard to do on your outer pant leg seams? It took a lot of scrunching and patience to finish them. I also drafted this triangle piece to help with swayback gaping which happens to me all the time. I am a swayback girl. I tried the trousers on after basting the legs together quickly just to test the fit and the waistline. I noticed I was getting the usual "low-rise back" effect and took action! I quickly drafted two triangular pieces in order to raise the back waistline to make sure I wasn't exhibiting my undies on a regular basis when wearing these.

the two triangle pieces
I did an adjusted dart as well. Instead of making the darts perfectly triangular, I extended them straight down and then tapered thanks to a tip from another swayback girl who recently addressed the issue on her blog. Here's the short version:
dart comparison, adriprints 2012

Pattern Crit: I was so happy that my first wearable muslin of Colette's Clover trousers is actually wearable. I made the zipper on the left instead of the right. I think it could use a hook/eye closure to help ease the zipper up. The invisible zipper installation proved to be a challenge, but with my Simplicity Sewing book + the Colette online tutorial + this invisible zipper tutorial from see kate sew, I was finally able to manage it and I only messed up one leg of the zipper just once! Plus, my fabric was really wide, so the pressure was off and there's enough leftover fabric to make another pair, which I definitely will! Also, I'm proud of my funky triangle pattern pieces.

my lady lumps

detail of triangle gusset
 About the dye... I used Dylon Fabric Dye (40C for the washing machine) color #34 Olive Green. My original fabric was a medium brown and with the olive green, they turned out a very deep olive. The dye worked really well and did not leach into the machine or on other items I washed with it right after dying (just to see). I followed the instructions and I'm really happy with the resulting dark green.

the dyed fabric w/ original next to it
 Check out the original post here on Sew Weekly!