Showing posts with label lace. Show all posts

Monday, February 17, 2014

Finished Object: Crystallize Beret

This lovely hat is the second I've made of its kind.  My friend, Amanda, over at Dilettant Knits designed the hat originally for Knitscene.  When the design rights reverted back to her, she updated the pattern adding multiple sizes, and I was able to test knit it for her.  I gave away the first test-knit as a gift, and finally finished this one for me!


Pattern: Crystallize by designer Amanda Bell
Size: small
Yarn: madelinetosh Tosh Merino Light

Friday, November 22, 2013

Finished Object & Giveaway!

I just finished two knitting projects that I'd like to share, and one I'd like to give away.

First, the finished test knit...
I just finished a knitted beret/slouch using a pattern by my friend, Dilettant Knits.
A nice tip when you're blocking a beret.  In order to shape the beret, you can wet block it over a plate balanced on a cup.  The curve of the plate opens up the lace patterning, and the cup allows the ribbed edge of the brim to shrink back so it'll stay on your head.

before blocking, the lace is still a bit contracted
Beret: wet blocking on a plate
Beret: wet blocking on a plate balanced on a cup
The other "knitted" project I finished is this spiral scarf using a novelty yarn product made by Rowan.  Rowan, the maker of KidSilk Haze yarn, also made this limited edition product called Kidsilk Creation. KidSilk Creation is a kind of tubular mesh novelty yarn using KidSilk Haze, but the problem is that it's not a very easy product to work with, and Rowan's team only came up with two projects to make with it... the same spiral scarf in a knit version or crochet version which are practically identical.

In any case, a friend gave me a hank in "smoke" color, and I used it to make this scarf which I now offer to you as a giveaway.  The quality of the yarn is great as it's 70% mohair and 30% silk as per the usual KidSilk Haze yarn, it's soft as a kitten, and light as air.  It would make a lovely holiday gift, and it's warm as can be!
Here are loads of people wearing their lovely scarves.

Shown wrapped once around
Shown folded in half and the ends threaded through
If you would like to win it, just leave a comment below, and confirm your entry using the rafflecopter widget!  This giveaway will close on Wednesday of next week.  Thanks for stopping by!

a Rafflecopter giveaway

Thursday, September 26, 2013

Tyrian Loop, Knitscene Winter 2013

Tyrian Loop is a lace beaded loop that was just published in Knitscene Winter 2013!  I'm really happy to be included in this issue along with two of my super designer friends, Dilettant Knits with her lovely pattern, Black Cherry Pullover and Rock & Purl was the featured designer with several patterns, Stereo Mittens, Hi-Fi Pullover, and Victor Shawl!

Here's my own photo of the loop focusing on texture...


And from the Knitscene site...

copyright Knitscene/Harper Point, 2013

A bit about the Tyrian Loop:
It comes in two sizes 48 (21 1/2)” circumference and 7 (10)” tall; shown in size 48”
Yarn 
Malabrigo Arroyo (100% superwash merino; 335 yd 305 m/100 g): #872 purpuras, 1 skein 
Gauge
21 sts and 38 rows = 4” in Geometric Lace patt 
Tools 
• Size 4 (3.5 mm): 32 (16)” circular (cir) needle 
• Size 10 (0.75 mm) steel crochet hook 
• Marker (m) 
• Tapestry needle 
• 180 (112) 4 to 4.5 mm Rocaille beads with silver centers

This loop (or cowl) has a fun geometric lace pattern, uses an i-cord as a foundation and bind-off, and includes beads that add eye-catching pop.


And, just a bit of pride in my pals' work...

Dilettant Knits, Black Cherry Pullover

copyright Knitscene/Harper Point, 2013


Rock and Purl, Featured Designer in the issue designed a whopping 4 projects for this issue...

Stereo Mittens
copyright Knitscene/Harper Point, 2013
Hi-Fi Pullover
copyright Knitscene/Harper Point, 2013
Victor Shawl
copyright Knitscene/Harper Point, 2013
and Quadraphonic Cardigan
copyright Knitscene/Harper Point, 2013


Monday, August 26, 2013

Columbina Camisole, knitted top pattern

Here's a new pattern out for August, my birthday month!


The Columbina Camisole was named for the delicate two-colored flower, and this simple two-colored camisole with lace edges is perfect for summer picnics. It’s also a nice travel project as it is worked flat from the bottom up. Lace is added from a provisional cast-on down to the bottom edge, and upward from open stitches. The lace edging is easy to memorize and can be blocked as rounded scallops or soft waves.


Skills required to complete the project:

  • provisional cast-on
  • knitting
  • decreasing/increasing
  • picking up stitches


The pattern does contain links to resources on how to do the provisional cast-on among other techniques.  And, if you'd like to know more about it, or purchase the pattern to make it yourself, it's here on Ravelry, and soon to be on Craftsy and Patternfish too.

The main knitting is very machine knit friendly, and lends itself to a very quick machine knit, and then the finishing lace can be completed by hand.

Happy Summer!

Saturday, March 23, 2013

Beads & Quilting

These days, I've been working on a top-secret project for an unnamed magazine.
See the sneak preview below...


The photo shows several different types of beads and how they look on the project's yarn.  Any thoughts?

And, in the quilting world, I've been prepping!


All my quilting blocks from last year's Craftsy Block of the Month Sampler needed some sashing in order to free-motion quilt them.  So, I'm taking that first step and adding 2.5" strips around all the blocks.  I can't wait to start FMQ'ing!  I may start before I finish sashing them all.  I don't think I have that much patience to wait!

And, news on the Knitmaster knitting machine,  I've opened it up to inspect its condition, and there's a lot of dust and cat hair, but as you saw, the machine can still knit.  Plus, the needle retaining bar (aka sponge bar) needs replacing, and once that's done it will be a lot smoother.  So, that's what I'm up to this weekend!  Hope you are all doing well yourselves.  Anyone doing any fun projects this weekend?  I am sorta missing sewing clothing.  Perhaps once the quilt and the deadline projects are done, I'll work on some trousers.

Tuesday, October 9, 2012

Tutorial: Blocking Your Knitted/Crocheted Items

"Blocking" in the fiber arts world, is usually a finishing step. After your garment (or each piece) is knitted or crocheted, block to match the measurements given in your schematics, or you can seam them together and block them as a completed garment.

before blocking
blocked blanket

The first step I take in this process is looking at the yarn band.  I make sure I understand the care instructions for the yarn I'm about to block.  Then, I look at the pattern for any specific blocking instructions (lacy shawls often have areas that are accented in blocking).  If you're worried about your yarn and want to avoid washing the garment, you can spray/mist it with water and proceed with blocking.

The blanket shown above was made by a friend of mine, and she used a washable yarn.  So, I went ahead and soaked before blocking.  Usually it's a 20 minute soak (often longer because I forget about it).  This lets the fibers relax into its new form.  Then, I squeeze out the excess water.  If I'm using strong yarn that can tolerate it, I'd place the gently wrung-out project in a lingerie bag and set it to the lowest spin cycle on my machine with a towel or other things that need wringing out.  If the particular yarn is too fragile for the spin cycle, I use a fluffy towel and lay the piece as flat as possible on the towel, and roll it up.  This makes a towel-garment sandwich "burrito".  I then squish the towel to remove even more excess moisture.  Once you've removed as much water as you can, bring out your blocking surface.

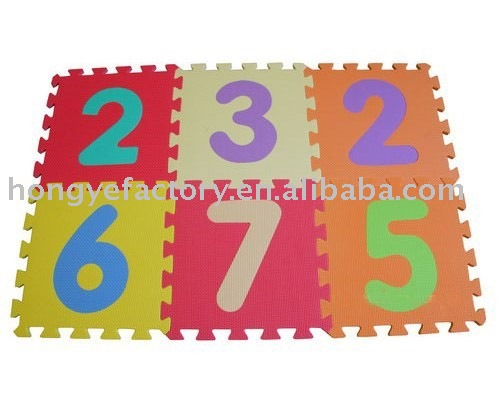
A friend and I went "halfers" on some kid's foam puzzle mat like this, so that's what I use.  Basically you need a stable surface that can take and hold pins in place.  Some folks use a mattress, others just towels.  I place a dry towel on the foam squares and place the item atop the towel.

Next, I assess the best plan of action.  Should I use the stiff wires?  Just T-pins? Flexible wires?  A combo?  The blanket project above was an easy choice - stiff wires for sharp crisp edges...

I take a blocking wire and kind of "sew" it through the edge of the blanket taking evenly spaced chunks and trying not to splice any yarn with the wires.  Sand down the ends of your blocking wire if you continuously get snags.

For hard edges like in this blanket, I used T-pins to secure the intersection between wires.  This makes a nice crisp corner too.

curved edges = flexible blocking wires
For something round like this curved earflap, I use flexible blocking wires and T-pins (Squishy Chullo Hat).


before blocking the "Percy Shawl"
after blocking the "Percy Shawl"
And with this scalloped shawl, you can see the drastic difference before it was blocked and after...  I used a combination of techniques with this one (T-pins and thread).  If I had had blocking wires back then I would have used the stiff ones for the top edge to get a straighter line.  Instead, I used what I had - thread running through the top edge and T-pins to stabilize the thread.  Then, I used a boatload of T-pins for the scallops.

I hope this tutorial gives you a general idea of the many options you have for blocking your hand-made goods.  These techniques can also be used for pre-manufactured wooly goods, too!

There are tons more resources out there and here are a few to help you out whichever way you choose to block your project...

Blocking Resources:
blocking lace on KnittingDaily
using blocking wires from Knit Picks
using flexible blocking wires on Knitter's Review
blocking with pins on the purlbee
making your own wires: DIY blocking wires
blocking without wires on CrochetMe

Tuesday, October 2, 2012

New Knit Pattern: Amaranth Headband

This latest pattern was inspired by a last minute improvised project and quick knit for a Queen’s Day headband (Koninginnedag in the Netherlands). I didn’t have anything orange to wear and so I quickly picked out some orange yarn and knit this up.


The Amaranth Headband, in its published form, is a more refined version that fits most head sizes, and is long enough to be tied at the ends to secure it.


Finished Measurements
(If using requisite yarn and following sample)
Width at center is 3”/ 7.5cm
Length from end to end after blocking is 25” / 63.5cm.
When worn, the headband can stretch an additional 4” / 10cm.

Materials
Rosy Green Wool, Cheeky Merino Joy (100% Organic Superwash Merino), 100g, 350 yd / 320 m
15 to 20g, in color #50 Ruby

Tools
1 pair of size US 4/ 3.5mm knitting needles (or size to obtain gauge)
Tapestry/Darning needle

Skills
• increasing and decreasing
• lace knitting
• chart reading

You can find it on Ravelry here add to cart

or Craftsy here.

The headband was #11 on the "hot right  now" list on Ravelry!!
 

Tuesday, August 28, 2012

Knit: Orange Blossom Camisole

Just published yesterday, my design "Orange Blossom Camisole" is now public.  It was published by the European Fiber Network who is developing a calendar (spelled "KALendar") so people can knit along!  On Ravelry, you can find it here.


This pattern was inspired by the orange blossoms of my hometown, Miami.  I interpreted the blossoms into a lace motif with a nupp at the center.  Dare I say a bobble/nupp tutorial is heading our way?

Tuesday, May 1, 2012

Color Challenge: Orange

Yesterday, April 30th, was Queen's Day here in the Netherlands, and the color of the day was definitely and resoundingly ORANGE resulting in a personal color challenge.

The day before, I skimmed through my closet and found not a single orange thing.  Not one!  I used to have an orange shirt from my University of Miami days (school colors: green and orange), but I guess I deemed the shirt too short and gave it away.  I fell asleep with the thought that I still might find the orange shirt, but I didn't.  So, I found myself on Koninginnedag sans the famous color.

I brainstormed... looked in my fabric stash and yarn stash and found a couple of contenders in the fabric section, but they were either too peachy or not a good solid orange color! The yarn stash fared a bit better.  I found the remnants of a skein of Wollmeise's limited production worsted weight yarn "Molly" in a razzle-dazzle orange.  I found my winner.

Wollmeise's Molly yarn in super-orange
  So, I quickly (2 hours is quick for me!) knit an orange headband.  Using garter stitch for the underside, and a lace pattern I've been playing with for an upcoming shawl as the main motif, out came this wild orange headband!

Orange-Glo Headband for Queen's Day
headband for Queen's Day
I really like the color.  It suited the occasion perfectly.  Happy Queen's Day, everyone!

Wednesday, March 10, 2010

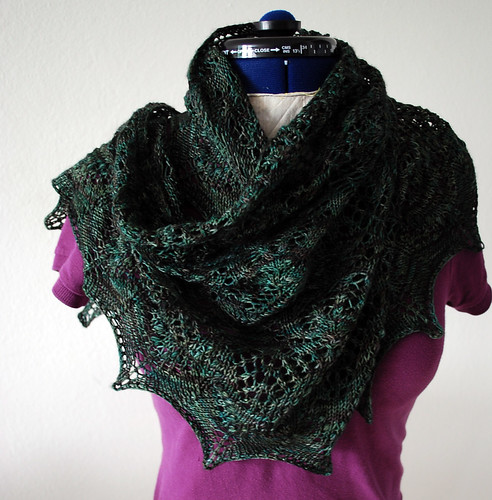
Finished Object: Percy Shawl

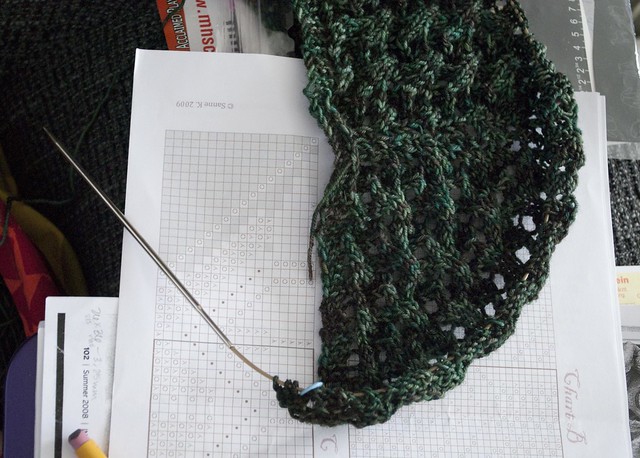
I finally finished the Percy Shawl for my mom last week, and have some photos to share for those who haven't seen it yet on Ravelry.


It was quite a challenge because of the blooms chart (Chart B).  It's the first lace shawl I've knitted that has knitting instructions on both sides- instead of detailed knitting on one side and purling all through the opposite side.  It's what creates that ladder-like lace within the blooms in the center section.  The designer did a great job assembling this pattern.  Thanks for sharing it with us, Sanne Kalkman!