Showing posts with label inspiration. Show all posts

Tuesday, December 5, 2017

My first online class!

About My First Class on Skillshare

My first class is about learning to use Adobe InDesign (which already comes bundled with many Adobe CC accounts) to make beautiful, clean, perfectly aligned contact sheets that are easily edited, updated, and exported to help you sell your work.
I created this course to help de-mystify InDesign. A lot of creatives, artists, and photographers pay for Adobe CC, but are not sure how to take advantage of all the software it brings. So, this is my effort in making Adobe's publishing software work for you. InDesign is a really robust piece of software and the perfect companion for Illustrator and Photoshop when you're looking to put it all together and publish your work.

I created this course to help de-mystify InDesign.
I've used InDesign to produce all kinds of promotional and informational materials throughout the years: business cards, mailers, postcards, booklets, portfolios, and contact sheets.
I focused on contact sheets as a way to explore InDesign and learn concepts that will easily translate to a lot of other projects. If you'd like to learn more, you can check out the class here on Skillshare.
I'd love to hear what you think!! And, if you've never used Skillshare before, here's a link for a  free 2 month trial of their premium membership - the link's limited to the first 10 who use it though, but take advantage while you can!

Advent Calendar Fun!

This is our third Finch & Foxglove collective advent calendar! I wanted to share with you the first of my illustrations which is this friendly penguin. This year I've decided to paint them directly on canvas and then upload them digitally! Here's the first one (above).

Our group calendar can be viewed here on our calendar page: http://www.finchandfoxglove.com/advent-calendar-2017/

Or alternately the beautiful images from my colleagues and I can be seen on our collective's Instagram account here:
https://www.instagram.com/finchandfoxglove/

Wednesday, November 11, 2015

Scrapbooking: Greetings from the Lido Deck!

I am so happy with this one!  I couldn't believe I got it done on time to be considered for the Make Art That Sells weekly review either.  Our things finally arrived from Germany and it meant we were in super-unpack-cardboard-box-processing mode!  But, I was also in a "making mode" as well as "where the heck is my scanner mode"... and so I made and found my scanner at last.

Here is my work resulting from the theme we were given: vintage cruise ship correspondence.  It's a bit of a mash-up but I think between the chosen color palette and my brush pen illustrations which have a late 50's early 60's vibe in them, that it's enough to cover the vintage aspect.   I really wanted a PiƱa colada after drawing this... love those so much.


Monday, May 18, 2015

Make Mine a Mini

My first animated illustration in at least 7 years.


I made the video itself over a few days, but the artwork had already been through a storyboard, script, etc.  Honestly, I had too many ideas and now resort to watching my own video to avoid repeating my own mistakes!  The purpose of the video was to present our favorite lesson learned in the Make Art That Sells course.

Last time I did any sort of real animation was 7+ years ago through elective classes at RISD which I adored.  You can see it here if you're curious (the lady was my puppet).  And, while I'm parading my freak-flag, I might as well share my old animated .gifs which you can see here.  Those were done using Photoshop layers.  I blame my brother for that.  He got me into pixel art (you can see his work here & here -- he mainly works in 3D).  This time, though, after going through all the prep work: writing a script, drawing a storyboard, starting my illustrations, scanning them in, ready to start animating... I froze!  I psyched myself out!

I knew I needed to use something else to help me get the results I wanted because I wasn't going to do traditional animation.  I thought of using either Flash or After Effects, but it seemed like such a huge task.  I chose After Effects and started exploring it through various tutorials trying to chip away at it and taking the skills I needed to get the effect I wanted.

- - - -
Helpful Tutorials:

First, I started with the Adobe.TV tutorials here which are fine (a little dry, but efficient).

Then, I watched this tutorial series from Phil Ebiner on Skillshare called "Complete After Effects Course" to familiarize myself with the skeleton of the software.  These tuts run somewhat long and you can skip the first 15-30 seconds of each.  These could be condensed.  I recommend with reservations - pick and choose what skill you need to know more about.

Next, I watched Jake Bartlett's "Animating With Ease" Skillshare series and this is where the meat is.  He masterfully edits all the episodes into 100% content.  Have a notepad ready.  Have After Effects open in the background or separate screen.  Be ready to go.

For very specific tasks like the walk cycle or lip-syncing, I really like Fraser Davidson's tutorials also on Skillshare.  The "con" to the walk-cycle course is that he uses strokes to make the limbs.  This makes most people's projects from the class look very similar.  I do like his tutorial-style and he does illustrate the concepts clearly so they're still valuable.  Also, he's humorous and his tutorials are fun to watch which is often not the case with tutorials.

Also, I dedicated an entire post to sharing my workflow in detail in case you were interested!

Tuesday, May 12, 2015

Floridiana: Behind the Scenes Part 1

I first signed up for Bonnie Christine's Surface Pattern Design 2.0: Start a Career Skillshare Class in April, but I kept a diary of my process, and thought it would be nice to share with you all, my readers.  This is Part 1 of 2 explaining my process behind the Floridiana surface patterns.

April 10, 2015
My hometown is a place full of contradictions.  I grew up in South Florida mostly in Miami, and being far away from it gives me some perspective on what a beautiful place it can be.  Lush, tropical plants grow everywhere: palms, hibiscuses, bougainvilleas, banyan trees, vines, orchids, and old oaks with Spanish moss hanging from them.  Wild parrots, ibises, and all kinds of birds made it their home along with the tiny, adorable key deer. It's not completely unheard of to find a gator in your yard, and/or see celebrities with their tiny dogs in their handbags.  Summer in Miami usually meant a long stay at the beach with your family... sardines on crackers, collecting seashells, water out of the cooler, running to the shade to avoid burning your feet, and do NOT feed the seagulls...
I'll see what kind of journey this reminiscing takes me...

April 15, 2015
First, a snapshot of our family.


All of these photos are from my family's albums.  Unfortunately, my grandma is not in any of these since she was usually behind the camera.   See what I mean about the palm trees?  Our backyard faced a canal that frequently had gators floating by.  We always had family over the house, and there was never a dull moment growing up.
If anyone else is working with family photos, isn't it hard to stop looking through all the photos?  I had to stop myself before I got too emotional.  I just wanna reminisce!  I miss my grandparents very much (they've all passed).   But, after mulling it over, I think I know what I'm going to draw now.

But first, an exploration in color.  My 2 (preliminary) palettes with colors directly from my family photos...
I've divided my colors between past and present which, in turn, created a warm and cool palette.  Handy!


Next, it's sketch time!

April 25, 2015
So I've been researching local Florida wildlife, flora, and fauna and started to sketch!  


I think I'm going to need to make a moodboard to help guide the style before I go digital.


April 29, 2015
I most definitely needed a style guide!  So I made one using my favorite print heroes.


April 30, 2015
And then I digitized and refined a lot of icons including lettering...


May 1, 2015
Working on the "hero" or main pattern, I chose to work with the ibis (instead of the key deer).  I may still do a repeat with the deer, though, since it's so cute.  But, here's what I did so far with the main one.  It really helped to have my style guides to help me figure out how I should lay out the ibis.


Wednesday, February 11, 2015

MATS Mantra Competition

This piece was a competition piece for MATS (make art that sells) mantra.  The goal was to encompass the feeling you get when you're taking a MATS course.  And, although I didn't win the big prize, I was able to use Illustrator in a new way for me.

See, I've been trying to nail down my style, and I absolutely love working digitally, but it lacks the grittiness and texture of my hand-illustrated and painted work.  So I've been trying to merge the two elements somehow (flat color + texture).

Here is what I came up with:


And this is how I got there:

I started out with pencil and ink sketches.  I had about 30 different thumbnails, and picked the heart-sun one because it was the most visually engaging.  

I refined the image, traced it into Illustrator, and using a light-table I used overlays to play around with text.

Here is the image before I added text, texture, gradients, etc.

I almost stopped there... but it needed texture!!  You can see the hand-written text below.  I had several versions of each snippet of text.  Lots of versions of everything!


And finally, I went in and "texturized" the background.  It was a weird feeling to paint the background with texture and grit, but I think it works for this piece.  And, even though I didn't win the big prize, I did win a free entry into MATS Global Talent Search!  Woot!!


Friday, May 9, 2014

3 Hours Past's Blank Canvas Tee: Maternity Hack

During Me-Made-May 2014 I'd like to share some of the me-mades I've made in more detail.  In order to see if I could replicate a maternity/breastfeeding top that I love, I tried my hand at drafting and here are the results!


If you're just starting out sewing with knits, a great place to start is a simple dolman sleeved t-shirt like the Blank Canvas Tee from 3 Hours Past the Edge of the World's Blog.  If you're past that, are ready to try some drafting, and would like to make yourself a breastfeeding or maternity top, then this is the mod for you!

Start with the Blank Canvas Tee from 3 Hours Past...

Added Materials

  • additional fabric because the length of the T-shirt is extended.
  • 1 piece of elastic - soft baby elastic or elastic about 1/4" wide that suits your fancy in the width of your t-shirt + 2" or so.

Extra Skills

  • sewing with elastic

Special Tools

  • twin needle
  • stretch needle 75/11  (a whaah?  Here's a needle guide from Schmetz)
  • pencil and ruler
  • maybe tracing paper if you don't want to write on your pattern
Inspiration: From boob design, this short sleeve maternity/nursing top is one of my faves.  It fits really well and the split top allows for belly room.


Okay.  Ready to make your own?
First print and assemble your pattern pieces from 3 Hours Past... Then, here's our goal: we want to create two pieces for the front that overlap by around 5" / 13cm for the smaller sizes.  You'll likely need a bit more overlap for the larger sizes or if you usually find yourself doing large bust adjustments.

The goals.
Measure from just below the armpit curve to your goal overlap length, then add 1" / 2.5 cm so you have enough to turn up a hem.  Trace what you have onto your fabric, or onto tracing paper to make pattern pieces.  I've highlighted what I did to the pattern in the photo below.


See the red highlight?  That's the top front piece.  The blue highlight shows where the the bottom front piece would be.  For the bottom, I took the design line straight up and did not taper in like the pattern - it's housing a big belly at the moment, and I thought it would be advantageous to have a little leeway.

The other change I made here was adding length.  Add what you will.  My goal was to have a t-shirt around 28" so I added a few inches to the bottom of both the back and front bottom pieces to achieve that.  I just followed the design lines to my goal length. To calculate length, I measured from the peak of the shoulder, parallel to the fold line.

Alright, you've traced and cut your 3 pattern pieces.  Do you have your edging pieces (no change from pattern) cut, too?  And those two strips of interfacing for the shoulders?  What interfacing? I used Vlieseline G785 since it's stretchy, lightweight, and works with knits. Everything cut? Great! Let's get these pieces ready to put together.

Assembly:

  1. Step 2 from pattern: Iron on interfacing to WS of back piece shoulder edges
  2. Front top piece - finish bottom edge with zig zag stitch or serge, turn up and twin needle the hem from the right side
  3. Front bottom piece - add elastic to top RS edge using a triple zig-zag stitch.  How?  I simultaneously slightly stretch the elastic while guiding the main fabric under the presser foot.  I do not stretch the main fabric.  Right hand for elastic, left hand for guiding fabric.  I do this 2" at a time so I don't lose my nerve.  Then, I fold over the elastic so I only see the final fabric, and straight stitch the bottom edge of the elastic.
  4. Overlap the two front pieces- With RS facing you, make sure the front top is on top, and the front bottom is behind it.  Make sure the overlap is what you desire and pin.  Stay stitch within the seam allowances (so ~1/8" from the edge) to secure the overlap.
  5. Step 3 to 9 are the same as the original pattern.
And there you have it!  You've made a maternity/breastfeeding t-shirt!  Feel free to change the neckline and make it a scoop neck like in the inspiration photo.  I like crew necks so I kept the pattern as is.  But, I think I'm going to try and make a tank or sleeveless v-neck.  We shall see!

Wednesday, January 1, 2014

2013, A Year in Review

This past year's work collage:


So, what *did* I do last year?  And, did I meet my resolutions from 2013? Let me revisit my resolutions, and let's see how faithful I was to them...
"And, my 2013 New Years Resolutions...knitting- publish a few more patterns, learn brioche knitting. Crochet - do a bit more of it. Sewing- sew a pair of perfectly fitting jeans/trousers, drape 1 dress or outfit. Quilting- finish quilting the 2 quilts from last year and make 1 quilt. Design - learn more about WordPress to create an online shop"
Knitting - I definitely published more patterns than I was expecting: Lustig Hat and Gloves, Squishy Cabled Vest, Easy Lace Loop/Cowl, Rosita Hat and Mittens, Bow Slouch, Columbina Camisole, Tyrian Loop, and Laren Fingerless Mitts... phew!  And, two projects still aren't published... more about that in the near future.

Rosita Hat & Mittens, photo copyright Knitscene/ Harper Point
Brioche knitting - I signed up for a class, and started learning, but then forgot to finish the online course!  Oops.  Let's give that one a try again this year.

Crochet - I used it more frequently this year, and I made a few amigurumi gifts and used crochet as a border in some of my own projects.


Sewing - I did manage to create a pair of jeans that fit me really, really well!  BUT... then I grew out of them, and more on that in the near future.  I loved participating in Me Made May, and hope to do it again next year if possible.
((Confession.)) I still haven't draped anything!! I failed here.  I did start drafting skirt and bodice slopers, but definitely no draping!  ((Ugh.  Guilty feelings here.))

Quilting - I did way more quilting than I thought I could!  I learned to free-motion quilt and I finished a bed-sized brown quilt, a mini lap version,  the blue sampler quilt, a baby quilt, and a double-wedding ring quilt for a friend.


Design-  I finally got my portfolio site transferred to WordPress, but I still haven't created an online shop.  Anyone have advice on easy PDF distribution systems with templates on WP?  Also, I redesigned my crochet font StitchinCrochet(PRO), and released it!


2014...  Truth be told, I don't know what resolutions I should make.  I am anticipating some big changes in my life, and the only things I can hold onto at the moment seem very vague...

1) make some art:  get back into pen and ink, finish digital illustration commissions
2) make some things with yarn: finish hand-knit projects, use machine to stash bust
3) make some things with fabric: continue on the quilting and sewing goodness track
4) blog more efficiently and step away from the internet traps (facebook and cheesy news sites)

Happy New Year!
Cheers to the new year!

Thursday, August 15, 2013

New Colors!

For about the last 15 years or so, I've had the same travel watercolor set.  I had taken it with me on trips here and there and all over.  Then, without even noticing, it was gone!  I looked for it to take with me on the last couple of trips, and thought it was just misplaced.  But, after a pretty comprehensive search through the earlier part of this week, and no gold, well, I gave up the old set for lost.

I was bummed.  Really bummed.

Then, I went to the art store with a friend and she went to another part of the store while I asked a shop employee for recommendations on a suitable replacement.  The set nearest to the one I lost was a bit too compact and had a water reservoir attached to it which was cool, but it was so limited in pigment pan space, that it just wasn't right.  She then showed me the set she has herself.  It's a set with 12 pans, but with space for 24 and fits a brush of regular size, too!  I was sold.  I bought two additional pans from their Horadam line - Manganese violet and a Dark red.

I don't know about you, but when I was a kid and received a new box of crayons, I tested out each color... So that's what I did here.


Yay! New watercolor set!  

Schmencke Set 75412 AKADEMIE® Aquarell, Solid metal box
with 12 half pans and space for 12 additional half pans
And, in 15 years, watercolor pans have changed a lot!  These pans are so much smoother and less grainy than before.  The pigment cakes dry way faster, too, and the colors flow much more like ink.  I'm kind of glad the old set retired itself.  Otherwise, I might never have known!


Thursday, July 11, 2013

Random Rainbow

I woke up to my laundry line in the light, and I realized I had hung the clothes in a kind of rainbow color-order!

You never know where you'll find a rainbow...


Have a great week, everyone!  I'm trying to keep my head above water with the work on my plate, but hopefully soon I'll be able to share some new projects with you all.

Friday, June 14, 2013

Strawberry Picking!!


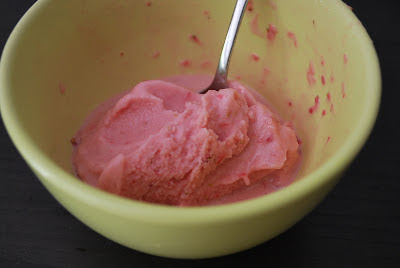
strawberry ice-cream! my favorite summer treat!

olive oil cake w/lemon and icing, perfect w/strawberries!

Does this mean summer is really here?


freaky strawberry
I hope so!  I went strawberry picking today since the fields opened earlier in the week.  I think it's true...perhaps summer really is here.  The strawberries say so, and I'd like to believe them.

I love eating fresh strawberries and making ice-cream with them.


Strawberry Ice-cream Recipe (adapted from the Ben & Jerry's Ice Cream & Dessert Book):
1 pint fresh strawberries (sliced, hulled)
1 tbsp lemon juice
1/3 C sugar

--- sweet cream base #1 (no eggs)
2 C whipping cream (I use soy cream)
3/4 C sugar
2/3 C half & half (I use soy milk)

Mash the strawberries, lemon juice, 1/3 C sugar, refrigerate, cover for 1 hr.
Then mix with sweet cream base until blended/pureed. Pour into ice-cream maker.  Let ice-cream maker do it's thing.  Enjoy!

As an alternative to the egg-less sweet cream base, you can also use this one with eggs:
--- sweet cream base #2 (with eggs)
2 eggs
3/4 C sugar
2 C heavy or whipping cream (I use soy cream)
1 C milk (I use soy milk)
prep this sweet cream base by beating the eggs until fluffy, slowly adding sugar, then the cream and milk.  You can cook this base at 160° F (71° C) stirring constantly if you want to prevent any chance of salmonella.  Let it cool completely in the fridge before adding the other ingredients and putting it into the ice-cream maker.


What do you like to make with fresh strawberries?

Monday, September 3, 2012

Good Morning, Gladiola!

I awoke today to find that my slightly beat-up balcony garden had presented me with yet another unexpected gift!  Here's what the gladiolas have to offer.  I'm not sure if this is the pink or purple corm, but I was so pleased to have these blooms in my life.  I am in looove with their color.  What would you call this color?

gladiolas grace the garden


Sunday, April 29, 2012

Quick Pick, Quick Pic

Quick photo of my recent hair donation and my new haircut.  Since I grew out my hair in memory of my grandmothers, I wanted my hair to go to adult women with cancer-related hair loss.  I started growing out my hair when my Abuelita died in October of 2010.  I'm so happy I could do something in her name that will benefit others.

Me + my hair ready to donate

I'll be sending along my chunk-o-hair to Beautiful Lengths which makes free wigs for women with cancer. 

And, both my grandmothers were the ones that inspired me to sew, crochet, and craft,  so without further ado, let's spread the love of all things crafts!

The winner of the crochet book was comment #7 from AA.  AA, if you're reading this blog entry, contact me with your mailing address at adriprints (at) yahoo (dot) com!  Congratulations, AA, and thank you to all who entered!


Thursday, March 22, 2012

Pretty Pretty Prince Charming

I ordered some goodies when my dear was in the U.S. so that we could cut the cost of shipping for our families.  He brought them back and it was so much fun unwrapping all the items!  My favorite is the fabric bundle from Free Spirit designer Tula Pink, a line of fabric called "Prince Charming" that includes some really beautiful illustrations and pattern repeats.

Check 'em out!

fat quarter bundle, marking tools, and new seam ripper!

such beautiful pattern design!!

And in Starlet Suit Jacket news, I've practically finished the body!  I just need to attach the sleeves.  For today's post, I wanted to feature some of the hand-tailoring from the course.  I decided to go with hand-tailoring for the collar and was pleased with the results.  My collar stands up all on it's own after the pad-stitching with just thread and hair canvas, and that was even before steaming it!

pattern pieces in wool and in hair canvas
collar before steaming

there's pad-stitching!

little hammie wearing my collar
Happy Crafting!

Friday, December 23, 2011

Thank you, Munich!

Getting ready to move is such a grueling process.  For some, this may be an exhilarating use of their organizational and leadership skills, but for me, it's just torture.  Living amongst the chaos of half-filled boxes, partially disassembled furniture, random paper, and all that snow falling outside; it just stresses me out.  Once things are finally in the boxes, and once they're in the truck and out of the apartment I can finally breathe a half-sigh of relief.

Even when all the boxes are packed, there's the emotional toll of leaving.  Moving long-distance is painful!  And, I'm not very good at saying goodbye to people, but really, who is?  I cope by saying "see you soon" or "see you next time" because "good-bye" just seems too final. This past week I've been giving my farewell "see you soon" speeches at every turn.  The last concert, the last Sunday knitting, the last MuKnitter's meet-up, etc. etc.  Each time, I'm reminded of the wonderful people I've met and the many memories we've shared during my 3+ years here in Munich.

If I didn't get the chance to tell you in person, I just wanted to say "Thank You".  Thanks for making the past couple of years so much fun.  Thanks for taking me to all your favorite places and showing me around.  Thanks for pushing me to try new things, challenging me to be the best me, and showing me how to do my best knitting tricks to date. Thank you for teaching me to speak German, and for accepting me into your groups. I'll miss you all dearly, and I'll see you all again soon.

Much Love,


Adri

Thank you for all the mementos!

Thursday, December 22, 2011

Bombshell Dress: Part 1

With a lot of help from Gertie's Craftsy Course: Sew Retro Bombshell Dress, I finished this big sewing project.  And, because it took a lot of hand-work, hand-sewing, and thoughtfulness, I thought I might walk you through the whole process.  In a following post or two, I'll show you the final dress. ((tee hee anticipation))

cutting out the paper pattern
In the beginning there were the muslins (also known as toiles, dummies, mock-ups, calicos, etc.).  A few of them.  These were to make sure the final dress would fit me since we knew the original pattern was a bit too small in some areas.  Thanks for the larger bust modification chapter, Gertie!


muslin #2, see the cups?  they are a little too pointy in this version
uh-oh! see that gathering... I had to adjust for a swayback


Muslins take a bit of work because you're sewing the actual pattern pieces together, then wearing them, adjusting via markers, pins, mirror, etc.  And all except the last of them ended up in the scrap bin.  But, when the muslin finally did fit my particular body specialties, I transfered the seam-lines onto fresh muslin and paper (for prosperity and reuse) and cut into the fashion fabric ((scary!)).  Spoiler Alert... It all worked out!  Yay for little victories!

the pattern pieces, thread traced (c) adriprints
Once I cut into the dress fabric, I had already sewn the main pieces about four times.  So, this part went quickly.  Then batting (or foam or whatever you choose) is added to the bodice cups for stability.  This part was a lot of fun.  I loved sewing the cup pieces together and then adding them into the bodice.  You think you're halfway through here, but you're not.  You still have to build the inner lining and the skirt, remember?

the cups are stable!  oh, and learn from me... leave more seam allowances.
After the cups are in, you add the skirt to the bodice, and insert the zipper.  I had to re-do the waistline and revert to the original waistline.  I am high-waisted!  Then, I made the inner lining which holds the boning for more structure.  I thought I would have to wear a bra with this one, but not so; it's so secure it's not necessary!

the inner lining with the casings for the boning
After this, it's just a matter of hand-sewing that inner lining to the bodice and making sure everything's in place!  Photos of the final dress can be found here.