Showing posts with label sewing. Show all posts

Tuesday, December 19, 2017

Giveaway Days!

If you are on social media, follow along with me this week and win some handmade goodies!

I'm @adriprints on Instagram and you can also find my work on Facebook.

Tuesday, May 10, 2016

Pre-Surtex Sneak Peek

May Flowers bring Spring... 
& Surtex!
I cannot believe it's May and time for Surtex!!
It's heeere!!
I've been prepping all year long for this surface design and textiles industry trade show, and it feels a little unreal that it's only a few days away. 
May flowers are an appropriate metaphor I think. I've been planting seeds since last year, and now is when they are starting to bloom...

My seeds (preparations) included creating over 180 images, making booth banners, promo bookmarks, promo books, fabric swatches, greeting cards, brochures, and sewing some hand-printed zip pouches! My fellow members of Finch & Foxglove, my art collective, have also been prepping their hearts out in order to make our collective's Surtex debut a success!


Prep Talk: Little Cards,
Big Thanks!

One of the things I love doing is making things with special touches -- a handmade embellishment, a touch of real texture, a tiny print, or very intricate background. In preparation for Surtex, I created teensy tiny cards that I printed, scored, and cut myself in order to give thanks to visitors, art directors, or art buyers who stop by our Finch & Foxglove booth. I also sewed some zipper pouches that are fully lined inside! The outside fabric is my own work, and it's so nice to see it on an actual product!
This is a general overview of the items I'll be bringing with me to exhibit at my debut Surtex, and I will be doing a post-Surtex review once all is said and done. I'm excited to figure out what works (as well as what doesn't)!

Wish me luck!!

And, if you're going to be at Surtex in NYC this Sunday to Tuesday, you can find me and my work at Finch & Foxglove's booth #543.  Can't wait to meet you! 

Wishing you a wonderful week!

P.S. Let me know ahead of time if you'd like to meet up with me so I can be sure to be at the booth - we're taking shifts since we're 8 artists in a 10x20' booth.

Tuesday, July 7, 2015

Super Simple Patchwork Quilt WIP

How do I deal with the stress of moving internationally?  I multitask like crazy, make lists, post stuff for sale... and do a simple patchwork quilt to deal with the need to do machine-like sewing and stash-busting.

Saturday...

4.5" scrap squares that have been hanging around for a while

later that day...

sewn into strips

and today!
nearly done with the quilted top

I still have five more rows to add, then sashing, then quilting!
Lots of progress!  Hurrah for the feeling of pseudo-accomplishment!

Sunday, May 17, 2015

Toddler Streaky Legs & Moneta

That felt really weird typing the title to this blog post, but yes, admittedly my son is now a toddler and most definitely not a squishy baby anymore!  I finally finished one of his "Streaky Legs" poofy pants this weekend!

The Facts
⁃ Fabric: <1m single jersey, <0.3m ribbing for cuffs
⁃ Pattern: Ottobre "Streaky Legs" pattern
⁃ Year: 2014?
⁃ Notions: waistband elastic
⁃ Time to complete: 1 day for tracing and cutting, an hour for sewing
⁃ First worn: May 16, 2015
⁃ Wear again?  He has no choice! hahah!
⁃ Mods? Nope, they fit great on him.

and I finished Moneta from Colette Patterns for me!


The Facts
⁃ Fabric: 3m soft interlock, maybe french terry in turquoise
⁃ Pattern: Colette Pattern 1028 Moneta
⁃ Year: 2014
⁃ Notions: Framilon clear elastic
⁃ Time to complete: 1 day for tracing and cutting, 1 day for sewing
⁃ First worn: May 17, 2015
⁃ Wear again?  YES!
⁃ Mods? Yes, I would like to make the shoulders wider so it doesn't fall off my shoulders... or expose my bra straps to everyone.

Monday, May 4, 2015

On the Sewing Table and Post-Pregnancy Body Reckoning

Do not fear, my fellow sewing enthusiasts, my sewing table has not gone unemployed these last few months; not entirely unemployed at least.  I signed up for Kid's Clothing Week which was two weeks ago and also Me-Made May as inspiration to get my sewing-mojo back and... wait, let me backtrack here... What happened to my sewing mojo? SEWING mojo, where are you?!  I don't yet have an answer for that.

I have been tracing patterns and cutting fabric, but haven't really finished anything!  I start a project, and then migrate back into illustration and leave these projects all folded in their little plastic tubs for days, and then weeks, and now months.  (sigh)

I have taken the first step, though, toward welcoming new projects and completing them.  I went through my closet and started the daunting, and somewhat sad task of separating clothes that will never fit me ever again. And, this (really sadly) included a lot of my homemade clothing.  It was pretty depressing to see the Bombshell Dress in the pile of clothes going to charity alongside all of my homemade jeans and trousers, and several dresses.  You see, my 3 main measurements (bust, waist, hips) are no longer the same as before pregnancy (no surprise to many of you), but I was totally in denial.  I thought that things would at least get pretty close to what they were, but there's no way that my waist or hips are gonna shrink in that way ever again, and it's been almost a year since the little guy was born.  So, it's time.

Oh, I want to tell you it's been so positive for me, and that I can easily see the silver lining -- that it's a way to start fresh and make space for projects and clothes I love -- but it's been hard.  It's been really hard actually, and if you follow my blog, you know that I'm a pretty positive person.  And well, my self-esteem has taken a pretty big hit.  I finally broke down this past week and bought new bras.  Not a single one of my old bras fit anymore, and it was a big first step toward acceptance of the new me.  Okay, I do have a silver lining, and it's that I'm now a pretty standard bra size which means I can find them in my size in pretty much any brand!  Yippee!

And, here's where I end my own pity party... right here! Done!

So, what am I working on?


Pattern: Streaky Legs, Ottobre 1/2015
Fabric: in sweatshirt, single jersey, and microfleece


Pattern: Moneta, Colette Pattern 1028
Fabric: Dark Turquoise knit


Pattern: ??
Fabric: all kinds of quilting cotton already cut into squares

Remember these?  These were the remnants of the zig-zag quilt I made almost exactly a year ago!  I cut waaay too many squares thinking I was doing a rainbow HST quilt, but instead went with a zig-zag.  I have no idea what to do with them.  I've got colors ranging from brown/tan to bright yellow-green.  Do you have any favorite quilt patterns to suggest?  Let me know. :)

Saturday, May 2, 2015

Funky Fresh Hat

My son finally fits into the hat I made him last year!

Remember the yellow and blue reversible hat (letter E in the photo)?
It was from the Hat Shop book, and was a great way to use up scraps.


It took nearly a year after his birth, but it finally fits...


We certainly make a funky fresh duo!

Friday, March 6, 2015

Sewing Knits: Vogue V9056

I always knew the three-quarter view was the most flattering!  Hah!

deep INHALE!
This was my first knit top of the year, and I think of it as a "lukewarm" project.  The cut of the pattern is not too friendly for those with poochy bottom-belly pouches like myself.  It makes the wearer look a bit "full" in the belly with just the slightest exhalation.  I'm still going to wear it, but possibly with shapewear underneath. It's not my favorite top, but I'll be wearing it anyway because I love the fabric.

EXHALE!
And somehow I managed to mistakenly align the stripes along the sleeve and create a mobius!  That made for a heck of a time when I was doing the twin-needle top-stitching.  I had a big laugh when I realized what happened.  I could've sewn a spiral up the sleeve! HAH!
EXHALE again...
My biggest frustration with Very Easy Vogue's V9056, though, is the sizing.  Its sizing is so off!  I even checked with the finished measurements, and made the size 12 with 14 sleeves.  I made an adjustment to the torso and lengthened it to make sure waistline really hit where it said.  I've never had to do that.  I'm short-waisted usually.  After trying it on, I was swimming in it!  I had to take it to the serger and lop off 3/4" on each side seam.  Yes, 1 1/2" total of fabric removed which in woven fabric patterns is ridiculous, but in a knit it's upsetting.  Negative ease, people! Cutting off the fabric, in turn, affected the drape of the peplum, but I can deal with that.  Just argh.


And the pattern illustration looked so promising, too!  One of my friends made it, and she looks awesome in it!  I asked her about the fitting, and she admitted to ignoring the measurements and just making the smallest size regardless.  So much for following instructions!  Hah!


Well, it's a non-maternity, non-nursing top and I need those so I'll keep making them!  Next on my list is Colette Pattern's Moneta.  We'll see how that one goes.  They're a bit more conscientious about modern fit, so hopefully I won't have to make too many changes to the pattern.

⁃ Fabric: grey and cream stripe knit
⁃ Pattern: Vogue V9056
⁃ Year: contemporary
⁃ Notions: twin-needle
⁃ Time to complete: 4 hours
⁃ First worn: this week
⁃ Wear again? Yes, but with reservations.
⁃ Modifications:  bodice dropped, side-seams taken in

UPDATE
March 19: I made a rookie mistake.  I forgot to wash the fabric before sewing, but in this case it's worked in the favor of this piece and it fits really well now!

Monday, November 3, 2014

Half Circle Skirt, Oktoberfest 2014


At the end of September, I was scrambling to make an outfit for Oktoberfest that fit.  A friend graciously gave me an extra "miede" (bodice) and I made the skirt and apron out of some beautiful trachten fabric.  The skirt is a super-crisp Trevira wool blend that is cool when you need it to be and warm when you need it to be.  I lined the side-seam pockets with a bit of nylon lining fabric so the pockets wouldn't stick to any leggings, stockings, or petticoat I might wear.


Project Details
Skirt Pattern: Burda Dirndl 09/2011
Apron was self-drafted

Thursday, October 2, 2014

Sewing for Baby, Ottobre's Spring Bird

Pattern: Ottobre 01/2014 Spring Bird
Fabric: double knit stripe from Stoff & Co. and double knit giraffe from another sewist
Modifications: truly double sided, buttons are on both sides of the fabric and snaps are too.


And, the LD finally wore it last week!


Wednesday, September 10, 2014

Adventures in AIO's (all-in-ones)

My latest experiments with cloth diapers have been with sewing all-in-ones (AIO's).  The advantage to this style of diaper is that you don't have a separate insert- the cover and insert are actually "all in one".


The disadvantage is that AIO's typically take a long time to dry.  This AIO is based on the TotsBots "BOB" (best of both) Easy Fit model here.  I love their diapers, but the latest version 4.0 only comes with velcro waist adjusters...


Why snaps?  Now that I've been cloth diapering for a few months, I have come to dislike sorting out anything with velcro (hook & loop) in the laundry.  So I went with snaps (poppers).  I've already had two separate incidents where super-strong velcros from baby's bibs snagged onto clothes and diapers. It's very sad to see scuffed and pilled clothing just because of an errant piece of velcro in the wash.  Grr.

After using these for a month I can say they work!  They also dry fairly quickly - not as quick as the TotsBots, but much faster than some of the other AIO's I have.

How these were made...
before sewing the outer/inner together... don't use pins

Pattern:

  • This video from Little Bundas for general techniques.
  • This pattern, 3x3 AIO round tab from Arfy of Prefold2fitted Blog
  • These written instructions from Tutu Mafia/Cloth Revolution's Sewn-In Diaper here.  These instructions plus the video above were crucial for me to get a good end result.  I also had the TotsBots diaper to look at for help.

Improvements for next time...
I need to fold over the edge where the suede cloth and the PUL edge overlap.  I left the PUL edge raw and it's stretching a bit thin.  I also think I'm just gonna do suede cloth and the insert inside (instead of PUL on the inside).  And, lastly, I've got to better reinforce the sizing snaps at the front center with more PUL.


Materials:

  • outer is Eco-PUL from Diaper Sewing Supplies this pack here.
  • Alova suede cloth for the back flap also from Diaper Sewing Supplies
  • the built-in insert is 1 layer velour (closest to the baby butt), 1 layer bamboo terry, 1 layer hemp with PUL at the front

chalk markings for centering snaps


Saturday, August 30, 2014

Nursing Top from Ottobre 2009


With my post-partum body changing so quickly, and the baby growing so quickly, I debated whether to sew anything for me for a while.  I started eyeing that red maternity/nursing top I made in the spring which was too big for me now.  I stared at it for weeks.  Then, a sewing buddy of mine offered to lend me a nursing top pattern she had in one of her older Ottobre magazines, and that was the clincher.  Chop-chop went the too-big nursing top!

I'm glad I decided to cut it up... I used up every bit of that tee, and finished off the rest of that thick red jersey fabric.  I didn't have enough for the inner panel, so I used a bit of this lovely stripe jersey I bought from a fabric store closing sale.  Glad I bought 2.5 m of it!  It's so soft!


Do I look maybe a bit tired in these pics? That would be because I am.  Hee hee. Somehow, the LD (little dude) started teething at 12 weeks and I've been coping with all that entails.  He's generally the sweetest little sweety, but when he's teething he turns into a puddle of moaning sadness.  It's heartbreaking and so I can't help but comfort him... at 2am... at 3am... at 3:30am.. etc...

So yeah, a bit tired, but it's getting better, and LD is learning to cope better.  I also have many more tricks up my sleeve now that it's been a few weeks!

---
Anyway, about the project:
Pattern: Ottobre 2009, #6 "Loving" Nursing Top
Fabric: recycled red jersey from maternity/nursing tee made in May 2014
Modifications: shortened the sleeves 1", but I think I just need a smaller size on top
Recommendations: instructions for the innermost panel say to turn over the nursing edges and stitch, but I think this reduces the stretch of the fabric.  I'd overlock this edge instead.  I turned over the bottom edges and used a rolled hem foot... this is not a good application for it.  The jersey loves to roll, and it made for a curly half-lettuce bottom hem.

The pattern is a very straightforward 7 piece pattern (you cut the binding, elastic, etc. based on given measurements).  I made an EU size 40 using my full bust measurement.  Next time, I'll cut a 38 top, maybe even a 36 for the shoulders and sleeves, and keep the bottom 40.  It's easy to adjust since there's a separate waist section.  On me, though, this is more of a nursing tunic dress. I'll be making some adjustments, but I like the dress aspect of it.


The trickiest part of this pattern was the clear elastic!  My machine loves it to the point of squishing it all together and creating these teensy, tight gathers which I did not need for this particular pattern.  In the end, I found the solution to be paper!  Once I put the thin pattern paper between the foot and the elastic, everything went swimmingly... okay, not quite - that binding went a bit wonky, but I can live with it. 


This went so quickly after figuring out the best way to sew with clear elastic!

Overall, I'm happy with it - it's wearable, but the shoulders/neck are wide for me... it's tough to choose a size with such a variable bust measurement, but the jersey should be forgiving enough to allow me to make a smaller size top.  I will definitely make another!

Saturday, August 9, 2014

Two-Part Nappies Revisited: Part 2

A quick tutorial on how to make your own diaper inserts using my pattern (or your own drafted pattern).
These diaper inserts require an outer waterproof cover of some kind, and will fit from newborn to 6kg+ (at least they're still working for us!).

the absorbent inserts inner flannel / outer terry cloth
Materials
  • Absorbent fabric (German term in parentheses) such as flannel (Flanell/Molton), terry cloth (Frottier), hemp fleece (Henf), or jersey, etc...  Feel free to recycle materials you already have; like an old flannel blanket, an old sweatshirt, or a towel.  I use terry-cloth on one side because I like to use Snappis and avoid hook & loop closures, but feel free to use whatever closure method you want.
  • Elastic (I used 1/4" wide elastic that is resistant to high heat)
Instructions
1- Place the paper pattern on the fold, and cut your materials for the diaper insert.  Don't forget to transfer all markings to your fabric.


2- Cut fabric for center pad (it's that center rectangle with the dotted line in the pattern).  I cut 2 layers of bamboo terry-cloth.
3- Layer the 3 elements as follows: absorbent material #1, pad rectangle(s), absorbent material #2.


Center the pad, and secure all three layers with pins.


4- With the smoothest fabric facing up, sew 1/8" to 1/4" within the four edges and across the center of the pad to secure it in place.


5- Measure the elastic band for the sides and top, then cut elastic 2-3” shorter than the measured length.
6- Tack both ends of the elastic where indicated and pin at the center.  Make sure to leave a little space on the outer edge for finishing the fabric.
7- Use a zig-zag stitch to attach the elastic on the back of the insert and the leg openings, stretching the elastic between the two outer layers as you go.


8- Use a zig zag stitch or overlock around all the outer edges to finish.  I stretch out the back and sides while feeding it through the overlocker.  I do not serge over the crinkled/gathered edges.

Wash a few times, and then let baby poo all over your work! Hahah!

Friday, August 8, 2014

Two-Part Nappies Revisited: Part 1

This post covers lessons learned in making diaper covers at home.  In cloth diapering, the outer cover is a waterproof barrier that prevents leakage.  These can also be used over regular disposables to prevent leaks, or just because they're really cute.


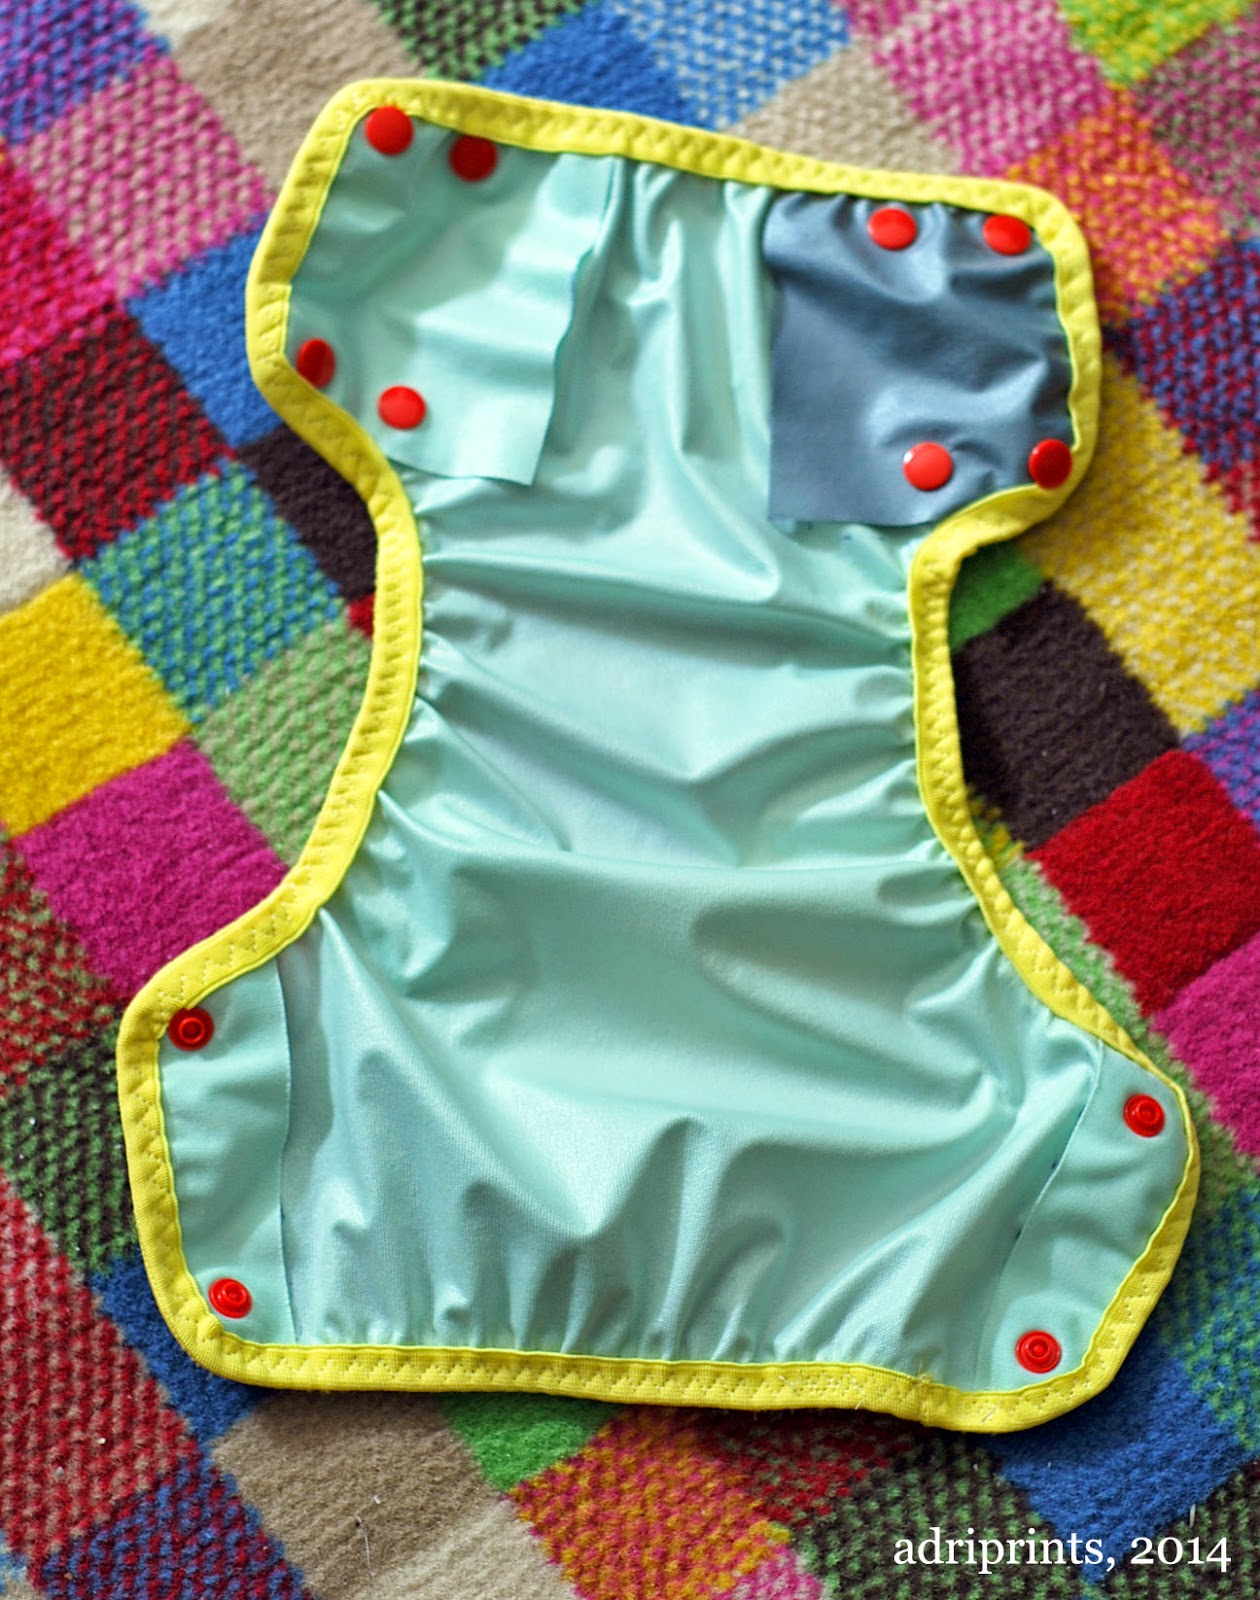
After a few mishaps and lots of leaks, re-purposing PUL, and studying more cloth diapers, I think I've found a few types of cloth diaper systems that work for the little dude.  This particular diaper cover is a homemade version of Motherease's diaper cover the Air Flow.  It works really well with the diaper inserts I make at home (more on that later).  These are not easy to come by here in Germany, so to me it's worth the effort of making more of them.

What I've learned so far:
FOE - fold over elastic goes on a LOT easier if you use a triple zig-zag stitch.  This video was key.
detailed photo of the inner wing of the diaper cover


KAM snaps - these snaps make a better seal with the Eco-PUL I bought from Diaper Sewing Supplies when there are 3 layers, and it's been exposed to warmth (i.e. it's been through a 60* wash and tumble dry).  That's it!  That is what was missing last time.  I didn't wash/dry the cover before trying out the snaps, and it was too thin.  Now I'm kind of sad I chopped up the grey & yellow cover before washing/drying.  It may have been salvageable.  Oh well.


With my latest effort, I went with a retro color combination!  Aesthetics aside, they work really well.  No leaks or poo-splosions yet!


As for the diaper inserts (the absorbing inner part of these two-part systems), I've drafted a pattern for anyone who wanted to try it on their own!  You can download it from the Google-Drive link here.

Come back this weekend to see the photo-tutorial on making your own diaper inserts!

Thursday, July 24, 2014

Just in time!

Pattern: "Indian Elephant" from Ottobre 06/2014

Yikes!  This baby really is growing fast!  I finished the all-in-one pattern "Indian Elephant" from Ottobre 06/2014 just in time for the little dude to wear it.  It only took me two weeks to make it, but now I know that may be too slow!  Whoah!


This baby is making me a much faster sewist.  Even a week can be too slow in the world of baby growth.  I'm going to have to plan projects for the far future to keep up!  The pattern "Indian Elephant" is pretty straightforward.  It's actually a lot easier than the onesie pattern "Warmly Wrapped" that I finished last week.


The toughest part is applying the binding and, once again, the snaps!!  What in the world is up with these ring snaps and why don't they install correctly!?  This is with the special pliers, too.  The prongs often don't align with the center of the snap and then stick out... possibly with the end result of scratching baby. Not nice.


If he's in hefty stuff-in cloth diapers like today, the crotch gusset is a bit revealing shall we say, but if he's in a trimmer model diaper, it'll fit just fine.  I may still add two more snaps.  Maybe.


Pattern: Indian Elephant, Ottobre 06/2014
Fabric: organic cotton jersey from Lillestoff in print "Pirates" by BORA
Notions: fine ribbing in red, a bunch of snaps, stretchy interfacing G785 from Vlieseline/Vilene, and Vliesofix (two-sided fusible interfacing)
Special Tools: twin needle, snap pliers, walking foot, stretch needle