The Squishy Chullo Hat is the partner to the Squishy Mittens.
This fun winter accessory is sure to keep your ears warm and your spirits high!
The Squishy Chullo Hat pattern features lofty cables atop a purled
field, a seed stitch brim, and fun earflaps to make sure the wind
doesn’t sneak in. The hat is knit by first making the earflaps, and then
casting on stitches to create the brim. Braids and pompoms are
optional, but they really do add an extra bit of fun to this really squishy
hat.
Sizes
XS (S, M, L): 20 (21, 22, 23)” / 51 (53, 56, 58) cm brim circumference
Skills
• knitting in the round and flat
• increasing and decreasing
• cable knitting
• chart reading
Materials
1 to 2* skein(s), Rosy Green Wool, Big Merino Hug (100%
Merino; 175 yds / 160 m, 3.5 oz / 100g), in color Coffee Bean #56;
approx. 150 yds / 137 m for main hat approx. 8 yds / 7 m for braids
approx. 30 yds / 27 m for pompom *Size L may exceed 1 skein with pompom and braids
Needles
US 5 / 3.75 mm double pointed needles or 16” / 40 cm long circular needles
Notions
8 stitch markers, tapestry needle, scrap yarn or stitch holders, cable needle, and pompom maker or cardboard, scissors
You can find the Chullo Hat on Ravelry here or Craftsy here.
Thursday, October 11, 2012
Wednesday, October 10, 2012
Tutorial: DIY Pompom
Fall is in the air... And, I love hats with pompoms. And, sometimes you just want to make your own pompom, right? And add pompoms to everything? Okay, well maybe not everything, but just in case you *did* want to add a pompom to a favorite hat or rabbit toy, or change out an existing pompom for a different one, here's a photo tutorial on how to do it using a template I created.
You can download your own template here on Craftsy.
First, trace and cut the pompom templates from chipboard (like the cardboard of a cereal box). Align the openings of the template pieces so yarn can easily pass through.
Hold one end of the yarn.
Wrap yarn tightly around the template until there is very little room in the center of the circle, but the opening remains clear. I mean really wrap it around until it's hard to wrap any more. Use different colors of yarn and mix it up for a crazy party pompom! Most yarns can be used as long as you can wrap it around the template, and cut it afterward...
Using a pair of sharp scissors, cut wrapped yarn all the way around the outside of the circle between the two templates.
Secure the pompom by wrapping scrap yarn between the two template pieces, around the center circle, and tying a tight knot.
Remove template. Fluff and trim to shape.
Use tapestry needle and tie-ends to attach to your project.
Want to make your own pompom? Download your own template here.
You can download your own template here on Craftsy.
First, trace and cut the pompom templates from chipboard (like the cardboard of a cereal box). Align the openings of the template pieces so yarn can easily pass through.
Hold one end of the yarn.
Wrap yarn tightly around the template until there is very little room in the center of the circle, but the opening remains clear. I mean really wrap it around until it's hard to wrap any more. Use different colors of yarn and mix it up for a crazy party pompom! Most yarns can be used as long as you can wrap it around the template, and cut it afterward...
![]() |
| wrap yarn around the template until center is barely visible |
Using a pair of sharp scissors, cut wrapped yarn all the way around the outside of the circle between the two templates.
![]() |
| use sharp scissors to trim between pieces around outside circle |
Secure the pompom by wrapping scrap yarn between the two template pieces, around the center circle, and tying a tight knot.
![]() |
| trim completely around the circle and secure |
Use tapestry needle and tie-ends to attach to your project.
Want to make your own pompom? Download your own template here.
Tuesday, October 9, 2012
Tutorial: Blocking Your Knitted/Crocheted Items
"Blocking" in the fiber arts world, is usually a finishing step. After your garment (or each piece) is knitted or crocheted, block to match the measurements given in your schematics, or you can seam them together and block them as a completed garment.
The first step I take in this process is looking at the yarn band. I make sure I understand the care instructions for the yarn I'm about to block. Then, I look at the pattern for any specific blocking instructions (lacy shawls often have areas that are accented in blocking). If you're worried about your yarn and want to avoid washing the garment, you can spray/mist it with water and proceed with blocking.
The blanket shown above was made by a friend of mine, and she used a washable yarn. So, I went ahead and soaked before blocking. Usually it's a 20 minute soak (often longer because I forget about it). This lets the fibers relax into its new form. Then, I squeeze out the excess water. If I'm using strong yarn that can tolerate it, I'd place the gently wrung-out project in a lingerie bag and set it to the lowest spin cycle on my machine with a towel or other things that need wringing out. If the particular yarn is too fragile for the spin cycle, I use a fluffy towel and lay the piece as flat as possible on the towel, and roll it up. This makes a towel-garment sandwich "burrito". I then squish the towel to remove even more excess moisture. Once you've removed as much water as you can, bring out your blocking surface.
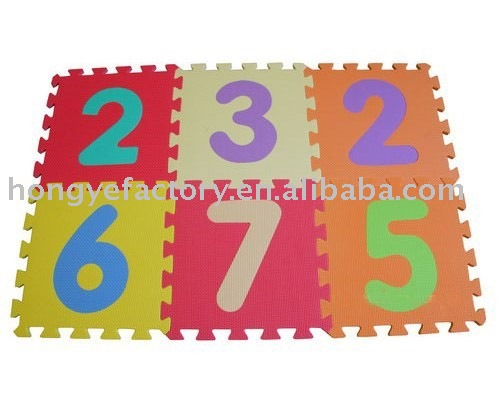
A friend and I went "halfers" on some kid's foam puzzle mat like this, so that's what I use. Basically you need a stable surface that can take and hold pins in place. Some folks use a mattress, others just towels. I place a dry towel on the foam squares and place the item atop the towel.
Next, I assess the best plan of action. Should I use the stiff wires? Just T-pins? Flexible wires? A combo? The blanket project above was an easy choice - stiff wires for sharp crisp edges...
I take a blocking wire and kind of "sew" it through the edge of the blanket taking evenly spaced chunks and trying not to splice any yarn with the wires. Sand down the ends of your blocking wire if you continuously get snags.
For hard edges like in this blanket, I used T-pins to secure the intersection between wires. This makes a nice crisp corner too.
For something round like this curved earflap, I use flexible blocking wires and T-pins (Squishy Chullo Hat).
And with this scalloped shawl, you can see the drastic difference before it was blocked and after... I used a combination of techniques with this one (T-pins and thread). If I had had blocking wires back then I would have used the stiff ones for the top edge to get a straighter line. Instead, I used what I had - thread running through the top edge and T-pins to stabilize the thread. Then, I used a boatload of T-pins for the scallops.
I hope this tutorial gives you a general idea of the many options you have for blocking your hand-made goods. These techniques can also be used for pre-manufactured wooly goods, too!
There are tons more resources out there and here are a few to help you out whichever way you choose to block your project...
Blocking Resources:
blocking lace on KnittingDaily
using blocking wires from Knit Picks
using flexible blocking wires on Knitter's Review
blocking with pins on the purlbee
making your own wires: DIY blocking wires
blocking without wires on CrochetMe
| before blocking |
| blocked blanket |
The first step I take in this process is looking at the yarn band. I make sure I understand the care instructions for the yarn I'm about to block. Then, I look at the pattern for any specific blocking instructions (lacy shawls often have areas that are accented in blocking). If you're worried about your yarn and want to avoid washing the garment, you can spray/mist it with water and proceed with blocking.
The blanket shown above was made by a friend of mine, and she used a washable yarn. So, I went ahead and soaked before blocking. Usually it's a 20 minute soak (often longer because I forget about it). This lets the fibers relax into its new form. Then, I squeeze out the excess water. If I'm using strong yarn that can tolerate it, I'd place the gently wrung-out project in a lingerie bag and set it to the lowest spin cycle on my machine with a towel or other things that need wringing out. If the particular yarn is too fragile for the spin cycle, I use a fluffy towel and lay the piece as flat as possible on the towel, and roll it up. This makes a towel-garment sandwich "burrito". I then squish the towel to remove even more excess moisture. Once you've removed as much water as you can, bring out your blocking surface.
A friend and I went "halfers" on some kid's foam puzzle mat like this, so that's what I use. Basically you need a stable surface that can take and hold pins in place. Some folks use a mattress, others just towels. I place a dry towel on the foam squares and place the item atop the towel.
Next, I assess the best plan of action. Should I use the stiff wires? Just T-pins? Flexible wires? A combo? The blanket project above was an easy choice - stiff wires for sharp crisp edges...
I take a blocking wire and kind of "sew" it through the edge of the blanket taking evenly spaced chunks and trying not to splice any yarn with the wires. Sand down the ends of your blocking wire if you continuously get snags.
For hard edges like in this blanket, I used T-pins to secure the intersection between wires. This makes a nice crisp corner too.
| curved edges = flexible blocking wires |
| before blocking the "Percy Shawl" |
| after blocking the "Percy Shawl" |
I hope this tutorial gives you a general idea of the many options you have for blocking your hand-made goods. These techniques can also be used for pre-manufactured wooly goods, too!
There are tons more resources out there and here are a few to help you out whichever way you choose to block your project...
Blocking Resources:
blocking lace on KnittingDaily
using blocking wires from Knit Picks
using flexible blocking wires on Knitter's Review
blocking with pins on the purlbee
making your own wires: DIY blocking wires
blocking without wires on CrochetMe
Wednesday, October 3, 2012
New Pattern: Amaranth Shawl
The sister pattern to the Amaranth Headband, the shawl features two colors knit side by side using a simple intarsia technique. The challenge was to create a curved
shawl knit sideways so it could incorporate the lovely lace motif I had
encountered when I made the Amaranth Headband. The shawl uses 1 full skein for the main color, and less
than half of the lace color. This shawl is knit sideways from one point
increasing toward the widest part at center, and then decreasing again
toward the opposite point.
Skills
• lace knitting
• binding 2 colors vertically (intarsia)
• increasing and decreasing
• cable cast on
Tools
1 pair of size US 4/ 3.5mm knitting
needles or size to obtain gauge
4 stitch markers
1 removable stitch marker
Tapestry/Darning needle
scrap yarn for lifeline(s)
It can be found on Ravelry here.
And it can be found on Craftsy here.
Width at center 12”/ 30.5 cm
Wingspan is ~66 - 68” / 168 - 173 cm
(If using recommended yarn and following sample)
Wingspan is ~66 - 68” / 168 - 173 cm
(If using recommended yarn and following sample)
Skills
• lace knitting
• binding 2 colors vertically (intarsia)
• increasing and decreasing
• cable cast on
Tools
1 pair of size US 4/ 3.5mm knitting
needles or size to obtain gauge
4 stitch markers
1 removable stitch marker
Tapestry/Darning needle
scrap yarn for lifeline(s)
It can be found on Ravelry here.
And it can be found on Craftsy here.
Tuesday, October 2, 2012
New Knit Pattern: Amaranth Headband
This latest pattern was inspired by a last minute improvised project and quick knit for a Queen’s Day headband (Koninginnedag in the Netherlands). I didn’t have anything orange to wear and so I quickly picked out some orange yarn and knit this up.
The Amaranth Headband, in its published form, is a more refined version that fits most head sizes, and is long enough to be tied at the ends to secure it.
Finished Measurements
(If using requisite yarn and following sample)
Width at center is 3”/ 7.5cm
Length from end to end after blocking is 25” / 63.5cm.
When worn, the headband can stretch an additional 4” / 10cm.
Materials
Rosy Green Wool, Cheeky Merino Joy (100% Organic Superwash Merino), 100g, 350 yd / 320 m
15 to 20g, in color #50 Ruby
Tools
1 pair of size US 4/ 3.5mm knitting needles (or size to obtain gauge)
Tapestry/Darning needle
Skills
• increasing and decreasing
• lace knitting
• chart reading
You can find it on Ravelry here add to cart
or Craftsy here.
The headband was #11 on the "hot right now" list on Ravelry!!
The Amaranth Headband, in its published form, is a more refined version that fits most head sizes, and is long enough to be tied at the ends to secure it.
Finished Measurements
(If using requisite yarn and following sample)
Width at center is 3”/ 7.5cm
Length from end to end after blocking is 25” / 63.5cm.
When worn, the headband can stretch an additional 4” / 10cm.
Materials
Rosy Green Wool, Cheeky Merino Joy (100% Organic Superwash Merino), 100g, 350 yd / 320 m
15 to 20g, in color #50 Ruby
Tools
1 pair of size US 4/ 3.5mm knitting needles (or size to obtain gauge)
Tapestry/Darning needle
Skills
• increasing and decreasing
• lace knitting
• chart reading
or Craftsy here.
The headband was #11 on the "hot right now" list on Ravelry!!
Subscribe to:
Posts (Atom)