
Finished up two more zip pouches with the over-locker, and now feel like I've mastered boxed corners.

As you can see, the size of the boxed corner makes a difference in the depth of the box. When I take out just 1.5" I end up with a shallower (3" high), longer box as you see on the left. When each corner is 2", the height of the box is 4"; creating a taller, deeper box like the one on the right.
I was learning overlocker techniques from Amy Alan's Beginning Serging class over at Craftsy, and I wasn't finding too much success with the "pinch and sew" method of boxing corners. I tried it several times, and the result was last week's slightly wonky zip pouch. This time, I tried another technique - a cut-out method - and found success!
How did I do it, you ask? I'll show you!
First, I measured and marked a square on each corner of the pre-prepped zip pouch. The square you mark does not count the previously overlocked seam. And, the sides of the square = half the eventual height of the zip pouch.

If you look closely at the above photo, I secure the layers of fabric so they don't shift when I cut through all the layers. I use my tailor's shears to do the cutting since it grips while cutting, and doesn't over-cut at the corner like my roll-cutter sometimes does.

Mark the edge.

Cut out the corner using your favorite grippy cutting tool.

Use a pin to help secure the layers of fabric at the corner and mark the future center of the seam. Pinch the fabric...

...and now you can line up your mark and pin with the center of the seam that goes across the zip.
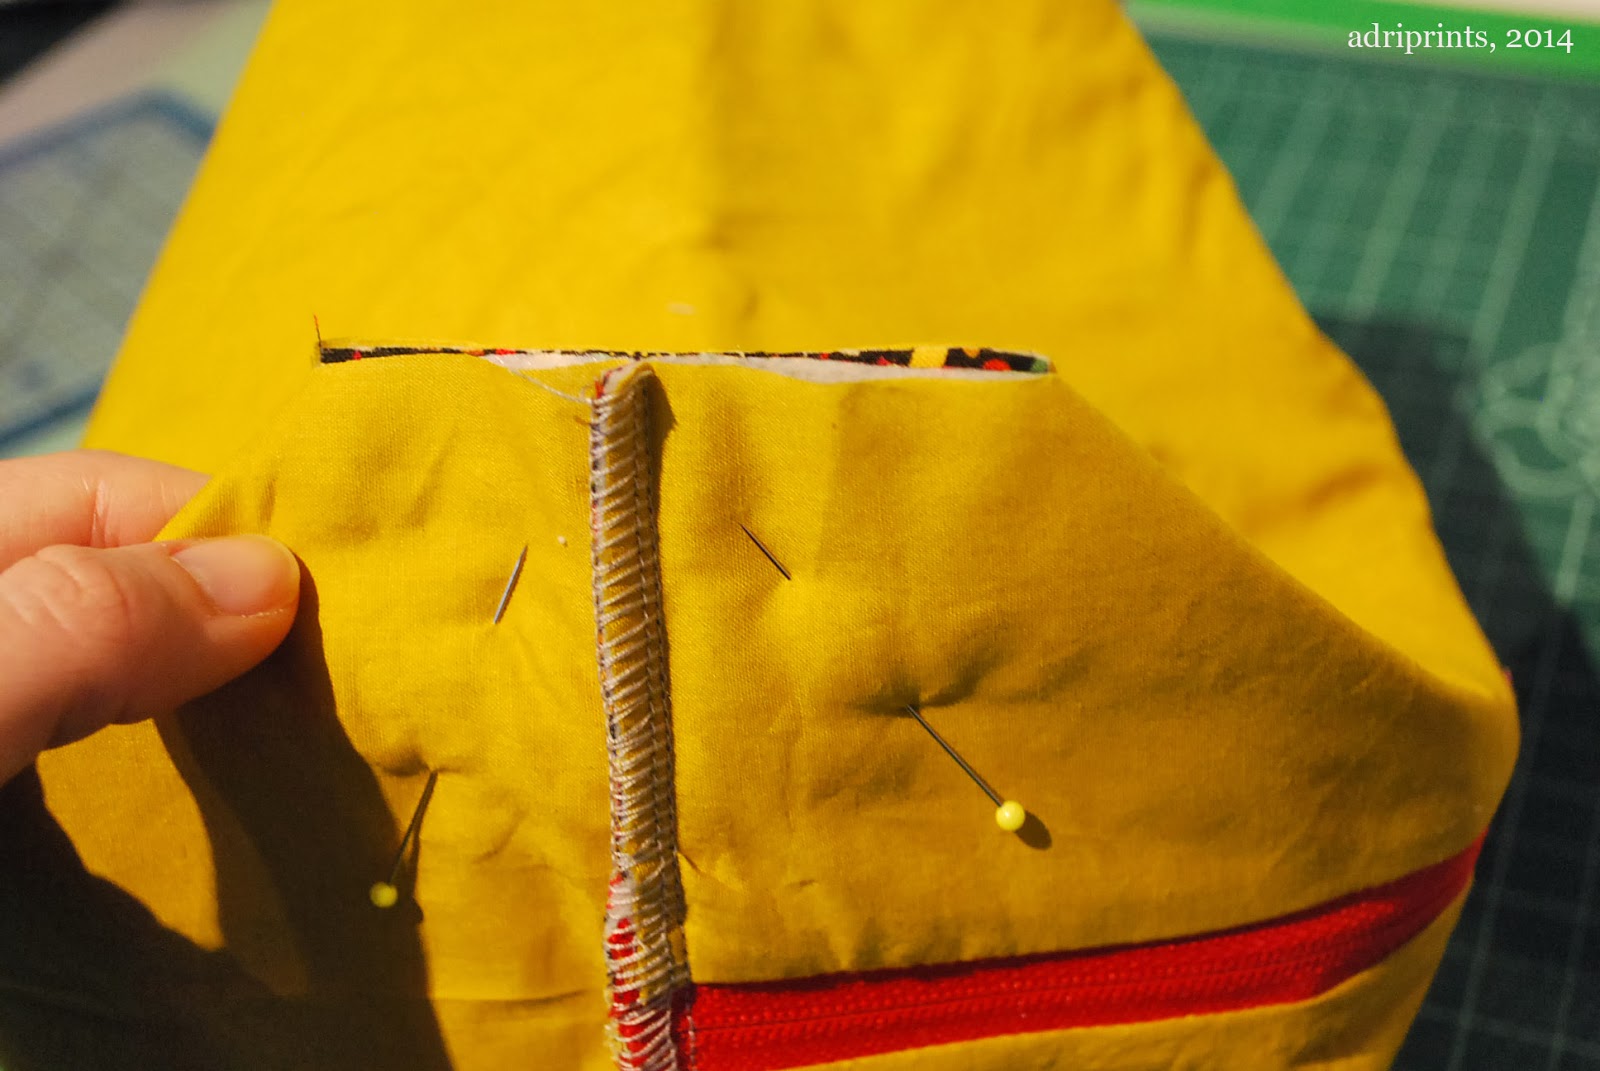
Then, secure all the layers with pins, but remove that first pin that was marking the center so you don't run over it with your serger blade. That would be chaos. Those secondary pins should be far enough away that you avoid the blade of your serger, too.


Whooo hooo! A non-wonky zip pouch for your eyes to feast upon!
I was learning overlocker techniques from Amy Alan's Beginning Serging class over at Craftsy, and I wasn't finding too much success with the "pinch and sew" method of boxing corners. I tried it several times, and the result was last week's slightly wonky zip pouch. This time, I tried another technique - a cut-out method - and found success!
How did I do it, you ask? I'll show you!
First, I measured and marked a square on each corner of the pre-prepped zip pouch. The square you mark does not count the previously overlocked seam. And, the sides of the square = half the eventual height of the zip pouch.
If you look closely at the above photo, I secure the layers of fabric so they don't shift when I cut through all the layers. I use my tailor's shears to do the cutting since it grips while cutting, and doesn't over-cut at the corner like my roll-cutter sometimes does.
Mark the edge.
Use a pin to help secure the layers of fabric at the corner and mark the future center of the seam. Pinch the fabric...
...and now you can line up your mark and pin with the center of the seam that goes across the zip.
Then, secure all the layers with pins, but remove that first pin that was marking the center so you don't run over it with your serger blade. That would be chaos. Those secondary pins should be far enough away that you avoid the blade of your serger, too.
Run the pinned seams through the serger and voila! Two boxed corners that are parallel, perpendicular, and totally symmetrical.
Whooo hooo! A non-wonky zip pouch for your eyes to feast upon!
5 comments:
Thanks for posting this! When I tried to do the corners of the project the way that Amy did them, my Serger wasn't happy with the excess that needed to get cut off. I ended up cutting off the "points" so that I could sew it. Your method would eliminate that and definitely end up with a cleaner finished product.
I had that same thing happen with the bunched up fabric, and none of my corners were symmetrical in the first go-around. Glad I could help!
Cool! I'm glad it helped! The interface I'm using in this project is Vilene H630.
Overlocking the edges = genius. I have an overlocker why didn't I think of that. :-)
Great tutorial. I don't have a serger, but this still makes boxed points a lot clearer for me.
Post a Comment