
If it doesn't fit, then consider adjusting the cuff seam allowances. If it still doesn't fit consider redrafting the sleeve (slash in the middle and add some width to the piece) if you think the gathering isn't enough to work for your arms. Then adjust the cuffs/interfacing and the marking lines accordingly.
Step 10:
Step 10A - Double stitch like you did with the ruffle on the top bell curve of the sleeve between the two asterisks. If your machine has a large stitch length use it! I used 4mm which is as long as mine goes. Try to keep the two lines of stitching evenly separated... try not to let your stitch line go toward and away from the first stitch line because it makes gathering the fabric more difficult. So, Step 10A is pretty straightforward.
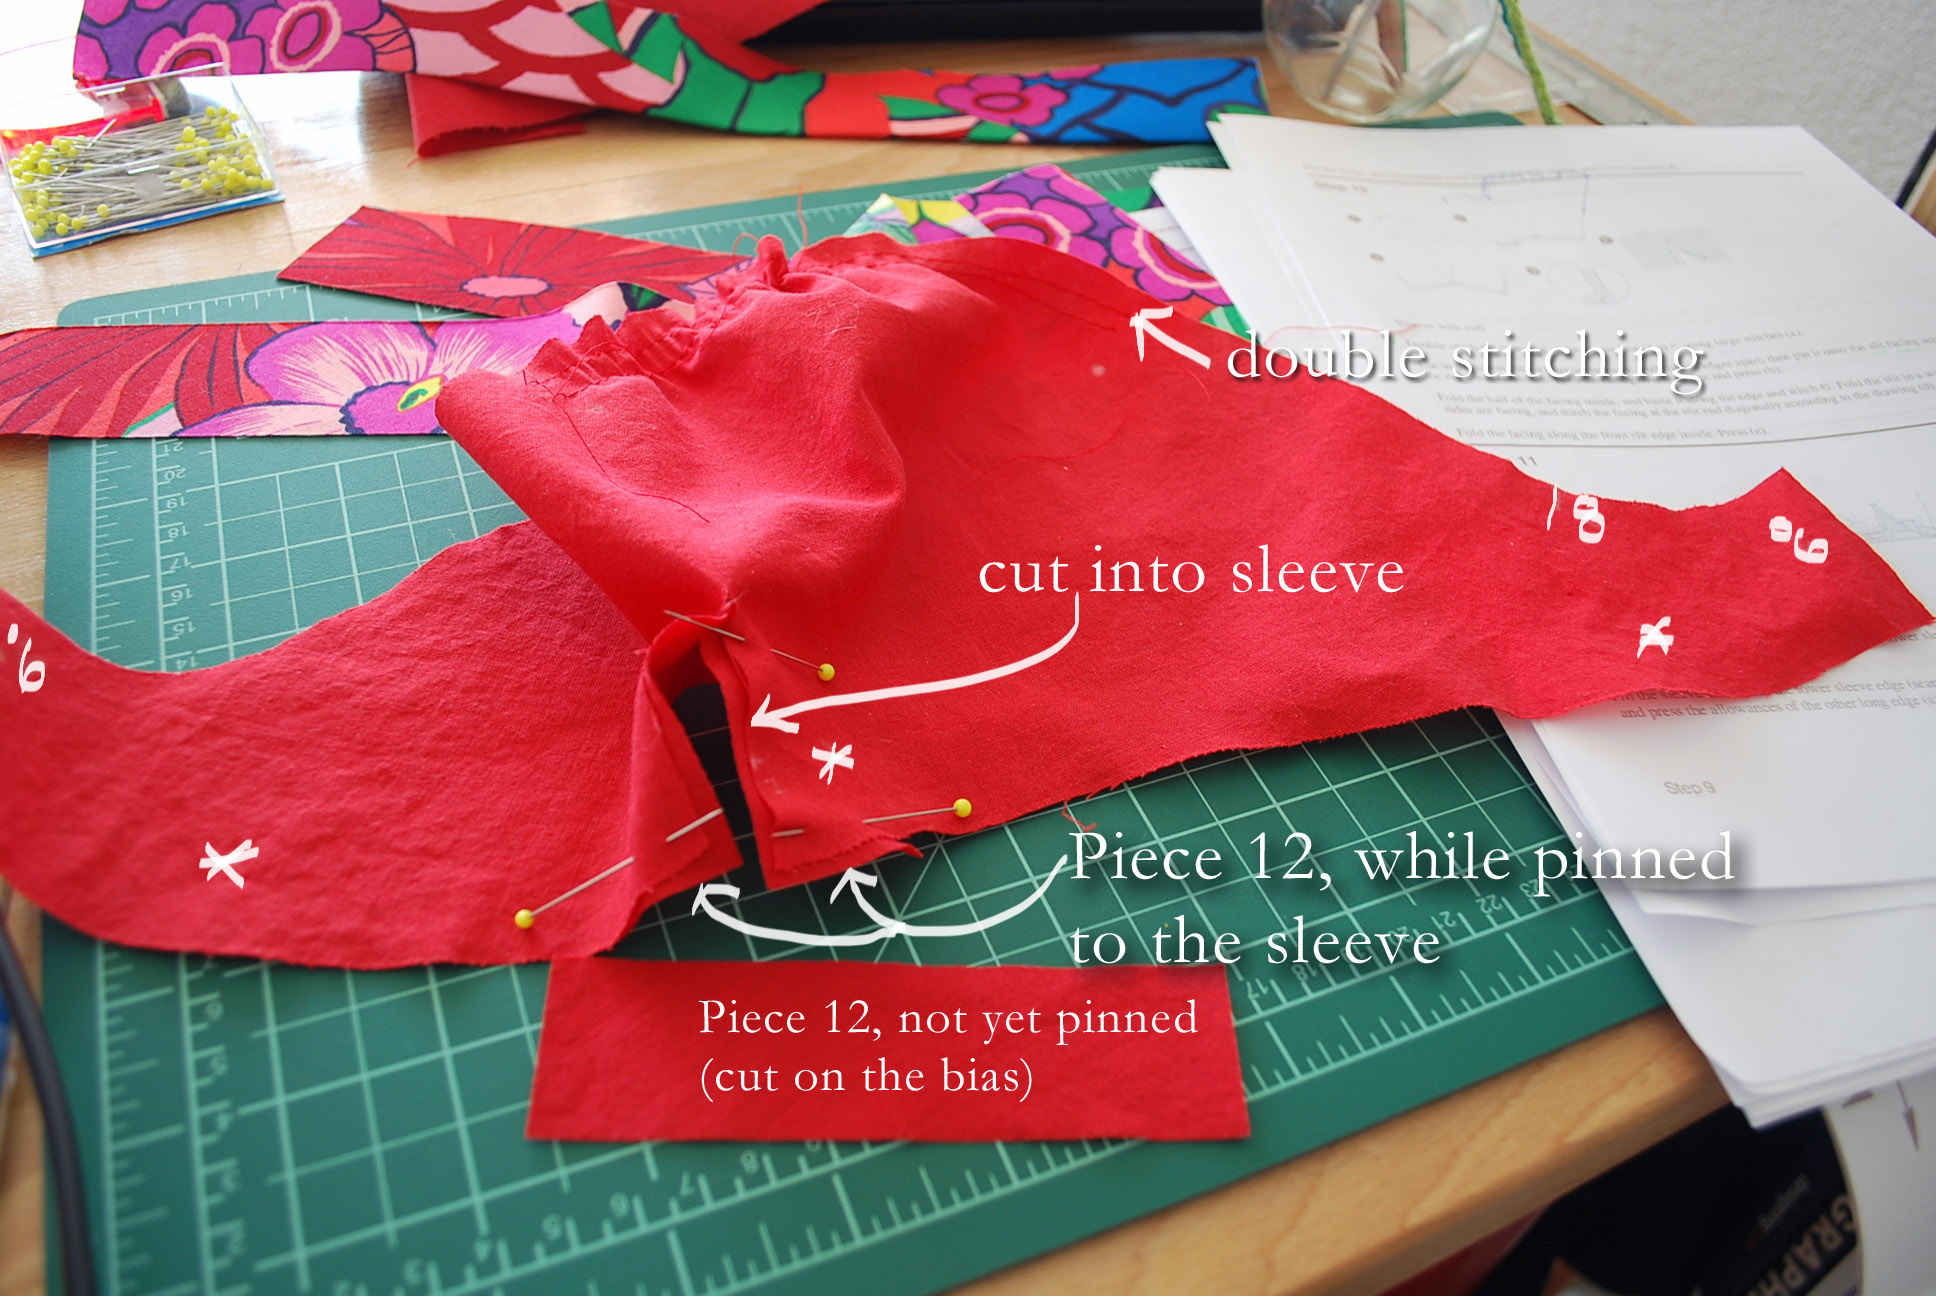
Step 10B - Then comes Step 10B, and the abstract origami illustration. Here's what it's trying to tell you...
After you cut into the bottom of the sleeve, you're going to need to seal that edge. So, pull the cut edges apart and pin piece 12 to the newly cut opening like this:
 |
| Step 10B, Close-up |
Another view of the situation...
 |
| Step 10B, A larger-picture view |
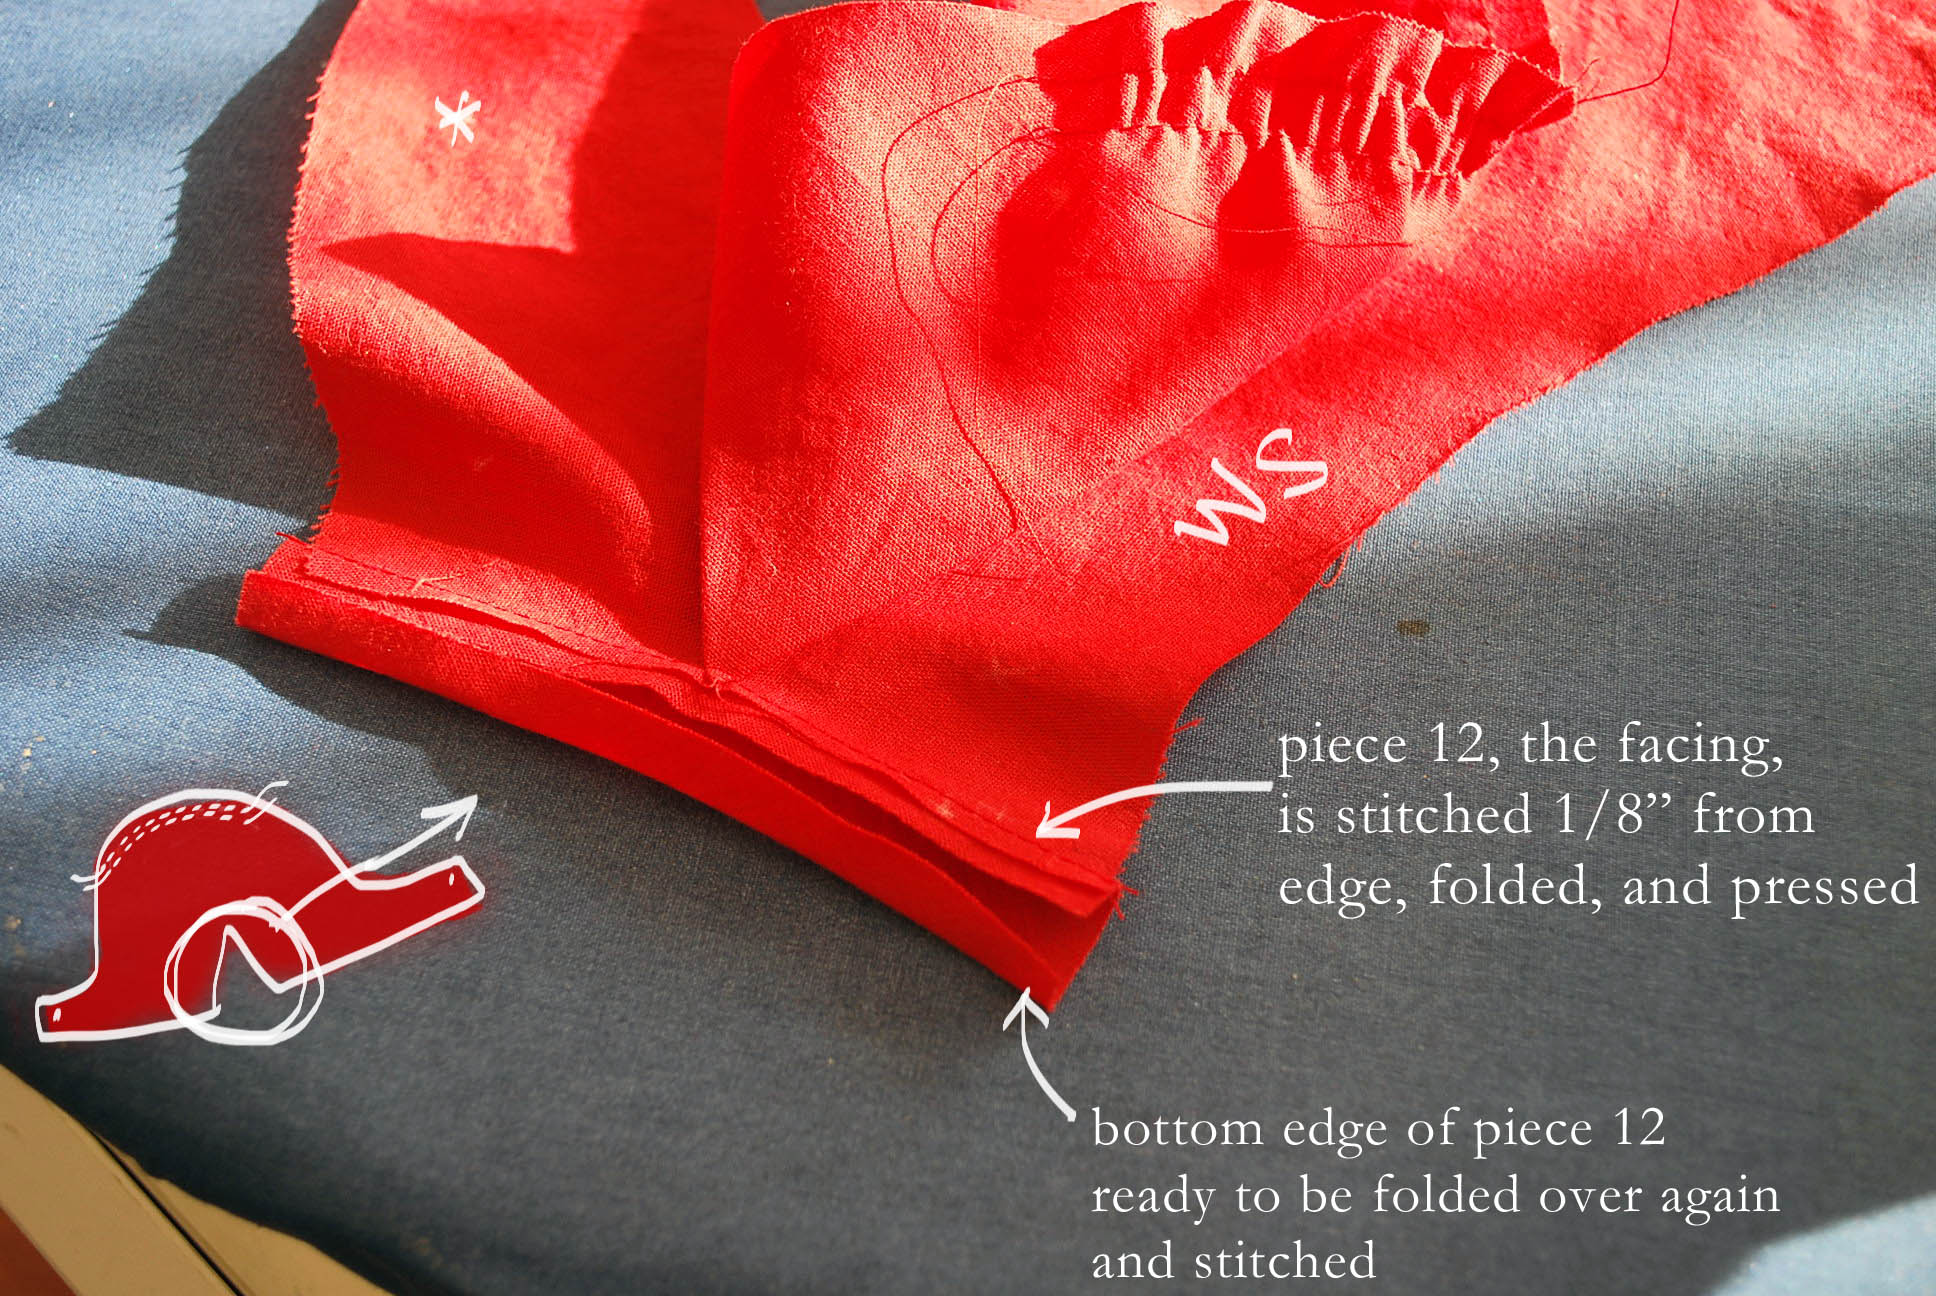 |
| Step 10C, folding and pressing piece 12 |
After folding piece 12 back onto the sleeve, baste stitch along the edge to seal that bias facing and create a non-fraying, finished edge.
Step 10D and 10E - Next, stitch a diagonal line from the sleeve edge to the outer edge of the bias facing we just completed. This creates a folding pivot for the slit and allows it to close easier and be pressed. Press!
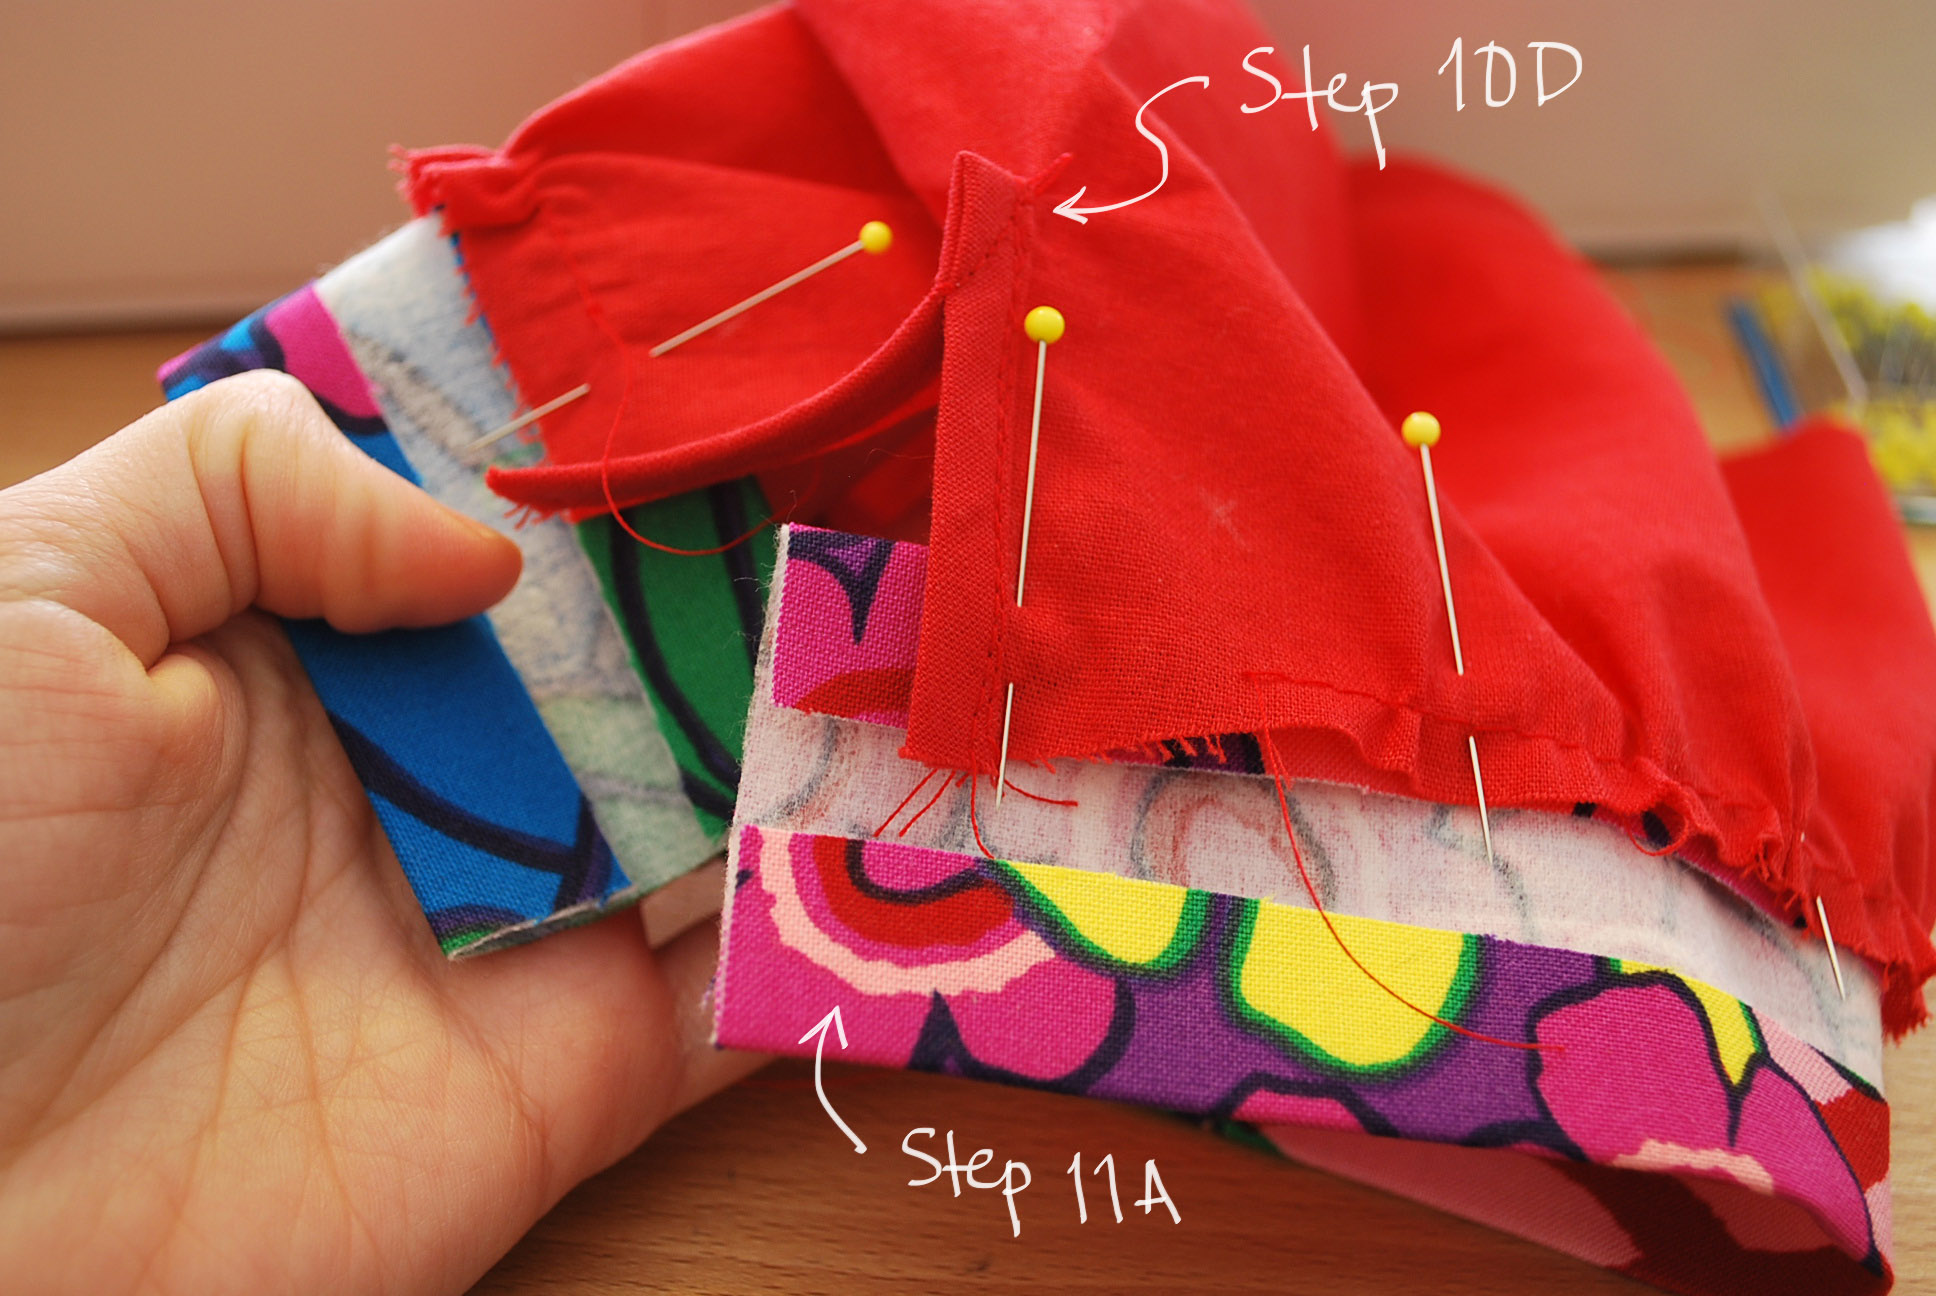 |
| Step 10D, E, and Step 11A |
Step 11:
Sew seam 6. I did a flat-felled seam again for 6 and made sure it would match up with the side seams. See seam treatment tutorials here from Coletterie! After stitching seam 6 which is the underarm part of the sleeve (see here for photo), do a quick hand baste between the asterisks at the bottom of the sleeve, gather and align with the the cuff piece (be sure you already interfaced it).
Step 11A - (photo above) Note that the sleeve has already been gathered between the asterisks and the cuff piece has been folded at the seam allowances (5/8") and pressed. Then, it was pinned (right sides facing) securing the alignment of the sleeve piece and the placement marks of the cuff.
Step 11B - Sew a straight line down the cuff ends as you see below (marked Step 11B in red thread). Then, trim the excesses and prepare the corners for turning inside out.

Step 11C - Both ends of the cuff are sewn and trimmed, and when you turn them inside out, they should be flush with the edge of the slit opening. If not, you can redo it or make it a design feature.
Next press the cuff edge as you want to see it in the end. Sew 1/8" or near the RS top edge of the sleeve securing the cuff. Top-stitch at will! Sorry for the outburst, I'm a longtime fan of top-stitching.
Step 12:
Step 12A - Don't hate me. I did not photograph this. The illustration was pretty good, and I'll highlight the key points. Also, here's where your pattern marking skills come in handy. I hope you marked all those stars and dots! Gather the top bell of the sleeve between the asterisks. Remember to hold the bottom threads and push the fabric away... brute force = damaged fabric.
Take note of the dots and lines where your sleeve piece is marked and pin them onto the body with RS facing. The sleeve should be kind of nested inside the body.
All the markings should align. For example, the side seam should match your underarm seam (dot 6), and there's a center mark at the top of the sleeve bell that should match your shoulder seam. You want to pin from the sleeve side (not the body side). You also want to stitch on this side of your sleeve.
From my Simply the Best Sewing Techniques book, page 178:
"With the sleeve side up, begin at the underarm seam and stitch along the seamline... As you stitch, place your forefingers on either side of the presser foot, to keep the eased area from puckering under the needle. When you reach the underarm again, overlap the stitches. Seam a second row 1/8" away from the first, but still within the seam allowance."I didn't know how to flat-fell seam a gathered sleeve so I just trimmed/graded the edges and zig-zagged. Then, I pressed the sleeve seam allowances into the sleeve, setting in the sleeve.
Step 12B - This one's easy. Fold and finger-press or pin a 1/4" (or 1/8" if you're a really good hem-person). Fold it over once more, press, pin, stitch.
Presto-change-o! You have a JJ Blouse!
Buttons:
For instructions and some really detailed information on how to measure for buttonholes, making them by hand, and buttonhole placement, I found this PDF from New Mexico State University really helpful.
For part 1 see here.
For part 2 see here.
3 comments:
Wonderful tutorial!
Thanks Adri!
Very useful tutorial, without it I would have been totally lost! Now I was able to succesfully make my own jj blouse: http://lapjevoorlapje.blogspot.nl/2014/08/de-terug-naar-werk-blouse.html. Thanks so much!
Glad you found it helpful! Your blouse came out really lovely! Thank you for sharing the link to your finished project. :)
Post a Comment